Pumpkin pie, again? Yes! Thanksgiving was just the season opener

By Leslie Brenner

For some people, pumpkin pie is limited-time-only affair, something you only eat on Thanksgiving. For me, that’s just the start of something beautiful: the kickoff of pumpkin pie season!

Why not? Everyone loves pumpkin spice, and its natural home is in a pie. I’ll probably be baking another one before the week is out.

If you know how to make a pie crust, filling it with pumpkin goodness is a no-brainer. Open a can of pumpkin purée, whisk in three eggs, add spices and cream and bake. It always turns out great.

We like to make it a little boozy, while we’re at it. For eons, brandy (usually Cognac or Armagnac, whatever we have on hand) has been our spirit addition of choice. This year we switched it up, spiked it with Rye Whiskey, and loved it. Feel free to swap it out for vanilla, if that’s easier.

If you don’t know how to make a crust, don’t worry — our recipe walks you through. Our favorite for this is an heirloom wheat crust we learned from Roxana Jullapat’s outstanding 2021 book Mother Grains. Made with both butter and cream cheese, it’s very easy to roll out and bakes up tender and flaky.

The Sonora wheat flour it features is whole grain, with wonderful nutty flavor. We buy ours from our friends at Capay Mills in Northern California; you can also find it at Grist & Toll, Hayden Flour Mills and Barton Springs Mill. Any hard red or hard white wheat heirloom flour can be used though; of course it’s always nice to purchase flour from a local artisan mill, if you have one in your area. (If you don’t have access to heirloom flour, a combination of 80% unbleached AP flour and 20% whole wheat flour should do just fine for this crust.)

Want to use an actual pumpkin or butternut squash? Of course you can: Just roast till very tender, then purée till smooth in a food processor or blender (without the skin, or seeds, of course.) It’s a straight swap, gram for gram, with the stuff from the can.

And then there’s that pumpkin spice: a combo of nutmeg, cinnamon, cloves, allspice and ginger. Feel free to adjust to your own taste.

Go ahead — live a little. You deserve more pie.

RECIPE: Pumpkin Pie with Heirloom Wheat-Cream Cheese Crust

Want free recipes delivered to your in-box? Sign up below!

Dry-brine your way to Thanksgiving happiness: Some salt, a bird and a little time is all you need

By Leslie Brenner

It’s easy. It’s not messy or cumbersome. Besides the bird, only salt is required. Once it’s in the oven, no need to baste. It produces the most perfect, succulent meat and gorgeous, crisp, brown skin. So unless you are one of those brave folks who likes to fry their turkey, why wouldn’t you dry-brine the big bird?

The method — which basically involves rubbing salt all over the turkey and letting it sit for three days — lets time and the salt do all the work for you. It’s a lot less messy and cumbersome than wet-brining, and doesn’t require finding a vessel large enough to submerge a turkey, nor finding a place in the fridge large enough to store that. (A turkey sealed airlessly in a zipper bag takes a lot less space.)

The one important point we are stressing this year is weighing your bird. Last year, we purchased a turkey that was two pounds lighter than labeled. If we hadn’t been paying attention, that could easily have led to an overcooked bird and not enough food — not to mention not getting what we paid for.

When I was growing up, my mom always had — handwritten and taped to the fridge — a turkey roasting timetable, for easy game-day reference. Following the link to the recipes is a timetable for your own easy reference.

The main takeaway: You’ll need to salt the turkey Monday morning, so get your hands on it right way.

Dry-Brined Turkey Timetable

The weekend before Thanksgiving

• Clean out the fridge to make space for the coming week of cooking. It’s a good thing to do pre-holidays in any case.

• Purchase your bird, so you’ll have it ready to salt on Monday morning. Be sure to weigh it once you’re home.

Monday

• If your turkey weighs more than 8 pounds (which most turkeys do), salt it this morning.

Tuesday

• If your turkey weighs 8 pounds of less, salt it this morning.

• If you salted yesterday, turn the bird over.

Wednesday

• Turn the bird over.

Thursday

• Morning: About 6 hours before you plan to roast, remove the turkey from the zipper bag and place it breast-up on a platter or sheet pan in the fridge to air-dry. Blot with a paper towel, if the bird has any visible moisture on the skin (it probably won’t).

• One to 1 1/2 hours before you want to roast, remove the turkey from the fridge and let it starting coming to room temperature.

• 15 minutes before roasting (or however long it takes your oven to heat), heat the oven to 425 F / 218 C. If you’re going to tie the turkey’s legs together, do that now.

• Turkey in — breast-side down on a rack in a roasting pan. The total roasting time for a 12-pound bird will probably be about 2 hours 45 minutes, but could be a lot faster, depending on your oven.

• 30 minutes after it’s in: Remove the pan and use oven mitts to turn the turkey breast-side up. Reduce the oven heat to 325 F / 163 C.

• 1 1/2 hours after flipping: Use an inatant-read thermometer to test the temperature at the thickest part of the thigh meat. If it’s getting close to 165 F / 74 C, you’ll want to check doneness frequently from this point on. (Note: If your bird is smaller than 12 pounds, start checking about 1 hour after flipping.)

• 45 minutes after first temperature check: Your 12-pound should be done, or close to it — pull it out, or keep checking every few minutes. (An 8-pound bird will done much more quickly.) Place on a carving board in a warm place (tented loosely with foil, if you like) to rest.

• 30 minutes after it comes out of the oven, carve and serve!


Want free recipes delivered to your inbox? Sign up below!

The smartest insurance for a perfectly cooked, ample turkey — and getting what you paid for? Weigh that bird!

By Leslie Brenner

Over the next few days, more then 40 million Americans are expected to head to the supermarket and purchase a turkey. How many of those humans will take it on faith that the bird they purchase is the size it’s purported to be? And do they know whether the weight on the label — the weight on which many will base their roasting times — is with or without the neck, giblets bag and plastic holding things in place?

Last year my turkey was more than two pounds lighter than the weight indicated on the label. Good thing I weighed it when I got home, or that bird would have been toast.

The turkey in question — an organic one purchased at Whole Foods — was labeled 11.36 pounds, and that’s what I paid for. Once home, I weighed it: The actual weight was 8 pounds, 12.6 ounces — including all the plastic, the neck and the giblet bag. Weight of the turkey without the neck; in other words, the roast-able, serve-able part? A mere 7 pounds 14 ounces.

Good thing I hadn’t invited the neighborhood!

Meanwhile, weighing it also prevented me from leaving it in the oven too long. Had I timed the roasting as if it were a 10- or 11- pound bird, it would have been seriously overcooked before the instant-read thermometer went anywhere near it. Not even the president could have pardoned that.

Did my mis-labeled bird represent a larger, undiscovered phenomenon? Were other unsuspecting turkey-lovers being overcharged for their birds as well? Imagine 40 million such mistakes in supermarkets’ favor. Or could the packing houses or the turkey processors be the ones cleaning up, selling mis-labeled birds to supermarket chains? Are underweight turkeys something the cooking public needs to be on the alert for. Or was what happened to me simply an innocent, random mistake?

I had to find out, so I snapped photos of the weight on the label, the whole package on my scale (showing the true weight), and the weight of each component. Receipt in hand, I returned to Whole Foods to see the manager, who called over the head of the meat department when I showed her my photos. Bafflement all around — and no offer to refund what I had overpaid. They collected my email address and said someone would contact me from corporate.

Why the weight is important

There are many reasons an accurate weight is important — for any kind of food product. For one thing, you need to get what you’re paying for (pretty basic!).

In the case of a turkey, obviously you need to know that you’ll have enough for your guests. The general rule-of-thumb is one to one and a half pounds of turkey per person (when you’re talking about a whole bird). If I were serving 10 guests and chose what was labeled an 11+ pound bird, that should have been ample. But if it were actually under 8 pounds? Might be a bit sparse — not what you want on Thanksgiving.

Then there’s the prep and cooking. If you dry-brine — that is, salt the bird a few days in advance of roasting for succulent, flavorful meat and crisp, golden skin — you need an accurate weight to know how much salt to rub on.

Whether you have dry-brined, wet brined or not brined at all, the weight will tell you approximately how long the turkey will need to roast. It won’t be anything like exact — oven temperatures very wildly, and most ovens do not heat evenly or maintain even heat during a long stretch. But at least the weight will help you know at what point to start checking on the turkey for doneness.

Using our Cooks Without Borders recipe, a 12-pound turkey usually roasts in about 2 hours and 45 minutes, but I always start checking at about the 2-hour mark, just in case. Miss the mark, start testing too late, and it’ll quickly go from done to dry and overcooked, particularly the breast.

You want the dark meat to reach 165 degrees F / 74 degrees C, but not go beyond that. The white meat will already be a bit more cooked than ideal at that temperature (which is why many cooks spatchcock). I love the presentation of a whole bird, so I live with less-than-perfect white meat. It’s a choice. It’s still delicious. But not if you go must past that dark-meat-is-done point.

The case of the mis-labeled turkey

In an effort to find out how my turkey was mislabeled, my local Whole Foods’ “Meat Team Leader” contacted someone in corporate, and it went all the way up to a District Vice-President, who personally called me, promising to get to the bottom of it and get back to me. I had to point out to him that still, no one had offered to refund what I had overpaid.

He did, and gave me a $25 Whole Foods gift card for my trouble.

He also got back to me, after contacting the processing center, and told me that they thoroughly looked into it, and determined that my mislabeled bird was an isolated incident — there was no systemic problem. Much appreciated, and I hope he’s right. Please weigh your bird.

Ready, set, go!

Today’s the day to purchase your turkey if you’re dry-brining; that way you’ll have it ready to salt Monday morning. (Or you could purchase first thing Monday and get it going by mid-day.) Here’s the recipe, to guide you, along with recipes for savory sides and appetizers.


Want free recipes delivered to your inbox? Sign up below!

It's a semolina granule, it's a dreamy stew, it's a Mahgreb celebration: couscous!

By Leslie Brenner

To lots of people, couscous is something you buy in a box, add to a pan of boiling water, stir, let sit 5 minutes then fluff with fork. Maybe they’ll zhuzzh it up a bit and call it a side dish.

But couscous can be so much more — as it is in its birthplace, the Maghreb subregion of North Africa.

In countries like Tunisia, Algeria and Morocco, couscous is both “grains” of rolled semolina like the ones that come in that box, and a savory meat-and-vegetable stew that’s spooned on top of the grains.

More accurately, those grains are granules. Made from crushed durum wheat (semolina), they are related to pasta, but they’re not exactly pasta. Traditionally they’re made by mixing the durum with water, and rubbing the mixture between your palms into granules. The granules are put through a sieve, and anything small enough to go through has to be rubbed again. It’s very labor-intensive. The granules are then steamed, then dried in the sun.

That’s just the beginning: To serve couscous, it has to be cooked — which involves steaming it several times (traditionally in a dedicated couscous steamer, known as a couscoussier), and spreading it out and rubbing it to separate the granules in-between steamings. After the last steaming, it’s super light and fluffy: the couscous ideal. (Properly prepared couscous is never clumpy or gummy.)

To say couscous is culturally important in the Maghreb is an understatement. “Couscous is considered the most important traditional dish among the Maghreb people,” wrote Oumelkheir Soulimani in a 2020 article in the African Journal of Food, Agriculture, Nutrition and Development.

The food historian Charles Perry (my former colleague at the Los Angeles Times), wrote about couscous for the Oxford Symposium on Food and Cookery in 1989. His paper, “Couscous and its Cousins,” points out that in Morocco and Algeria, “the local word for it is sometimes identical to the word for ‘food’ in general.” He concludes that it was the Berbers of northern Algeria and Morocco who first created couscous, sometime between the 11th and 13th centuries.

So the tradition is very old.

(Of course there’s also the pearl couscous that’s popular throughout the Levant — in Lebanon, Israel, Jordan and Syria. Those much-larger granules are produced in a similar way, but the aesthetic is very different. That’s another story.)

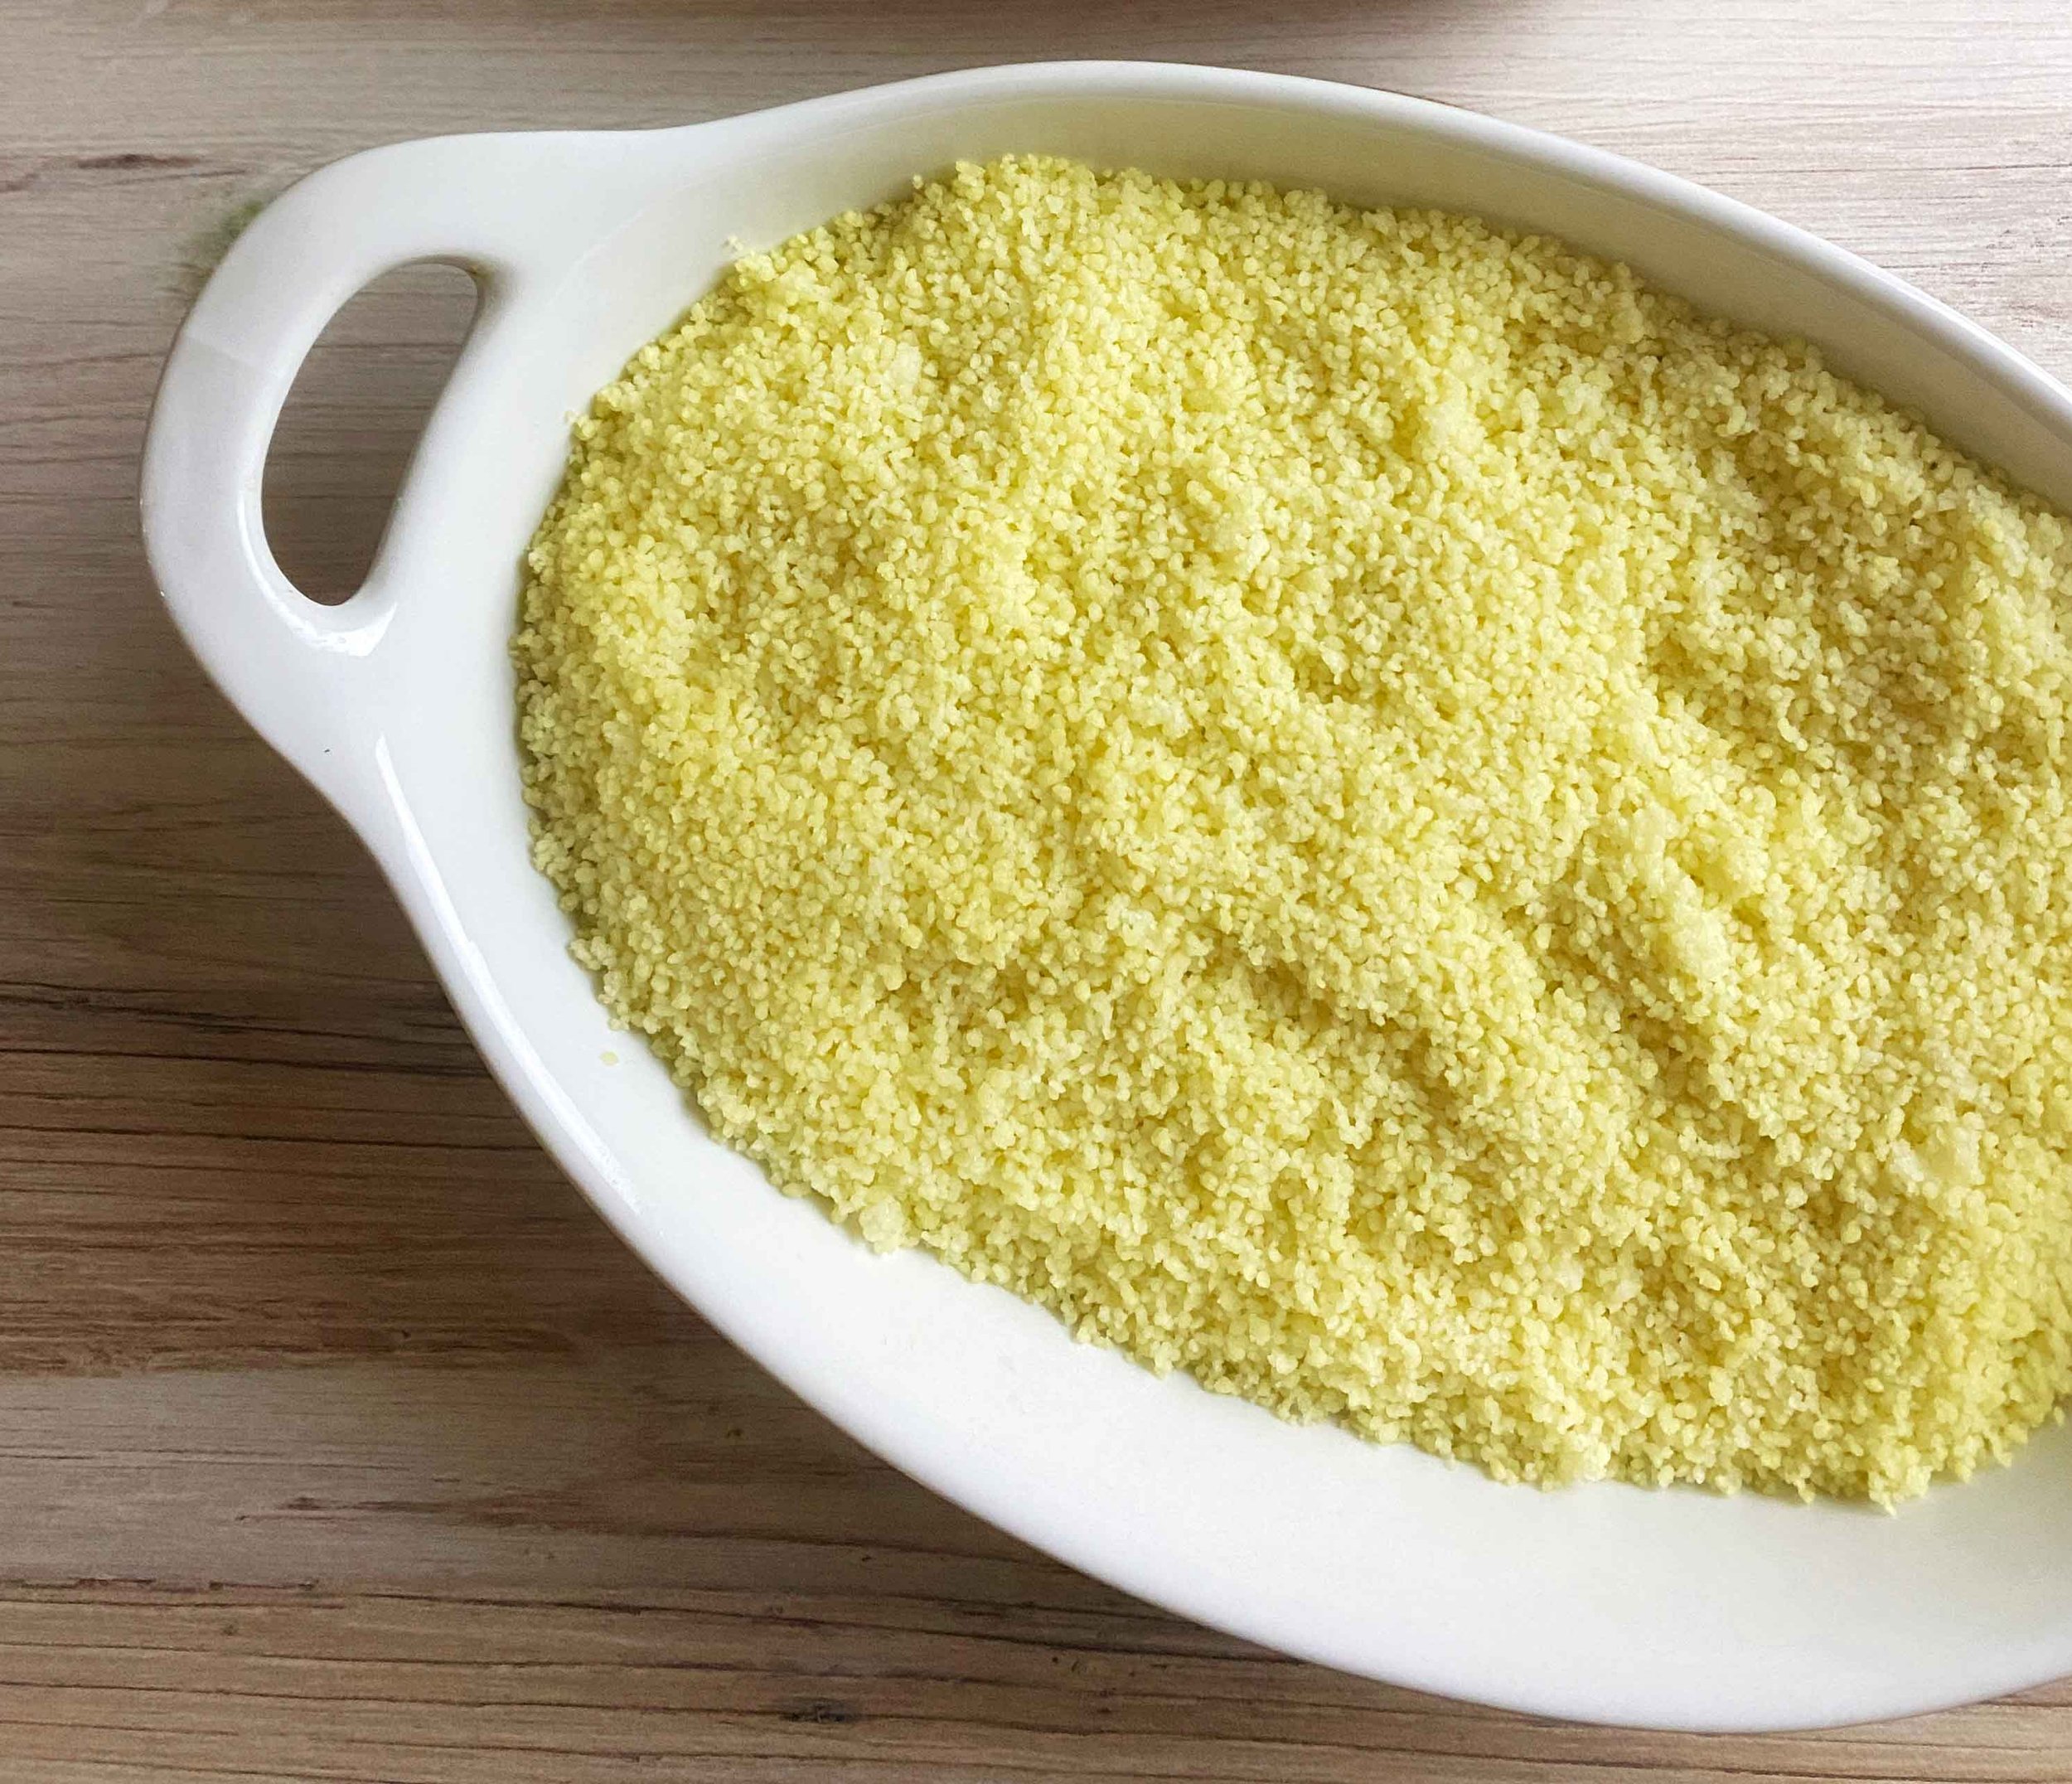
How is what you buy in the box different than scratch-made semolina rolled between the palms? Soulimani explains that in detail — basically, it’s similar to the artisanal product up to the point where it’s dried.

When you follow the simple instructions on the box, you’re skipping the whole steaming routine that traditionally follows. The couscous tastes fine, but it’s much heavier than the ideal; a box of couscous steamed three times makes twice the volume of one made according to package instructions. And it sits heavy in your belly. That’s why until recently, if I wanted to do couscous right, I’d set up a steamer (I don’t own a couscoussier — pronounced coose-coose-ee-YAY) and spend a couple hours preparing the granules. No, you don’t have to do that to make a great couscous; more on that presently.

Either way, you’re using industrial couscous from the box (or bag, or whatever) — unless, of course, you happen to be in possession of some hand-rolled, sun-dried couscous.

The topper: a festive stew

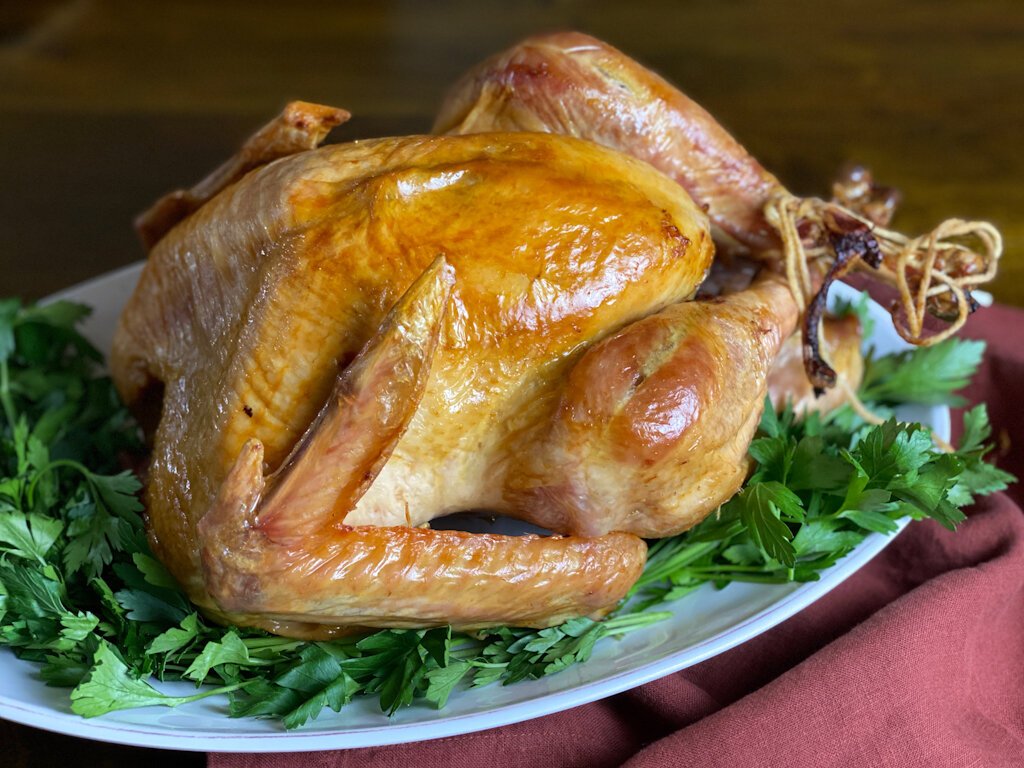
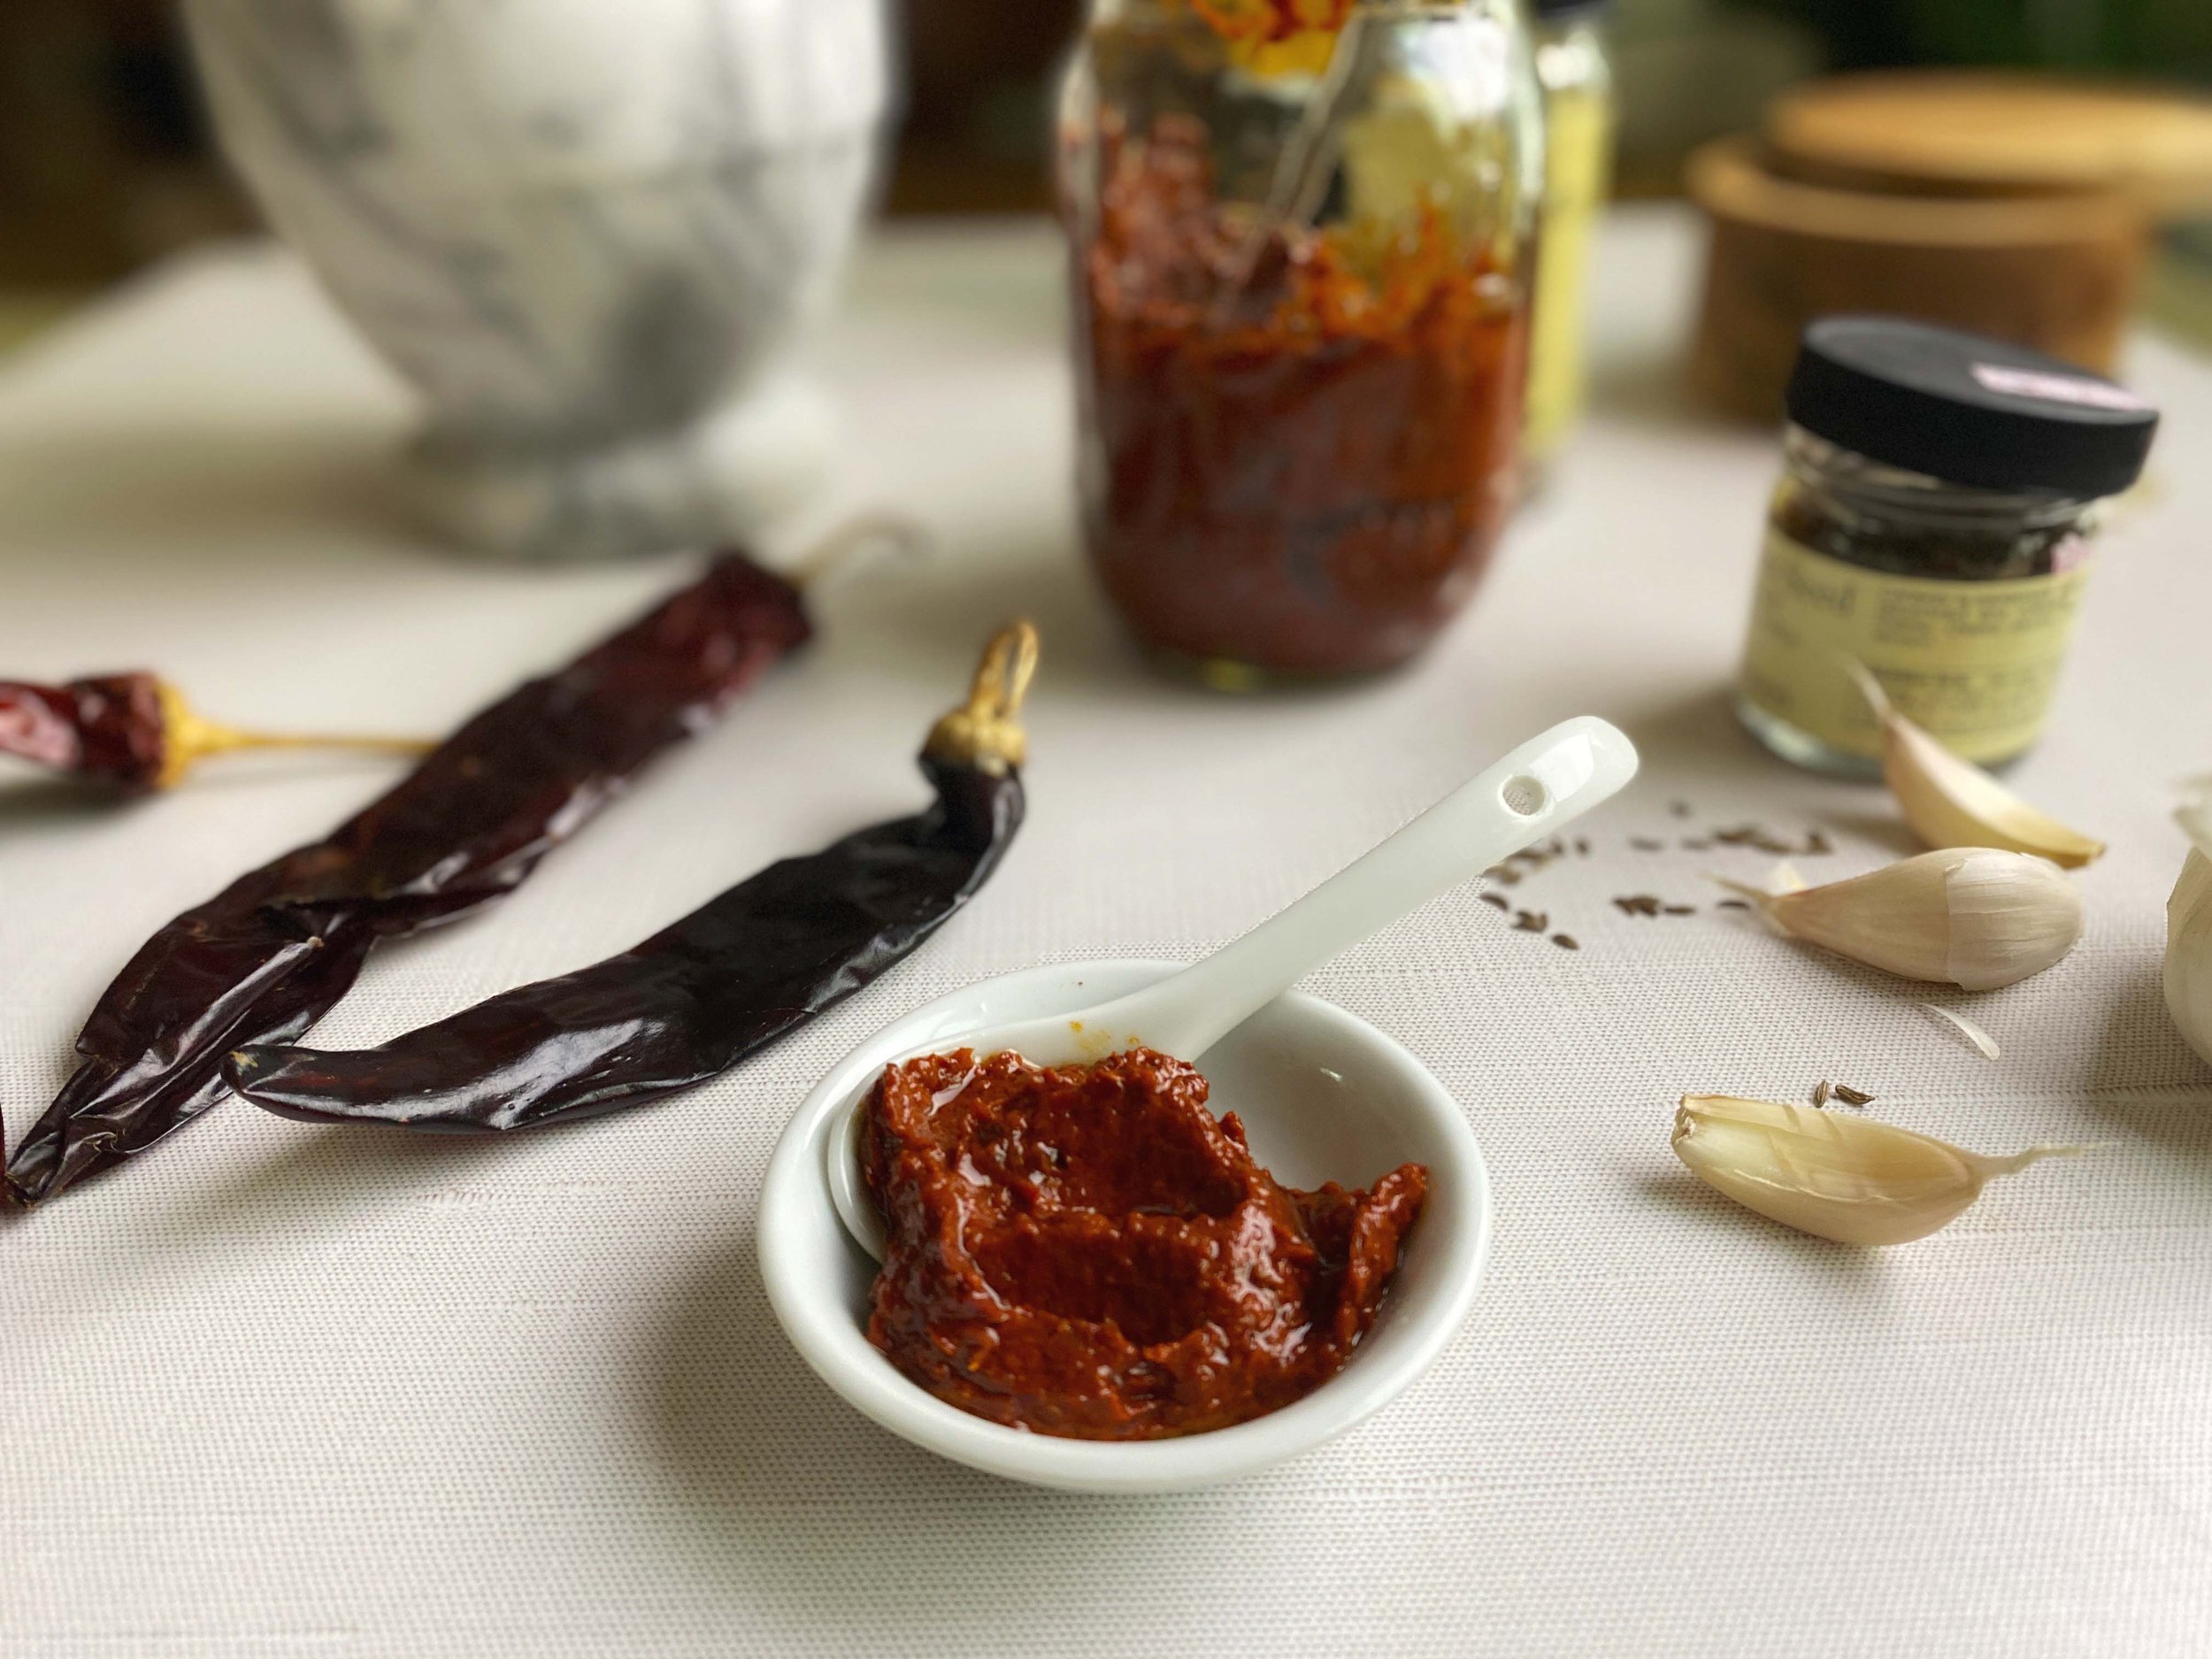
The stews that go on top are wide-ranging: They can involve lamb, chicken, fish or vegetables, or a combination. Often there’s a sweet element — raisins or caramelized onions, pumpkin or sweet potato; sometimes chicken is brushed with honey. There’s usually cinnamon and saffron, and harissa — which may also be served on the side. Traditionally, fresh country butter (smen or oudi) may be included.

READ: How to make your own Tunisian-style harissa — and why you’ll be thrilled you did.

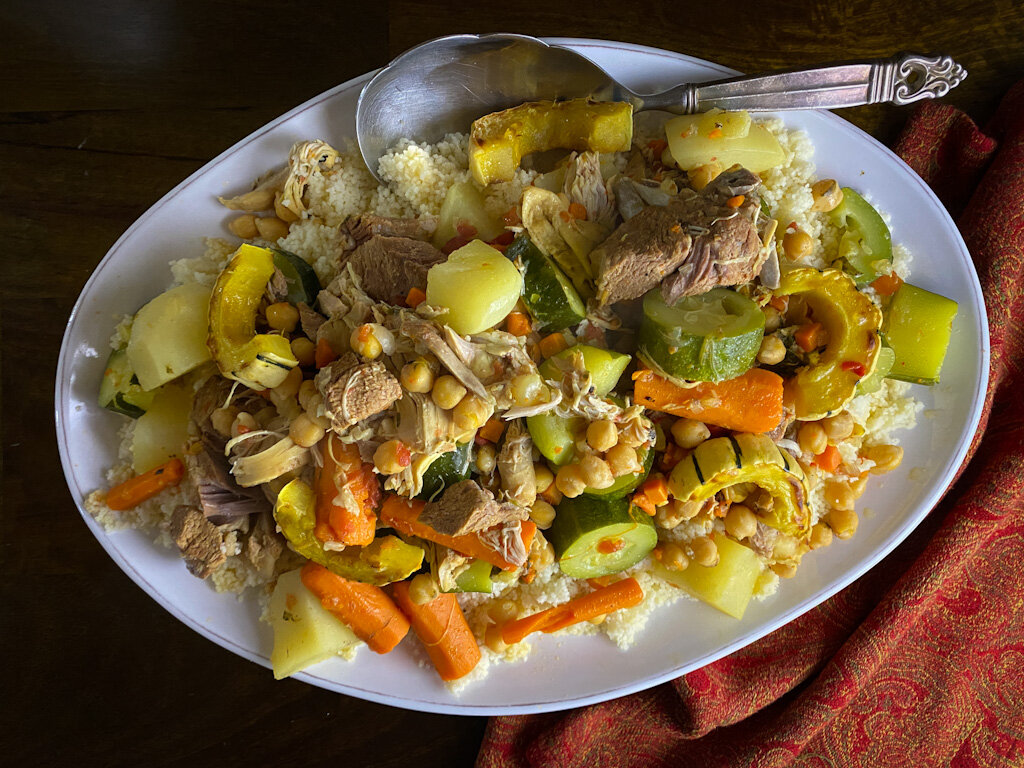
Since I was a wee twenty-something, I’ve been making a festive rendition inspired by a traditional Moroccan dish: couscous with seven vegetables, in the style of Fes. The seven vegetables are a Berber tradition; they include zucchini, turnips, carrots, tomatoes, sweet potatoes, cabbage and pumpkin. The Fes-style couscous also includes chickpeas, raisins and onions, along with chicken and lamb, cilantro, cinnamon, saffron, harissa. The grains get tossed in a lot of butter.

My couscous includes all of the above except for raisins, cabbage and sweet potato; instead of pumpkin, I use delicata squash because it’s easier and (to me) more delicious. I skip the butter on the couscous — I find it’s rich enough without it, as the broth is rich.

Why do I skip some of the vegetables? Only because I first learned to make the dish from a cookbook in the Time-Life “The Good Cook” series. A method more than a recipe (as was the habit in those excellent books), it gave a basic outline — which worked great. Over the years, I’ve evolved it a bit.

Putting it all together

The basic idea is make a broth with cut-up lamb and chicken; chickpeas are included from the start if you’re using dried ones, or toward the end of you’re using canned (either is fine). The broth is flavored with harissa, cinnamon, cilantro, tomato and diced carrots and onion; big chunks of carrot and turnip are added later, followed by zucchini and roasted red pepper strips. Once everything is tender and delicious (what a gorgeous aroma!) and your fluffy couscous is ready, you put the granules on a platter and lay the meats, chickpeas and veg on top, along with roasted delicata squash rounds. Moisten it all with a little broth, and bring it to the table, along with a sauceboat of broth and a dish of harissa.

Recently, a brilliant solution surfaced for the age-old couscous granule quandary of whether to spend hours steaming and rubbing, or take the 5-minute box-instructions shortcut. In her recent cookbook Claudia Roden’s Mediterranean, the renowned author devised a quick-and-easy method that’s a hundred times better than the box-instructions. (Basically, pour on boiling water, stir, wait five minutes, stir again, wait five minute, drizzle on a little olive oil, then rub the grains between your hands to separate the granules and coat with oil. Cover with foil and bake 10 or 15 minutes. Fantastic!)

One day (maybe soon!) I’ll make a proper couscous with seven vegetables in the manner of Fes. And I did get my hands on hand-rolled, sun-dried couscous from Tunisia; Zingerman’s sells it. I, however, have not yet been able to get satisfactory results cooking it according to package directions or using Roden’s method. I’m going to continue working with the product, and if I succeed, that’ll be another story, too.

For now, I invite you to enjoy a couscous that’s always been a favorite among my friends and family — using the familiar couscous in a box and incorporating Roden’s clever hack. Want to make it super-special? Take the time to make homemade harissa. But even if you use harissa from a tube, I think you’ll love this.


Want free recipes delivered to your inbox? Sign up below!

<

How to make your own Tunisian-syle harissa — and why you'll be thrilled you did

By Leslie Brenner

Sure, the stuff in the tube is pretty darn good. But there’s nothing like homemade harissa — North Africa’s signature brick-red, aromatic chile paste.

Just ask UNESCO, which granted harissa from Tunisia a place on its “intangible cultural heritage” list last December.

Tunisian-style harissa is incredibly vibrant, velvety and alive, and though only a few ingredients comprise it, it has remarkable depth of flavor.

Given its worldwide popularity, you’d think there’d be recipes for it all over the internet. You’d be wrong: While there are a gazillion recipes using it as an ingredient, there are shockingly few recipes out there — at least on Anglophile and Francophile sites — for making something like the real Tunisian deal at home.

It’s quite simple to make; there are only four basic ingredients: dried chiles, caraway seeds, coriander seeds and garlic. Plus salt, of course, and olive oil to preserve it. All the formulas you might turn up that include things like tomato, cumin, cilantro or lemon juice? Maybe they’re good, maybe they’re not; hard to imagine that they improve upon the Tunisian classic.

It starts with dried chiles. In Tunisia they come from Cap Bon, Kairouan, Sidi Bouzid and Gabes, according to a film that was part of Tunisia’s submission for the UNESCO listing. Other sources mention Nabeul. In the Americas, the closest chiles to those are said to be guajillos and California chiles.

Snip them open with kitchen shears or scissors, shaking out the seeds and removing the stems. Seed removal is important for the best flavor in texture. Leave the seeds in, and you have a harissa that’s punishingly hot. Remove them, and you get incredible chile flavor, minus the fire. Instead of a tiny dab, you can swipe a piece of bread through harissa and relish it. Note that in the video, the woman making harissa from dried chiles shakes out the seeds before grinding them.

Rinse them, then soak them in boiling water for about 30 minutes, so they become soft and pliable. In Tunisia, a manual grinder — like a meat grinder — is traditionally used to grind the chiles. A food processor or blender does the job nicely.

For the spices — caraway and coriander seeds — grind them yourself for the best flavor. Sure, you could use pre-ground spices, but as long as you’re going to the trouble to make harissa, why cut corners?

Throw the spices, the rehydrated chiles, a few garlic cloves, salt and a little olive oil in the processor, and blitz away, until you have a smooth paste. That’s it. You have harissa. Maybe you’ll need to add a little water along the way.

Taste it, and swoon. Use it in a favorite recipe — go ahead, use more than you might if you were squeezing a tube. Stir it into a soup. Slather it on a roasted sweet potato. Or serve it with a tagine or couscous. Ready to store it? Put it in a jar, cover it with olive oil, and your supply will last in the fridge for months.


Want free recipes delivered to your inbox? Sign up below!