Great for entertaining

Sauce gribiche makes every simple thing you cook instantly delicious

Seared barramundi with gribiche

How about an easy-to-make sauce that can turn the simplest grilled fish into a dazzling dinner party dish? Or that can dress up boiled or roasted asparagus? Or that you can add to sliced boiled potatoes to turn them into the snazziest potato salad ever?

That's the beauty of sauce gribiche: It can make every simple old thing deliciously new again. 

Poached leeks. Poached chicken. Boiled shrimp. Cold cracked crab. Fried or pan-fried soft shell crabs. Steamed mussels. Thick roasted slices of cauliflower. Sliced rare roast beef or lamb or ham. The possibilities are, you know, endless.

Traditional sauce gribiche is a mayonnaise made with hard-boiled egg yolks instead of raw ones, dressed up with herbs, capers and cornichons. (It's French, which is why it's called "sauce gribiche" instead of "gribiche sauce.") That old-style version is just as tedious to make as mayo, too, as you have to dribble in the oil while you constantly whisk, being careful not to let it "break." (Don't worry, though: Our new-wave version is super easy!)

The traditional style of gribiche bears little resemblance visually to the new-wave versions turning up in restaurants these days, though the ingredients are the same. The reason? Instead of whisking the ingredients into an emulsion, you quickly stir everything together. Using soft-boiled eggs instead of hard-boiled ones, and lots of herbs, brings it irresistibly into the 21st century in terms of looks and taste. 

Grilled jumbo asparagus with gribiche and bottarga from Gjelina: Cooking from Venice, California

I stumbled on one as I flipped through Gjelina: Cooking from Venice, California – the new book from chef Travis Lett. Lett uses it to sauce jumbo asparagus that he first parboils, then grills; the dish is finished with lots of grated bottarga, dried cured mullet roe. I love bottarga, and I happened to have some in my fridge, so I made it – and loved it. (Note: in case you happen to make it, boil the asparagus longer than he tells you, or it will be crunchy-hard. Also, I substituted panko for the garlic crouton crumbs that added a bunch of extra steps to his recipe, and the panko worked great.) But bottarga is hard to come by, and it's expensive, so before I added it to the dish, I tasted it without. Good, but not great. It wanted a little more zing. I decided to develop a recipe that would be zingy enough to jazz up simple, plain food without the help of bottarga. 

I pretty quickly hit upon the answer: cornichons. Traditional gribiches include them, yet Gjelina's did without them (probably they would taste weird with the bottarga). Adding them did the trick: It was much more vibrant. I made a batch and tried that on asparagus I cooked simmered in salted water till tender:

Asparagus with new-wave gribiche

Bingo! This was perfect! I also used it to sauce barramundi, a delicately flavored fish with nice body. I did nothing fancier than put salt and freshly ground black pepper on the fish, and seared it gently in a little olive oil. Wow – it was really good, something I'd happily serve at a dinner party. 

Want to try it? Here's the recipe:

Seared barramundi with new-wave sauce gribiche

I didn't stop there. I also found a version in one of my all-time favorite cookbooks, Judy Rodgers' The Zuni Cafe Cookbook. I'll tell you about that – and more about gribiche – in my next post!


Brazilian chocolate cake: Really, it doesn't get any better than this

I can't remember the first time I tasted the Brazilian chocolate cake from Deborah Madison's The Greens Cookbook, but I do remember who made it: my friend Michalene. (She's also the genius who asked the gobsmacking question about whether I'd tried the magic lacquered chicken technique with duck. Now I have! It is going to work! I am developing it! Stay tuned!) But the cake. It doesn't look like the photo above once it's finished; what's pictured is the bottom half of the cake after I iced it with ganache. It just looks so luscious, I couldn't resist. Wanted you to keep reading. Forgive me. This is what it looks like when it's finished:

I know, not as glam. I'm not much of a baker; yours will probably be more beautiful. Michalene's always is. Also it is not easy to photograph a bundt cake.

However – and this is a big however – I've made the Brazilian chocolate cake a jillion times, and every single time it has turned out great: moist, with a lovely, fine crumb, rich and magnificently chocolatey. Not too sweet. 

It is, quite simply, the perfect chocolate cake. When you slice it, you can see a stripe of that fabulous glossy bittersweet ganache in the middle, exactly the right amount. It is the little black dress of chocolate cakes: simple, elegant, necessary. It may look a little austere, but oh, baby, it is anything but. A cup of strong coffee in the batter gives it depth and dimension. 

Otherwise, there's nothing unusual about the recipe, which as far as I can tell is foolproof. When I last made it, a few days ago, I purposely fooled with the recipe. I used pastry flour instead of cake flour. I used room-temperature coffee instead of hot coffee. I used a 3.5 ounce bar of chocolate instead of the 3 ounces the cake part of the recipe calls for; same for the ganache. Both cake and ganache were perfect. 

I wish I had a slice right now. Thierry, Wylie and I polished it off pretty quickly. It is not only dreamy as a dessert, it's amazing the next morning (and the one after that) for a decadent breakfast. Wylie was home for spring break when I made it. Though he has never been a big fan of cake, he loves this one.

And you will, too.  Here's the recipe:

Fried Rice SMACKDOWN! Lucky Peach vs. Mission Chinese Food - Round One (Lucky Peach)

It's the event of the season, the match-up we've all been waiting for: enticing fried rice recipes from two hot new Asian cookbooks. On the left is the Chinese Sausage Fried Rice from Lucky Peach 101 Easy Asian Recipes by Peter Meehan and the editors of Lucky Peach. On the right is Salt Cod Fried Rice from The Mission Chinese Food Cookbook by Danny Bowien and Chris Ying. 

The Mission Chinese Food fried rice has a cult following and takes more than 24 hours of advance preparation – after a dedicated hunt for ingredients. You'll be required to soak salt cod in several changes of water for 24 hours, make mackerel confit in advance and fry-up the salt cod till it's hard as jerky, then shred it in a food processor. before you start. Are you up to it?

Meehan's recipe is the underdog, with no restaurant pedigree – though Lucky Peach magazine certainly has a cult following. You can put the whole thing together in a half hour, though unlike its opponent, it prefers (though doesn't require) that you use day-old cooked rice.

Both include Chinese sausage, scrambled eggs and scallions, and neither relies on soy sauce, which makes things interesting.

Mission Chinese Food Cookbook's Salt Cod Fried Rice

We'll be judging the fried rice contenders in several areas:

–Taste: how delicious is it?

–Ease of preparation: Is it worth the time and effort?

–All-around awesomeness and wow factor

It's going to be a tough contest, and we have quite a bit of prep ahead of us, so let's get going!

Both require a trip to the Asian supermarket, though the Lucky Peach recipe offers substitutions if you can't come up with things like Chinese sausage (use bacon or pancetta), Shaoxing wine (dry sherry will do) and fish sauce (use soy sauce). For the purpose of this smackdown, I used the Chinese preferred ingredients. If you're thinking of making the Mission Chinese Food fried rice and you don't have access to salt cod, fresh or frozen mackerel fillets, Chinese sausage and fish sauce, just fuggedaboudit. Make the Lucky Peach recipe and call it a day.

Are you ready? 

After gathering all the ingredients, I started two days in advance, cooking jasmine rice beforehand for the Lucky Peach recipe. For the Mission Chinese Food recipe, I submerged the salt cod in cold water.  

A little background on the Mission Chinese Food recipe. "The spirit animal of this dish is the fried rice with salt fish and chicken at R&G Lounge in San Francisco," writes Danny Bowien, the Mission Chinese Food chef. (Wow – that was the site of one of my greatest food memories ever – a Chinese banquet ordered by Melanie Wong, one of the first friends I ever "met" online.) Bowien then riffs on the umami wonderfulness of salt cod: "I love the way it seasons and perfumes rice with a funky, fermented flavor. But I don't particularly love biting into a gnarly chunk of it. The aim of our Salt Cod Fried Rice was to capture that pleasant fishiness without the stank." His solution for his restaurant was to shred salt cod, then fry it. But customers complained there was no visible fish, "so we gilded the lily with chunks of rich mackerel confit."

OK, then – I went to work preparing the mackerel confit, which involved first filleting the mackerel I found in the Asian market. It seemed a little ridiculous to me, but it was really easy and actually quite wonderful.

Mackerel confit

All you do is cover mackerel in vegetable or peanut oil in a saucepan and put it in a 300-degree oven for 25 minutes. Let it cool in the oil, then flake the fish into small chunks and either use it right away or cover it with the oil in a jar and store it in the fridge up to a week. It has a wonderful soft texture and lovely, lightly salty (though no salt was added), delicately fishy flavor, like a cheffy version of canned tuna. The fillet I had yielded more than the 4 ounces the recipe called for, so I'd have to think of a use for the rest of it (an amped-up mackerel-salad sandwich, maybe?). Anyway, it made me feel like confiting every oily fish I can get my hands on.

OK, first up: The Lucky Peach Chinese Sausage Fried Rice. 

As in all Chinese cooking, you definitely want to prep all your ingredients in advance, have them ready and all measured out – your mise en place. The book actually uses a master fried rice recipe, which is great, as it teaches you the technique.

To prep, I sliced Chinese sausage, measured out some frozen peas, whisked together a sauce (Shaoxing wine, fish sauce, sugar and sesame oil), beat two eggs, chopped garlic and ginger and sliced scallions. That was pretty much it – 20 minutes max. 

The recipe calls for 3 cups of cooked long-grain rice, which you can get by cooking about 1 1/4 cups of raw rice. You put the rice in a bowl, break up the clumps with your fingers and make sure your mise is next to the stove. 

First you get your wok very hot, cook the eggs very quickly in a little oil and get them out of the pan. Add more oil, then add garlic, ginger and scallion whites (we kept white and green parts separate), cook just a few seconds, add the peas and sausage, and cook just till heated through. 

Now's the fun part. Dump the rice into the wok, toss it to mix, and use a spatula to spread the rice up against the sides and bottom of the wok, maximizing contact.

"Stir and fold once a minute" for 3 minutes, till the rice is hot and "a little charred in spots." Now pour on the sauce, toss it and continue the spreading, searing, tossing routine "until the rice is evenly colored and looks pleasantly dry." Now add the eggs back in, chopping them up and toss in the scallion greens. 

Ding-ding-ding! Finished!

Oh, man . . . heavenly! The egg is tender, and the dish is perfectly balanced, absolutely satisfying and fun. And it's big fun to make – I can't wait to do it again. Here's the recipe:

Next it'll be Mission Chinese Food's turn. Stay tuned for Fried Rice SMACKDOWN Round Two!


The Chinese lacquered roast chicken that changed my life

Now and then, a recipe comes along that feels truly life-changing. The short crust pastry for the lemon-raspberry tart I wrote about earlier this week was one for me. It wasn't a new recipe when I discovered it a few years ago – it had been right under my nose in the Chez Panisse Desserts cookbook forever, but it was new to me when my friend Michalene pointed me to it. Today it's my go-to recipe for tart crust.

Now a Chinese lacquered roast chicken has changed my life.

There's nothing more delicious than roast chicken, and every cook should have a favorite recipe for it (at least one!) in his or her repertoire. For years, my go-to roast chicken has been the Judy bird – that is the Zuni Roast Chicken from Judy Rodger's The Zuni Cafe Cookbook. It's the spectacularly flavorful, crisp-skinned chicken you have swooned over if you've ever gone to San Francisco's Zuni Cafe and ordered roast chicken for two. I will write about the Zuni chicken soon here on the blog and give the recipe, but the technique is basically this: Tuck fresh herbs under the chicken's skin, rub it all over with a lot of kosher salt, and let it sit in the fridge like that for one or two days. When you're ready to roast, wipe the chicken dry, heat a skillet on the stove, plop in the chicken, transfer it immediately to a very hot oven, and let it roast. No basting, but you  have to flip the chicken a couple times and fiddle with temperature. It always results in a fabulous bird.

When I don't plan ahead, I've used the Judy technique without the advance salting, and sometimes even without tucking herbs under the skin. It's still always excellent. I thought my abbreviated version was the simplest great roast chicken possible without a rotisserie.

So when I read about author Peter Meehan's roast chicken approach in the new cookbook Lucky Peach Presents 101 Easy Asian Recipes, I sat up and took note. "We are advocates of a hot-and-lazy approach: one high temperature, one pan, one position, one great result." He talked about how seasoning a bird ahead of time and letting it sit uncovered in the fridge lets him have an easy dinner to pop in the oven anytime in the next three days, and now I was really sitting up straight. This man is sensible! When he wrote, "I started doing this after I fell under the spell of Judy Rodger's Zuni Cafe Cookbook," I dropped the book and ran out to buy a chicken. Invoking Judy's name confers instant credibility.

In the Lucky Peach Presents 101 Easy Asian Recipes cookbook, Meehan offers three roast chicken recipes. For me, it was a no-brainer: Lacquered Roast Chicken.

Irresistible, right?

Here's the deal. This is the easiest roast chicken recipe in the universe, and the result is magnificent. 

All you do is this: Paint a chicken with a mixture of half-honey, half soy sauce, then sprinkle it with salt. Let it sit uncovered in the fridge for one or two days, then roast it in a 400 degree F. oven for 50 minutes. That's it. No basting, no flipping, no lowering and raising temperatures. Let it rest 15 minutes, then carve it and here's what you get:

I kid you not. The skin was wonderfully crisp, the meat super-flavorful and both dark meat and white meat were perfectly cooked. The white meat was moist, juicy and delicious as the dark meat. A miracle!  I can't wait to try it again.

Here's the recipe:

Want something smashing this weekend? Pick up a chicken tonight or tomorrow, paint it with lacquer and it'll be ready to pop in the oven Friday or Saturday evening. Or paint a bird with the lacquer on Sunday afternoon and leave it in the fridge so you can roast it for an easy weeknight dinner next week. And please let us know – in a comment here – how you love it!

Meanwhile, I told Michalene about it, and what she said glued me to the ceiling: "Have you tried it on a duck?" Oh, man.

NOTE: I later made the chicken again, and it required ten minutes longer to cook – about an hour total roasting time. When it's done, the skin will be mahogany, and the legs will wiggle freely at the joints "like you could almost tear them off," as Meehan writes. The internal temperature should be 165 degrees F at the thickest part of the breast and where the thigh meets the breast. Also, when you're preparing the bird, don't worry if some of the glaze falls off the bird – it doesn't matter. That's why we have foil lining the pan.

Ta-da! Presenting a custom-created, Cooks-Without-Borders reader-asked-for-it lemon-raspberry tart

So I'm pretty excited about this: A reader who signed up for the Cooks Without Borders newsletter mentioned that she's craving a lemon-raspberry tart and would love a recipe. Hmm, I thought. That does sound awesome! Especially this time of year. 

I didn't know how I would make one, but I decided to give it my best. I knew what crust I'd use: Lindsey Shere's amazing short crust pastry from the Chez Panisse Desserts cookbook. It's foolproof, easy to put together (even if it seems kind of crazy while you're doing it), doesn't require rolling pin skills (you press it in the pan with your fingers) and results in an incredibly tender and flaky crust. 

I thought it would be nice to marry a classic lemon tart – filled will lemon curd – with raspberries somehow. But simply garnishing a lemon curd tart with raw raspberries didn't sound great. I could create a raspberry tart with lemon pastry cream, but pastry cream is a pain in the neck; lemon curd is easier and more forgiving. 

I found inspiration in Shere's recipe for a simple raspberry tart. She has you brush a prebaked tart shell with melted, strained raspberry preserves, line the shell with rows of berries, bake it for only five minutes, and then glaze it. Why bake the berries only five minutes? "This brings out the perfume of the raspberries without softening and making them mushy," she writes. Bingo! I'd make a lemon-curd tart, pull it out of the oven five minutes early, add just a couple rows of berries (so as not to overwhelm the lemon flavor with too much berry flavor), bake it five minutes more, then glaze the berries.

It turned out great! Two pals and I nearly polished off the whole thing, in any case – after eating a giant dinner. My raspberries were sort of dull-tasting supermarket berries, but treating them this way heightened their flavor. 

Are you up for it? Here we go!


First we make the crust. Don't be afraid: It's easier than you may think, and every time you make one it gets easier and easier. (Believe me: I'm not much of a baker, and I can manage it!). It's such a great crust that if there's one thing you want to learn dessert-wise, this crust might well be it. It's that good. 

To make it, whisk flour, salt and sugar together in a bowl, add sliced chilled butter and work in the butter with your fingers or a pastry blender until it looks like this:

Add vanilla and water, gather it into a ball, let it rest 30 minutes, then use your fingers to press it into a tart pan. It may look at first like you won't have nearly enough dough to cover the pan, but you do – just keep pushing it around with your fingers until you have an even layer covering the bottom and sides.


Stick it in the freezer for a half an hour, then it's ready to bake: in a 375 degree oven for 25 minutes, or until it's golden-brown and baked through. Got it? Here's the recipe:

Now let's make the lemon curd. Again, this may sound scary, but it comes together really nicely – and it has beautiful, bright lemon flavor.

Basically you cook eggs, sugar, lemon juice, lemon zest, milk and butter – stirring constantly – over low to medium heat until the mixture thickens to the consistency of a thick cream. Let it rest five minutes, give it a quick whisk, then chill it. Once it has cooled down, pour it into the baked tart shell.

Bake it in a 375 degree oven for 25 minutes, pull it out (leaving the oven on), add a couple of rows of berries, and pop the tart back in the oven for 5 minutes longer. Remove it from the oven, melt some strained raspberry preserves, stir in a little kirsch, and glaze the berries. Tart accompli! Shall we do this? Here's the recipe. Please let us know in a comment if you plan to try it – and if you do, how it turns out!


Dreaming of spring, I cook – and eat – an entire bunch of stir-fried asparagus

My friends will tell you I'm a little bit crazy. 

OK, maybe more than a little. This day and evening are a case in point. At 8 a.m. I was at my home computer, fiddling with a story I was trying to post online for work. I made coffee. I launched into writing a review, fearing I'd be late for my noon deadline. At some point I made a salad (with Thousand Island dressing, which I deserved, as I was on deadline) and then at three thirty or four I filed, apologizing profusely to everyone involved. Caught up with emails. Jumped into another story I'm writing, this one for Palate magazine, which I'm editing and which has to be completely finished a week from today. (Insane!)

After a while, I looked at my watch and was stunned that it was 7:30. I got up from my desk and turned lights on in the other rooms. Thierry was out, and the house was empty. What would I do for dinner? Some people might just make some pasta or something else they had around, but I wanted something green. I've been craving asparagus. And I'd been eyeing a new cookbook I thought would be fun to review: Lucky Peach 101 Easy Asian Recipes. I flipped through to see if there was a recipe involving asparagus. Bingo! Stir-fried asparagus! I got in the car and headed to the market to buy a bunch.

Oh, but wait – as long as I was headed to the store, maybe I should see if there was something else I wanted to make. I went back inside. Flipping through the book again, I landed on something irresistible: lacquered roast chicken. "Lacquered" is like a magic word for me, no way not to succumb. Further, this looks like the easiest roast chicken recipe in maybe all of history. Four ingredients, including salt (a bird, some honey and soy sauce). You paint the bird with half-honey, half-soy, sprinkle with salt. Let it sit, uncovered in the fridge, 12 hours to 2 days. Pop it in the oven, roast 50 minutes, let rest 15, and carve. Had to try! 

Bought the chicken, bought the asparagus. The recipe called for one large bunch. Drove back home.

Stir-frying asparagus


I brought a large pot of water to a boil, added salt, dropped in cut-up veg, blanched briefly and drained. Heated oil in the wok, added garlic, then asparagus, then chopped Thai chiles, and stir-fried. Then oyster sauce, sugar, white pepper. Stir-fried. Then chicken stock, and cooked till sauce thickened a little.

"Serve on a large platter," it said, and so I did. It should have said a small platter – not a whole lot of asparagus here. The recipe said it made four servings, but I'd say two or three. OK, maybe my bunch of asparagus wasn't that big, but it was the biggest one I saw. 

I took a few picture of it, then sat at the table, poured a glass of white wine, pulled out some chopsticks, and ate the asparagus. All of it. It was very good. Try it. See for yourself.

But wait. There was more: the chicken. Spring chicken! I mixed together two tablespoons of honey and two tablespoons of soy sauce, then painted a thin, even layer on the chicken. Set the time for 15 minutes, during which I did the dishes. Ding! I painted the chicken with the rest of the marinade, then sprinkled it with two teaspoons of kosher salt and put it in the fridge, uncovered. Tomorrow or Saturday (who can think that far ahead!?) I'll zip it into the oven. 

To all a good night.


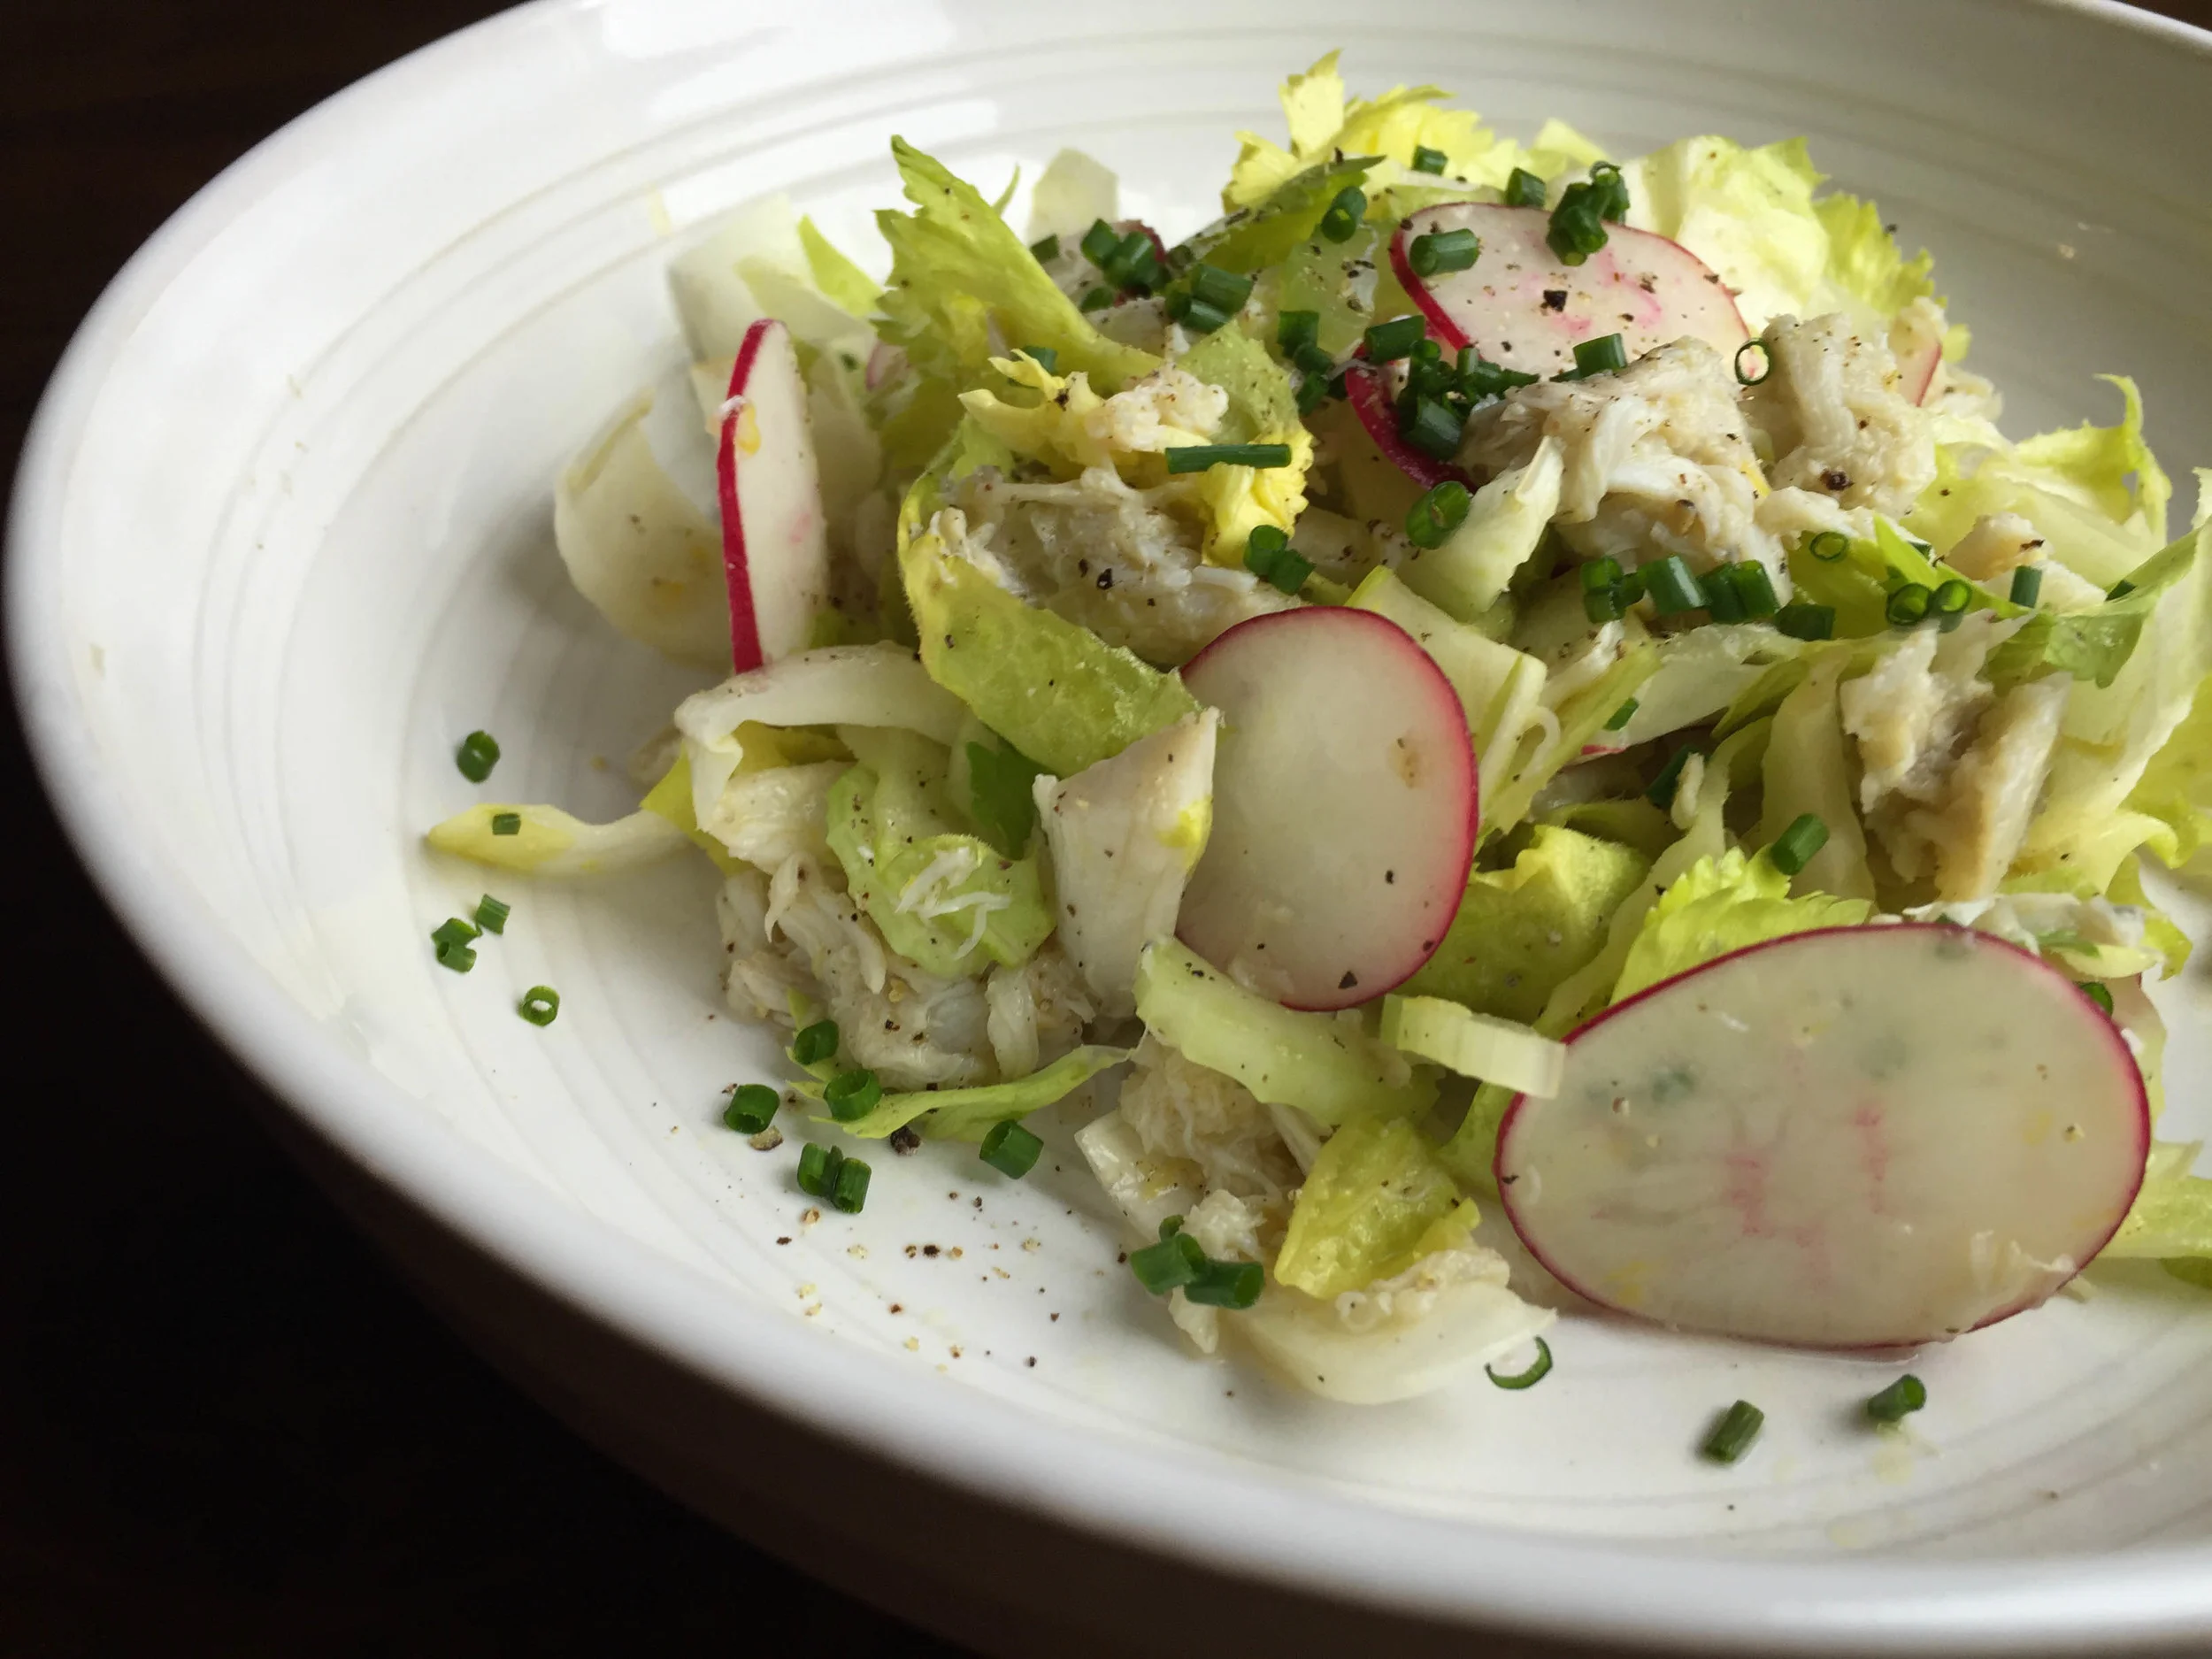
Celery, endive and crab salad: a delicious way into a winter dinner party or Valentine's dinner for two

Celery, endive and crab salad

You're having friends over. You've planned your main course, and the nibbles over drinks for starters, and the dessert. But what, oh what, should you start with when everyone sits at the table? 

This time of year, it often comes down like this: For a main course, I'm making something rich or hearty – like a stew or braised meat or poultry, or a roast of some kind.  So to start, I want something light, but not inconsequential. It would be lovely if it could involve greens. A winter salad? 

This salad of celery, Belgian endives and radishes – with crab meat for a bit of luxury and lemony dressing to keep it fresh – is elegant, pretty and fresh: just the ticket. 

You can slice the radishes and celery in advance, so the salad comes together in no time flat when you're ready to dine. 

Or maybe you're cooking a Valentine's dinner for your sweetie? Make half a recipe, and serve it – with a glass of crisp Sauvignon Blanc (maybe Sancerre!) – as a prelude to a steak or roast chicken. Sound good? Let's do it!


My pissaladière: a French cook, three pounds of onions, a jar of anchovies and an overscheduled journalist add up to one snazzy starter from Provence

Pissaladiere

There I was, caramelizing onions at midnight on a Thursday night. At seven the next morning, in between dressing for work and putting on my makeup, I found myself rolling out tart pastry, organizing anchovies, putting things in and pulling them out of a hot oven. My morning workout? Not happening.

It didn't seem completely batty to offer to bring a pissaladière -- a Southern French caramelized onion-and-anchovy tart -- to dinner at my friends' house on a Friday night when the event was a couple weeks off in the future. No problem, I thought, as I normally I work from home on Fridays. But as I stared down my schedule the Wednesday before, I found myself with back-to-back-to-back meetings at the paper downtown. Working from home was not in the stars. The dinner was a Francophile dinner party at our friends Keven and George's place (also downtown); the theme was Provence. Georges had bouillabaisse on the menu as the main course. So how to manage the promised  pissaladière?

No worries -- I'd prepare the ingredients on Thursday evening, assemble and bake it in the morning, drive it (gingerly!) downtown, and let it cool its heels in my car all day while I did my thing at the paper. A quick turn in Georges' oven, and we should be great to go.

Pissaldiere ingredients

Crazy? Perhaps, given all I have on my plate at the moment. But making this classic dish is much easier it would appear, and making the tart actually turned out to be a high point in a stressful week. Have I mentioned that I'm happiest in the kitchen?

More often than not, a pissaladière is made with bread dough, but I learned to make it from an old friend, Danièle Mazet-Delpeuch, who makes hers using pâte briseé  -- a savory tart crust. We could argue about bread vs. pâte briseé all day long, and Danièle is not from Nice (from whence the dish comes), but rather Dordogne. But I think she has it right: The flavor of sweet, deep onions with salty anchovies melting into them show more deliciously on a flaky crust.

Interesting side note: Danièle was a home cook, queen of the hearth oven in the kitchen of her family's 500-year-old stone farmhouse, when François Mitterand -- who was president of France at the time -- tapped her to be his private chef at the Élysée Palace. They made a movie about her a few years ago called Haute Cuisine; Catherine Frot did a wonderful job portraying Danièle. Here's an interview Epicurious did with Danièle when the movie was released in the U.S. In any case, she's a wonderful cook, and an amazing spirit. A true cook without borders if ever there was one.

Pate brisee

But back to our regularly scheduled tart.

So, the first thing to do is caramelize onions -- a lot of them. It's a slow caramelization, and I'm completely opposed (morally, gastronomically and vehemently) to adding sugar to speed the caramelization. Required: a sharp knife, a low flame and patience.

Slice thin about three pounds of yellow onions in a little olive oil (or better yet duck fat, if you have some) and let them cook very slowly for more than two hours, till they're deep golden and sweet. Then you drain them. While the onions caramelize, make your pâte briseé. Give flour and salt a whirl in the food processor, toss in bits of chilled butter, pulse till it has the texture of coarse meal, add an egg lightly beaten with a dollop of milk, let the motor run till it clumps together. Honestly, it's that simple.

Let the dough rest in the fridge half an hour, roll it out, fit it into a tart pan with a removable bottom, pour in the onions, smush them in nicely, garnish the top with anchovies, niçoise olives and bits of fresh thyme, pop it in the oven, and in 35 minutes, you have a gorgeous pissaladière. Click on the black bar below for the recipe.

Pissaladiere

Place in shopping bag, drive to the office, spend the day getting things done, arrive at K and G's, present tart, demand Ricard. (That's is the beloved anisette aperitif of Southern France.) 

Note to self: Next time I make this, do it on a weekend!


How to turn a humble celery root into a classic French salad, céleri rémoulade

Céleri rémoulade

Céleri rémoulade

This simple French salad – julienned celery root dressed in mustardy mayonnaise with herbs – is one of my favorite starters. And it's one of my husband Thierry's least favorites. That's because when he was growing up in France, céleri rémoulade was considered to be the worst of the worst: school cafeteria food. 

He always groans when I make it. And then he tastes it, and gobbles it up. 

Though you can use store-bought mayonnaise in this dish, making your own mayo for it transforms it into fabulous dinner-party food.

I think I've tried every possible way to make mayo – whisking it by hand, using a blender, a food processor and a mixer. Easiest and most reliable, I think, is a hand-mixer. My recipe for mayo makes about a cup, and you won't need that much for the céleri rémoulade; you can use what's left over to slather on sandwiches and make tuna salad. Or flavor it and pretend it's aioli, as so many restaurants do! 

Once that's done, prepare the celery root. Also known as celeriac, it's the ugly duckling of the vegetable world.

First, use a small, sharp paring knife to peel it. Don't worry if it seems like you're cutting too much away – you want to get rid of all the ugly hairy stuff. Then slice it into julienne matchsticks. You can do this using a sharp chef's knife by first cutting it into 1/8 inch slices, then stacking those slices up and cutting them into 1/8 inch julienne. 

The whole thing's much easier if you have a mandoline to get those first slices. (What’s the best mandoline? I love my Oxo, which is more than 15 years old; here’s a newer model. But friends swear by the much less-expensive Benriner brand.) Set it on 1/8 inch slicing, slice up the whole celery root, then make stacks and use your knife to slice into 1/8 inch julienne. If you have a hand-guard, be sure to use it. With their super-sharp blades, mandolines can be vicious!

Chop herbs and other flavorings for the sauce. Parsley, chives, tarragon and chervil are all nice in it, but even just parsley is delicious in the rémoulade. You can also chop up some capers and even cornichons, though those are optional. You'll want to give it a bracing dose of Dijon mustard, for sure. And sometimes I lighten it up with crème fraîche, though that's optional too. 

Once the sauce ingredients are combined, dress the julienned celery root with enough of the sauce to moisten it, then taste it and adjust the seasonings. Let it sit for an hour or two – or overnight – so the flavors meld and the sauce soaks into the celery root. Then serve it as a first course with a simple French dinner.

Ready to try it? Here's the recipe!