Great for entertaining

Obsessed with butter chicken: Our recipe follows the world’s favorite Indian dish faithfully back to its origin

The ultimate murgh makhani — also known as butter chicken

The ultimate murgh makhani — also known as butter chicken

Several months before The Great Confinement, I became obsessed with butter chicken.  

It began with a problem I needed to solve for a client, for which an Instant Pot seemed like a possible solution. Never having used one, I Googled — and found a nearly two-year-old New Yorker profile of one Urvashi Pitre, “The ‘Butter Chicken Lady’ Who Made Indian Cooks Love the Instant Pot.”

Butter chicken? I’d never given the dish much thought — always assumed it was an Indian dish concocted for American tastes, as chicken tikka masala is for the Brits.

How wrong I was. And how silly I felt, and still feel — mostly because of the missed opportunities to indulge in murgh makhani (butter chicken’s proper name) during a lifetime enjoying Indian food. 

Meanwhile, if exemplary butter chicken could be easily achieved at home in less than a half hour using an Instant Pot, well, then, I had to get an Instant Pot.

My young-adult son Wylie was living with us at the time. Though suspicious of the plug-in-pot contraption, he’d always been partial to the charms of butter chicken, so he was keen to give the recipe a whirl for dinner one weeknight. It was remarkably easy: You put nearly all the ingredients — chicken pieces, a can of diced tomatoes, spices and salt — in the Instant Pot and turn it on. Then you pull out the chicken, use a stick blender to blitz the sauce, swirl in butter, cream, more spice and cilantro, put the chicken back in, and that’s it. Wylie started prepping everything just as I was leaving my office to head home; when I walked in 20 minutes later, he was swirling in the cream.

Wylie’s first (Instant Pot!) butter chicken. Delicious — and so easy!

Wylie’s first (Instant Pot!) butter chicken. Delicious — and so easy!

The Instant Pot butter chicken was astonishingly good: rich, nicely spiced, altogether satisfying. And in so little time, with so little effort. Bravo Urvashi Pitre! 

Urvashi Pitre, a.k.a. the Butter Chicken Lady, with her instant pot murgh makhani in Southlake, Texas

Urvashi Pitre, a.k.a. the Butter Chicken Lady, with her instant pot murgh makhani in Southlake, Texas

Now I wanted to meet the famous Butter Chicken Lady — who happens to live not 25 minutes from me. I had the perfect opportunity. Another one of my clients, in process of opening a new store and cafe in Southlake, Texas, asked me to recommend a local cooking personality for the store’s inaugural Supper Club series. The Butter Chicken Lady! The event was an instant sell-out, and the guests (some of whom flew in from other states) loved it. What a kick to dine on delicious murgh makhani seated literally next to the extremely delightful Butter Chicken Lady. (Check out her excellent blog, Two Sleevers, where you’ll find hundreds of quick-and-easy recipes.) 

Meanwhile, I was getting curiouser and curiouser about murgh makhani. What were the origins of the dish? Were they knowable, or, like most dishes, something with hazy beginnings, a dish that evolved over eons? Would other versions include onions, which were conspicuously absent from Urvashi’s version?

The simplicity of the answer to the origin question threw me for a loop: Butter chicken — murgh makhani — was created, according to a 2018 Washington Post story, in the late 1920’s or early ‘30s in Peshawar (then India, now Pakistan) by a chef named Kundan Lal Gujral. It’s exceedingly rare that a dish has origins so precisely knowable, but butter chicken’s origin story is uncontested, the smart story by Andreas Viestad asserted.

I found the piece just as I was headed to Massachussetts to visit Juliet, a brilliant web designer (and gifted cook) who is now my partner in Cooks Without Borders. As we drove from the airport to her house, I told her about the Post piece, which profiles Monish Gujral, the grandson of Kundan Lal — who also created (incredibly!) tandoori chicken. His grandfather had wanted to create a dish for his mentor that was lighter than the usual dishes of the region, so he had the wacky idea of roasting a chicken in a tandoor oven, which at the time had normally only been used for baking bread. Tandoori chicken was a hit that put the restaurant — Moti Mahal — on the map, and later Kundan Lal created butter chicken as a way to use leftover tandoori chickens. Bathed in a rich, tomatoey, buttery, beautifully spiced sauce, murgh makhani made Moti Mahal famous throughout India. After partition in 1947 (when Pakistan and India were separated), Kundan Lal moved to Delhi, where he opened his own Moti Mahal. His grandson Monish apprenticed with him, becoming a chef at Moti Mahal after graduating university, and eventually taking over the family business — now an empire of some 250 restaurants.

Having eyeballed the WaPo adaptation of Gujral’s recipe, I thought it looked remarkably quick and easy — maybe even as quick to put together as Urvashi’s Instant Pot version. “Let’s make it!” said Juliet. Leave it to my friend to have all the ingredients already on hand.

The WaPo adaptation had us quick-roast pseudo-tandoori chicken pieces in the oven, having slathered on a yogurt-and-spice coating, but not leaving it to marinate before roasting. The sauce came together quickly on the stovetop.

The butter chicken Juliet and I made from the Washington Post story.

The butter chicken Juliet and I made from the Washington Post story.

Again, this was delicious — perfect for a flavor-happy weeknight dinner.

But I couldn’t help but wonder how close this was to the original; the tandoori-approximation seemed a bit quick and clipped, and did the dish maybe want a little more depth?

Monish Gujral’s book, On the Butter Chicken Trail, offers a recipe slightly different than the adaptation in the WaPo piece. It calls for making an actual tandoori chicken first, marinating a skinless chicken first in lime juice, chile powder and salt, and then in a yogurt-spice blend — for at least four hours altogether, so all those flavors soaked in — then skewering the soaked bird and roasting it in a tandoor oven or grill.

Most cooks I know do not have a tandoor, and grilling isn’t always an option, but those two marinades seemed very worthwhile, and I wanted to do something a bit closer to the original than the WaPo recipe. Chicken thighs strike me as more practical for most American cooks, always flavorful, of course, and easier to cook evenly in high oven heat than a skinless whole chicken. Our recipe calls for roasting the thighs on a rack over a baking sheet so the pieces don’t braise in all the juices that collect otherwise.

[EDITOR’S NOTE Oct. 19, 2020: In honor of the first-ever World Butter Chicken Day, October 20, 2020, commemorating the 100-year anniversary of Moti Mahal, we have published a new story and created a new, streamlined version of our recipe. The new version is called World Butter Chicken.]

I also adapted the wonderful garam masala Gujral uses, which gives the dish a gorgeous aromatic underpinning. (The recipe for garam masala in Gurjal’s book yields nearly a pound of spice mix — more than most cooks I know would use in a lifetime; I scaled it down to a twelfth of that.)

Kundan Lal Gujral, the creator of murgh makhani — a.k.a. butter chicken. Gujral also is credited with with creating tandoori chicken. Photo courtesy of Monish Gujral.

Kundan Lal Gujral, the creator of murgh makhani — a.k.a. butter chicken. Gujral also is credited with with creating tandoori chicken. Photo courtesy of Monish Gujral.

Finally, while Gurjal’s recipe calls for 14 medium-sized ripe red tomatoes, that is an awful lot of tomato for one chicken; one 14.5-ounce can of diced tomatoes seemed and tasted like the right amount, and canned tomatoes are more practical outside of tomato season.

That left me with one question: While the WaPo recipe called for Kashmiri chili powder, with 2/3 paprika and 1/3 cayenne offered as a sub, the recipe in the book called for “red chilli powder” without specifying a type. I tested it with the paprika and cayenne combo, and that seemed perfect. But what was ideal — and how much does it matter?

I went straight to the source, and asked Gurjal, whom I had no trouble finding through Facebook.

Now I was just beside myself — first I got to meet the Butter Chicken Lady, and now I was corresponding with the Butter Chicken King himself! Juliet pointed out that he was really more like the Butter Chicken Prince, as he was descended from the dish’s creator, but to me the fact of his world-wide murgh makhani empire makes him the Butter Chicken King.

Gurjal clarified the red chile powder question: Kashmiri chile powder, or a commercial blend called Deggi Mirch (a powder of Kashmiri chiles and red bell peppers), or the paprika-cayenne alternative work well. I sent him my adaptation of his recipe pre-publication, we discussed the switch to canned diced tomatoes and my adaptation of his garam masala, and he approved of the whole package. He was careful to add that you don’t want to blend the sauce too fine; you want it to have a bit of nice texture.

When we chatted later on the phone, he told me about his two grown children (his daughter is a lawyer at the High Court in Delhi; his son is in law school in London). “When they’ve been away and they come home,” he said, “right away, they always want butter chicken.”

Of course they do. It may well be the world’s most beguiling comfort food.

Treat yourself: This Chinese-style lacquered roast chicken will add outsized joy to your life

If you can get a chicken, you can make this smashing dish.

If you can get a chicken, you can make this smashing dish.

We all need something delicious in our lives right now, and the ingredients to make many of our fall-back comfort foods have become, all of a sudden, unattainable. Depending on where you live and how you shop, it may be difficult or impossible to find pasta, eggs, dried beans and flour, for instance. Flour’s elusiveness is particularly annoying, as it stymies bread-baking, cookie making and cake creation.

Where I live, in Dallas, Texas, eggs are hard to come by, but we can get chickens — something my brother in L.A. failed to turn up in his extensive hunt yesterday.

If you live somewhere where you can put your hands on a bird — and you possess (or can get) a little soy sauce and honey — you can, with very little effort, make one of my favorite dishes ever: Chinese-style lacquered roast chicken. (Substitute tamari for the soy sauce, and it’s gluten-free!)

LuckyPeachChickenPlatter.jpg

It comes from Peter Meehan’s 2015 cookbook Lucky Peach Presents 101 Easy Asian Recipes. Though it requires preparation 12 to 48 hours in advance, that preparation is super quick and easy, requiring only about 15 minutes of active prep: Combine soy sauce and honey, paint the bird with it, wait 15 minutes, paint again, sprinkle salt on, and tuck into the fridge. After 12 hours, or two days later, pop it in the oven to roast, hands-free — no basting or turning over the chicken (no need to flip the bird!).

Serve it with a stir-fried or steamed vegetable; fortunately things like broccoli, asparagus and baby bok choy have not been difficult to obtain. I love this recipe (also adapted from the Lucky Peach book) for stir-fried baby bok choy with whole garlic — and garlic, as we know, is great for boosting our immune systems. The book calls for a choice of baby or regular bok choy — or spinach (Meehan specifies regular, not baby spinach) or pea greens.

Chinese Greens with Whole Garlic.jpg

Ideally, you’d also want to serve the glorious chicken and beautiful veg with rice. I did manage to snag a bag of jasmine rice at the online supermarket this morning (I’d been seeking it for a week); otherwise it seems to be all manner of brown rice crowding the real and virtual shelves. With this chicken, and this bok choy, brown rice sounds positively dreamy.

We at Cooks Without Borders and your fellow cooks would love to hear from you in a comment — if you try one of these two dishes, how’d you like them? Any issues? Were you able to find appropriate ingredients?

Need a lift? Throw together a batch of these spicy, zingy (addictive!) taquería carrots

Taqueria Carrlots landscape.jpg

UPDATED: August 2, 2020

First came the cravings for comfort carbs: mac and cheese (or any pasta smothered in sauce); warm chocolate chip cookies; sourdough bread. There’s a reason the boxes of pasta were the first edible things to disappear off the shelves in the early days of the Covid-19 pandemic.

After a week or two of that, I started craving anything tangy: the lemons and limes that were so hard to get our hands on, som tum (Thai green papaya salad); dill pickles.

I also kept thinking about the zingy, hot, crunchy pickled carrots we used to love munching in L.A. taquerías. Known in Mexico as zanahorias escabeches, they are super easy to achieve with very limited resources. And four and a half long months later, they still keep hitting the spot.

If you have any carrots in your fridge — and any kind of chile peppers — you can make these in just a few minutes. The carrot slices are cooked very briefly in a half-vinegar, half-water solution with salt and aromatics; chiles and onion are added off-heat to keep the flavors fresh.

They are just the thing to make a video-chat happy hour with friends even brighter. Mix a margarita, open a beer, show off your glorious carrots, crunch away, and dream together of a bright and pickly future.

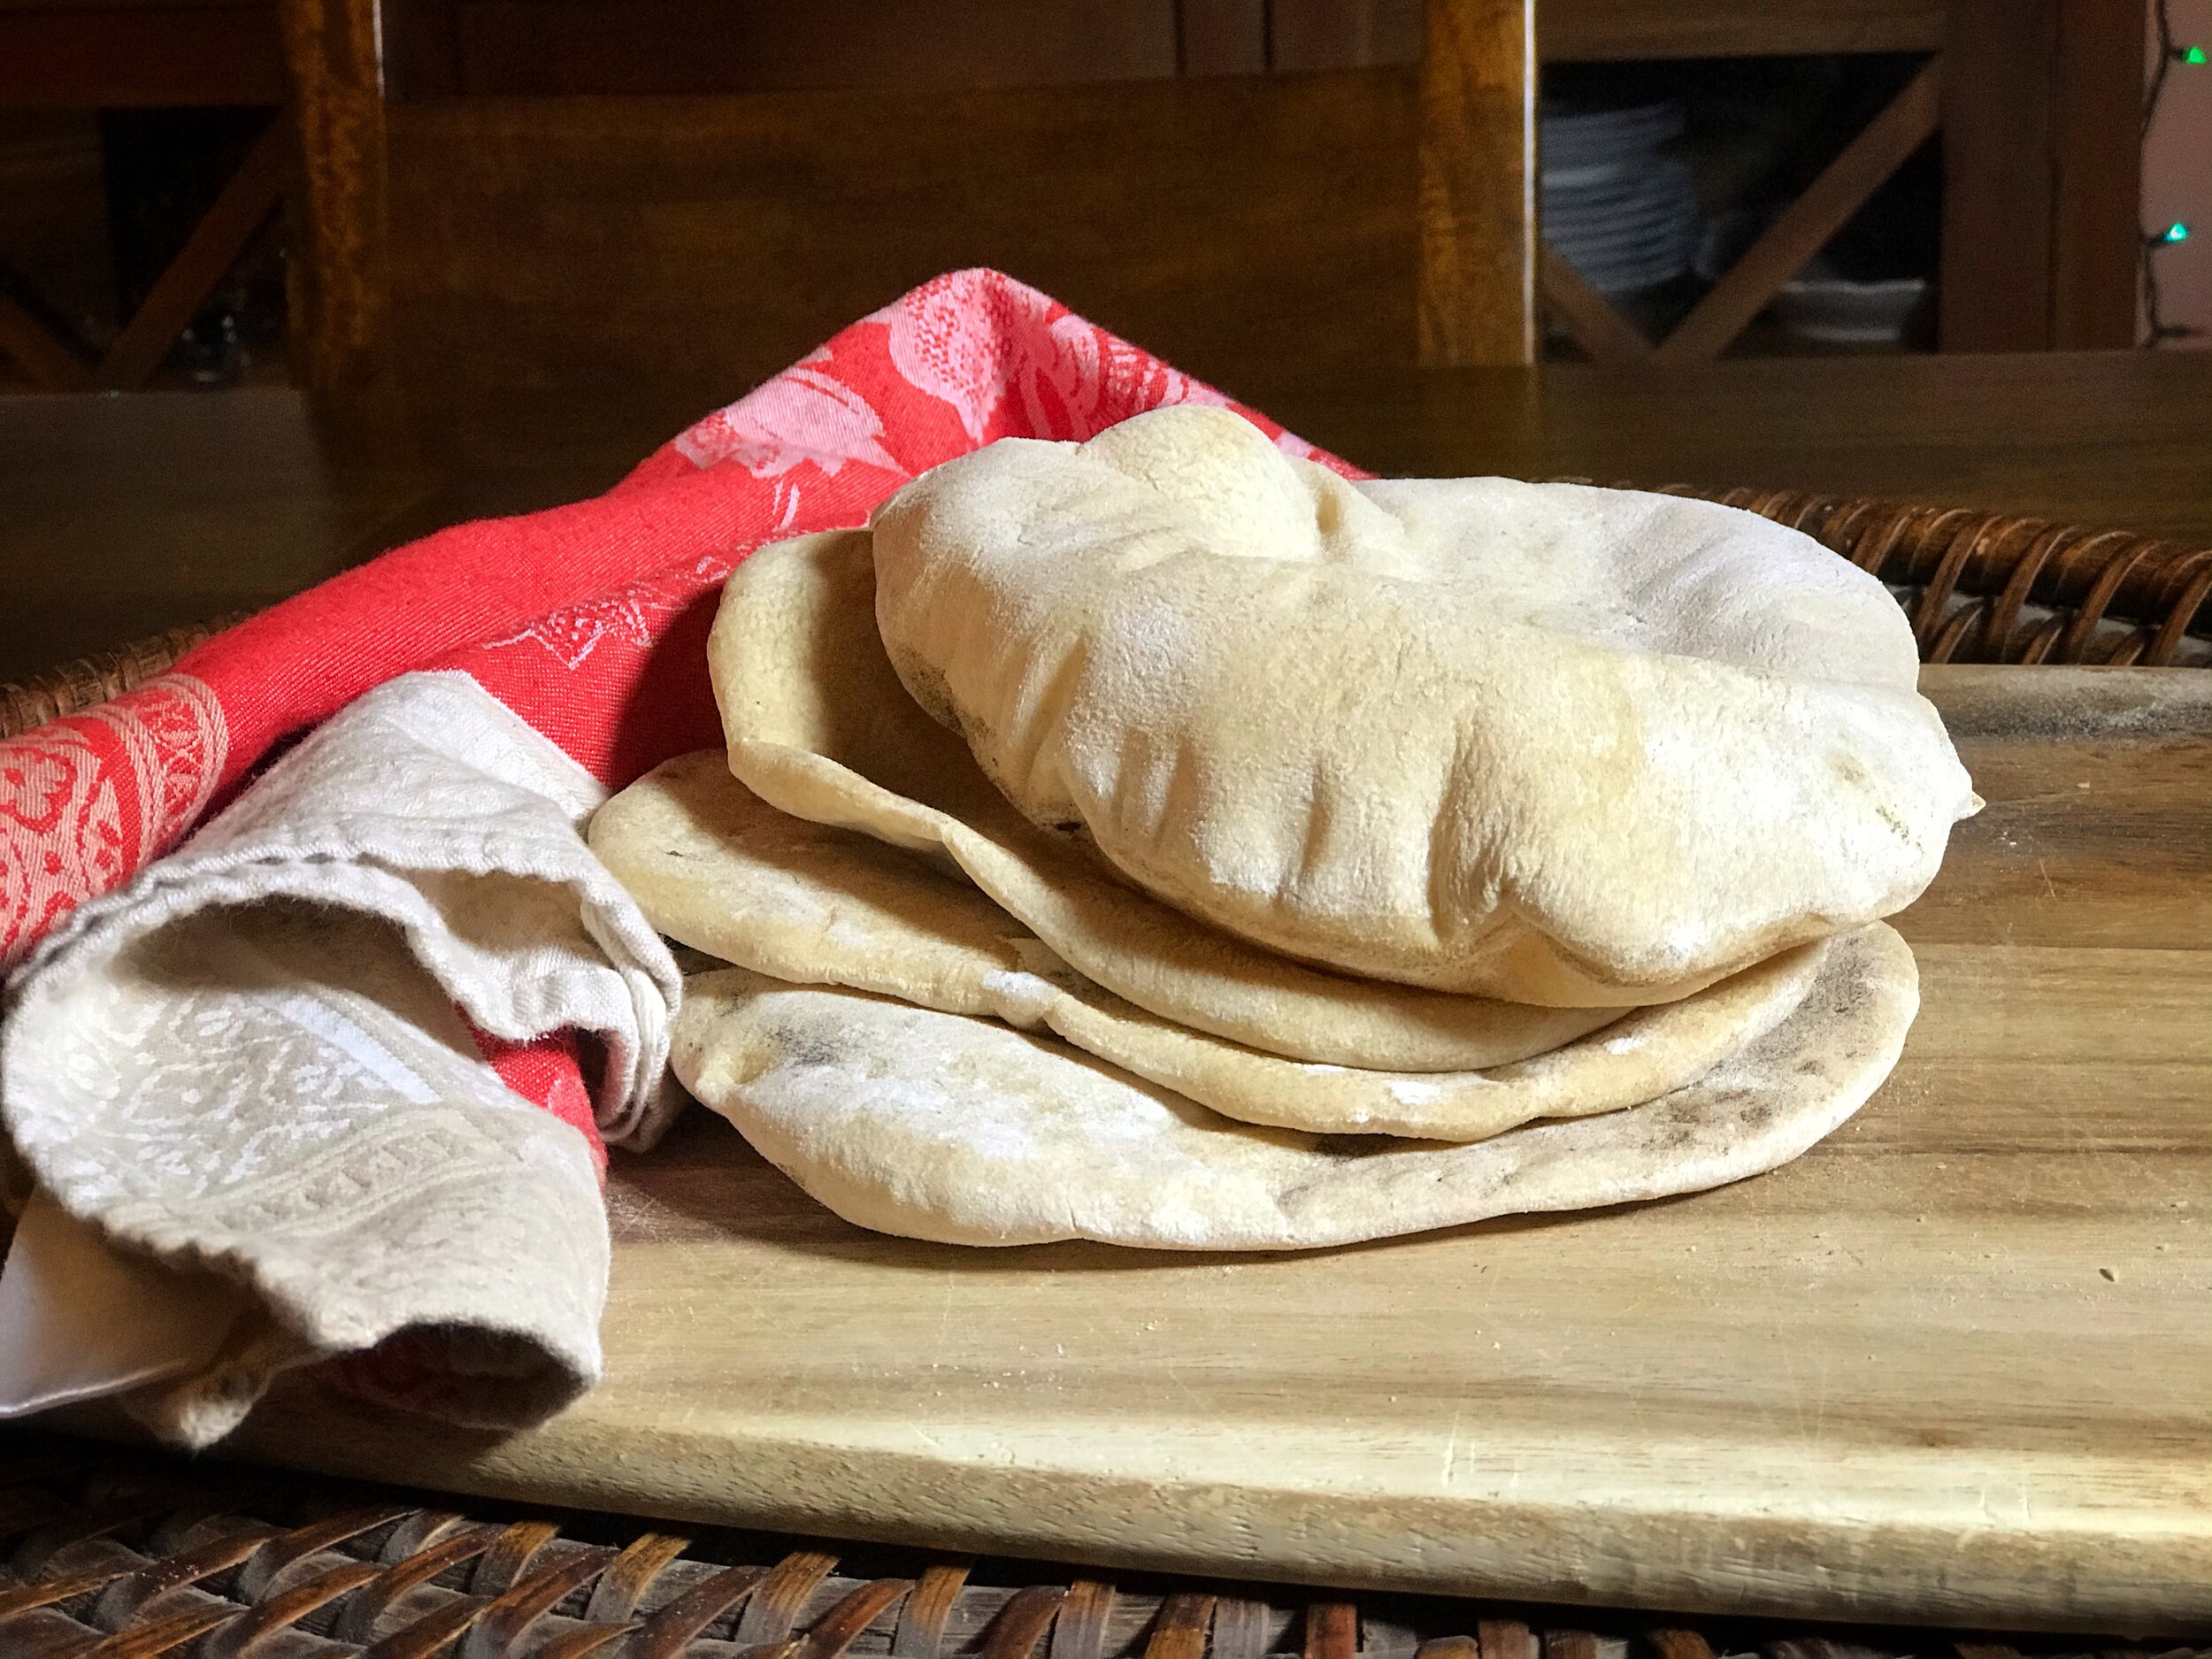
Freshly baked pita bread can happen in your very own oven

EarlierPitaLandscape.jpg

There’s nothing like pita bread straight from the oven to scoop up just-made hummus or baba ganoush, swish into a lentil soup, or to wrap around left-overs — drizzled with tahini and hot sauce and brightened with fresh herbs.  

It’s not difficult to make pita — or khobz in Arabic — even if you’re not a seasoned baker. And it’s super fun. There’s an incredible reward at the end, when you look into the oven and see those bad boys magically puff up into bready balloons. You can actually watch them inflate!

It’s a lovely, soul-sustaining project to cheer up a day when you’re stuck at home for, ahem, whatever reason. Fresh-baked pita freezes brilliantly, so you can save some for later — or zip some up in a plastic bag and freeze it for an at-risk friend or relative who can’t leave home for groceries. (They’ll be perfect with the soup you made for them!)

During the pita baking process, there is a lot of resting and rising and waiting between steps — perfect moments for whipping up that hummus or baba ganoush, or chopping the vegetables for soup.

We are big consumers of pita at our house, largely thanks to my own personal baba ganoush and hummus addiction. The pitas are usually store-bought, and much to Thierry and Wylie’s chagrin, I usually come home with the whole wheat ones — which honestly are usually more like chewing on particle board than eating bread. In any case, we really consider them vehicles for the dips.

Best is when I can make it up north to my favorite Lebanese bakery and buy the freshly made ones, still warm in their plastic bags. There I usually buy both white ones and whole wheat. The white ones are gloriously puffy, fluffy and delightful; the whole wheat pitas — while undeniably better than the mass-produced ones — are, I have to admit, on the punitive side.

Because pitas are so ubiquitous through the Levant, I kept imagining that they couldn’t be all that hard to make, and learning how was getting higher and higher on my bucket list. Mine could split the difference between white and whole wheat and go fifty-fifty. The pita of my dreams! Surely it was attainable.

A couple months ago, I took the pita plunge — reading everything reliable I could find and starting to play with recipes.

Pita Landscape.jpg

Many of the recipes that looked serious enough for me to want to try them required a stand mixer, which I don’t own. (I never wanted to develop recipes that require one because I don’t feel a stand mixer should be a required piece of kitchen equipment.) Very few of the promising recipes I found called for more than a token amount of whole wheat flour.

Looked as though I’d have to develop my own. To do that I began swapping out whole wheat flour for half of the all-purpose flour in a couple of different recipes, sometimes adding extra water to compensate. Claudia Roden’s method in The New Book of Middle Eastern Food almost got me there, but the dough didn’t rise quite as much as I wanted it to.

Finally, I turned to Anissa Helou’s award-winning Feast: Food of the Islamic World, hopeful about Helou’s method because she has written such wonderful baking books (I love Sweet Middle East and have Savory Baking from the Mediterranean on my wish-list). Also, because pita bread (khobz) is literally the very first recipe in Helou’s 500-plus-page tome, I knew she must take her khobz very, very seriously.

Helou’s recipe calls for instant (fast-acting) yeast, and I wanted to use active dry yeast. (This may be a TMI situation, but active dry yeast keeps for a long time, and I wanted to develop a recipe that could be made without dashing to the supermarket; if you keep active dry yeast, flour, olive oil and salt on hand — which is so easy to do — you’ve got the makings for pita.) So I had to veer from her first few steps, and also had to find the right flour to water ratio.

But I was able to keep the heart of Helou’s method, the part that gets us from shaggy ball of dough to rolled-out discs ready to go into the oven. From Michael Solomonov and Steven Cook’s book Zahav, I borrowed the excellent idea of baking the breads on inverted baking sheets preheated in the very hot oven.

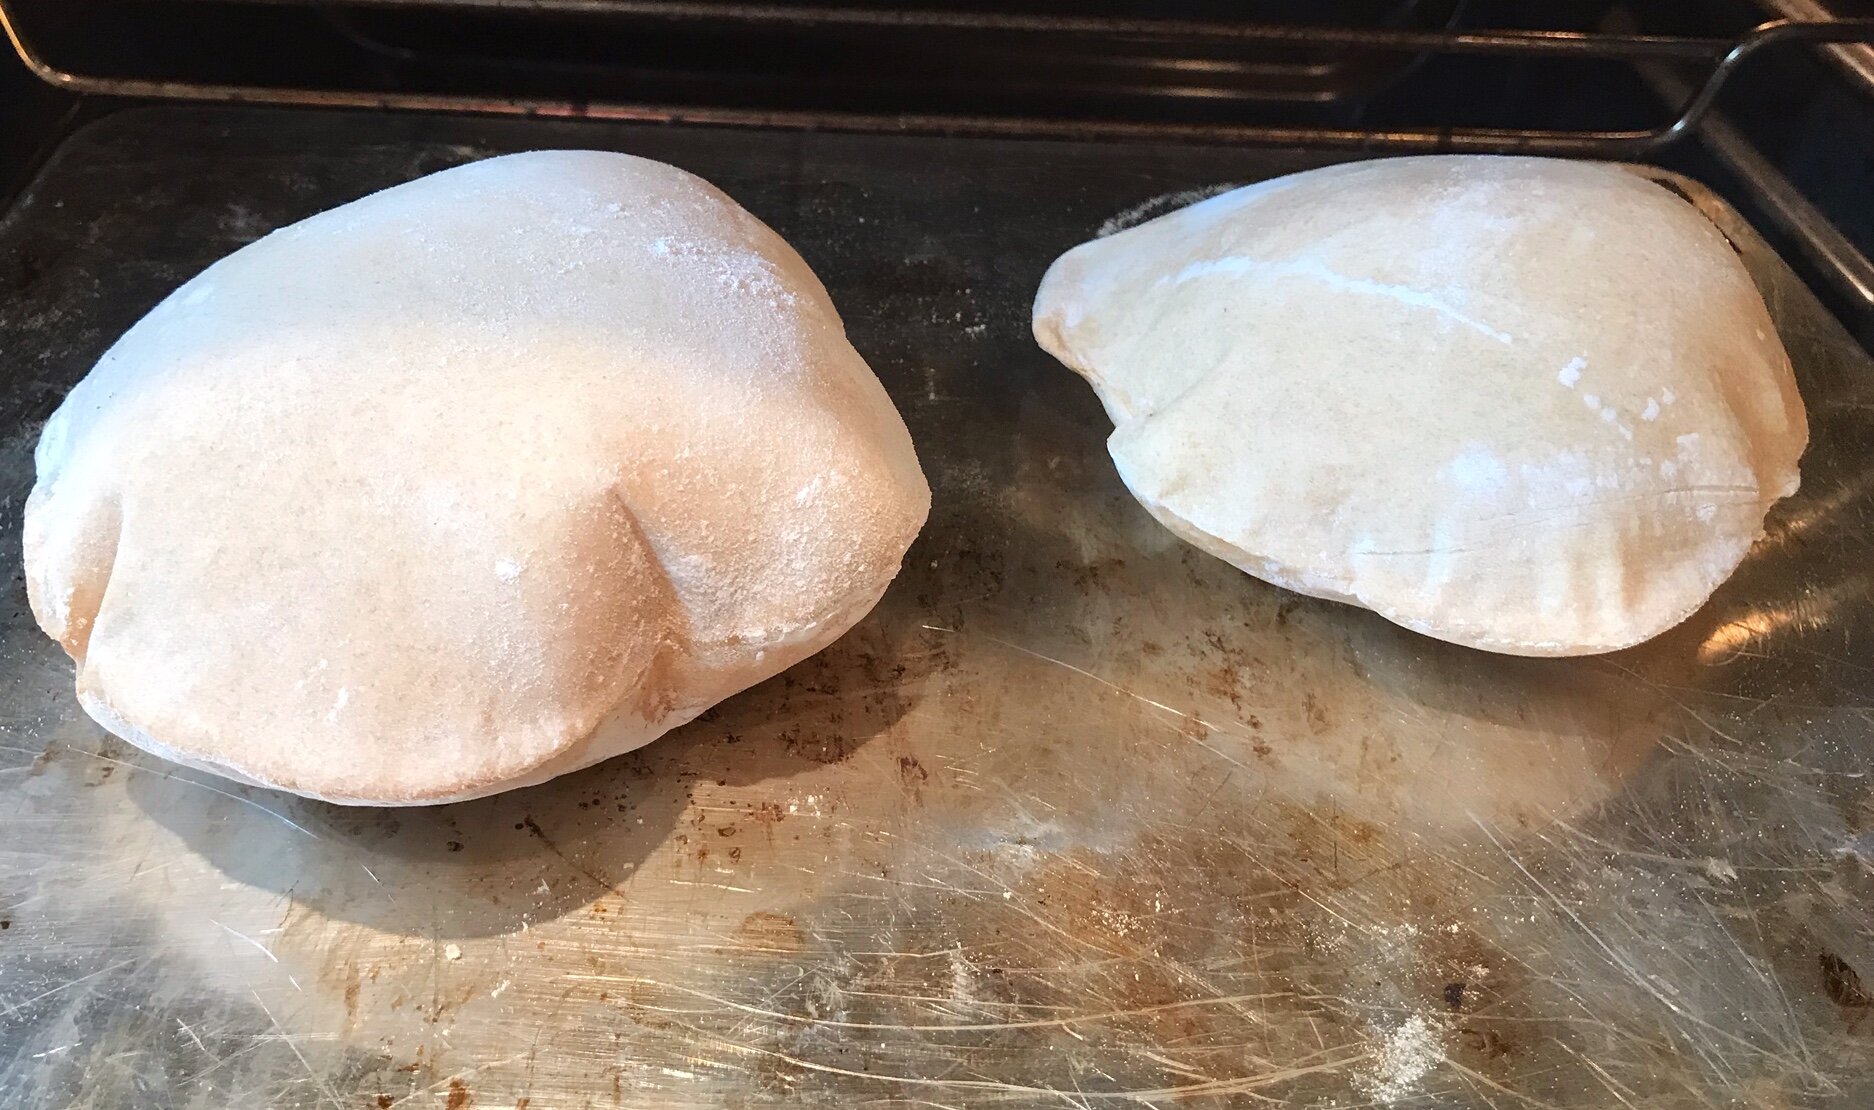
Watching the pitas puff inside the oven is the first payoff.

Watching the pitas puff inside the oven is the first payoff.

None of the recipes I consulted warned of what can happen if you let the baked pita breads cool completely before storing leftover breads: They can get stiff and crackly, not what you want. I added Roden’s suggestion to put them in a plastic bag as they come out of the oven, keeping them soft and pliable.

I hope you dive in and give this pita project a go; the process of kneading and rolling and waiting for the dough to rise is so wonderfully tactile, giving such a lovely rhythm to a day spent at home.

And the first payoff — that gasp of delight when you peer inside the oven and see the pita breads poofing up like balloons — is so much fun. The second payoff? That’s when you pull the first one apart and taste it — and marvel that it actually came out of your very own oven. Quick — get the baba ganoush!

OK, OK, enough lallygagging — to the recipe!

RECIPE: Pita Bread

Baba ganoush fever: How can burnt eggplant become a dip that’s so friggin’ brilliant and addictive?

Baba Ganoush.jpg

Five years ago, an 800-year old chickpea dip suddenly became a global obsession. Now, something tells us that baba ganoush — the smoky, lemony eggplant dip that’s a mezze-table favorite all over the Levant and beyond — may be about to steal the spotlight from its foodie-star brother.

Baba ganoush’s charms can be elusive to those of us who dwell in the Americas. Unless we have Levantine roots, we may not have been exposed much (if at all) to exemplary baba — or muttabal, as it’s called in Syria. The stuff you find in supermarkets, if you do manage to find one baba ganoush among the grillions of plastic hummus tubs that have taken over the refrigerated case, tends to be pale-flavored and forgettable. Meanwhile, I’ve read recipes that suggest adding Liquid Smoke. Liquid Smoke!

I knew that the babas that turned my head over a lifetime of eating in Lebanese restaurants were the unabashedly smoky ones. But somehow, I never wondered how they got their smoke. Or what gave the best ones their wonderful creamy texture. Or how much tahini, lemon or garlic would make a baba ganoush sing.

Somewhere in the back of my semitic mind I understood that the dish was related to the eggplant “caviar” my Jewish grandma used to make. (She roasted eggplants, cutting them in half first, but never long enough to get them smoky, and there was no tahini involved after that.)

Happily — life-changingly, perhaps — it’s easy to make a brilliant one, especially if you have access to an old-fashioned charcoal grill like a Weber. You can also make a pretty outstanding one using your kitchen broiler. In case you want to cut to the chase and achieve immediate baba bliss, here’s the recipe:

The technique is simple: Poke holes all over whole eggplants, then roast them, either under your broiler or directly on coals on the Weber, turning them once, until they’re completely charred and seem to collapse.

Eggplants roasting directly atop live coals in a Weber grill

Eggplants roasting directly atop live coals in a Weber grill

Cut them in half, scoop out the flesh — which will have taken on wonderful smokiness — place in a sieve and mash the flesh over a bowl to get rid of its bitter liquid and achieve a lovely soft texture. Separately, whisk together tahini and lemon juice till fluffy, then add the mashed eggplant, crushed garlic and salt. Spread the dip on a serving plate, drizzle on some good olive oil and scatter with chopped parsley, and you have baba ganoush heaven. Really, it’s that easy.

And it’s a fun dish to make. It’s fun charring the eggplants on the grill, and delightful when you whisk the tahini and lemon to fluffiness. It’s even fun to pull the flesh out of the charred skins with your fingers.

Once roasted, the flesh inside is meltingly tender.

Once roasted, the flesh inside is meltingly tender.

More on technical details in a moment, but first a word about baba ganoush’s history.

Curiously, I was unable to turn up much background about the dip, especially anything definitive. There’s no entry for baba ganoush (or baba ganouj, or baba ghanoush, or baba ghannuge, its alternate spellings) in The Oxford Companion to Food, or in The Encyclopedia of Food and Culture that takes up probably way too much real estate in my cookbook case. Unlike the Wikipedia page for hummus, which boasts two fulsome paragraphs about origin and history and nearly 700 words about regional preparations, Wikipedia’s baba ganoush wisdom is weirdly scant, pretty much limited to a stab at its etymology. (Baba, everyone agrees, is Arabic for “father” or “daddy,” and the Oxford English Dictionary suggests that Ghannuj is “perhaps a personal name.”)

The most intriguing tidbit I turned up came from my brilliant former colleague at The Los Angeles Times (now retired from the paper), Charles Perry, who wrote in a 1997 story about eggplant and its history that “The ancestor of today's baba ghanouj was flavored with ground walnuts instead of tahini.” Beyond that, we have only found speculation about the dish’s history. (If you are an expert, please weigh in with a comment! I am attempting to contact Charlie, who published Scents & Flavors: A Syrian Cookbook in 2017 — which I just ordered — and who I’m pretty sure possesses more intelligence on the subject; will update if successful.)

I found recipes for baba ganoush in some of my favorite cookbooks — including Claudia Roden’s The New Book of Middle Eastern Food and Arabesque and Yotam Ottolenghi and Sami Tamimi’s Jerusalem, and Annisa Helou’s splendid Feast: Food of the Islamic World, which won a James Beard Award in 2019. Online, J. Kenji López-Alt offers his serious take on Serious Eats; The Washington Post’s Smoke Signals columnist Jim Shahin wrote about it and gave a smoky recipe in 2018.

There are lots of recipes out there that include yogurt — which is also wonderful, but not the classic, and many recipes that simply roast the eggplant but stop well before optimum smokiness has been achieved.

Other recipes that I found to be almost perfect have some tiny little detail I felt could be improved. For instance, Serious Eats’ López-Alt calls for not pricking the eggplants, so they’ll cook more quickly and peel more easily, but he also points out unpricked eggplants will explode in your oven (yikes!). In addition, he calls for spinning the flesh in a salad spinner as a way of quickly getting rid of the bitter moisture in them after roasting, which I find cumbersome and messy. I much prefer Roden’s quick and easy solution: mashing the flesh with a fork in a strainer over a bowl; this is much faster than the slow-drain many other recipes call for, and adds no extra work as the flesh needs mashing in any case. (And not puréeing in a food processor, as some recipes recommend — you want to retain some lovely texture and not make it too smooth.)

Chasing optimal smokiness, perfect balance and the creamiest texture has kept me experimenting with recipes for a couple months in order to come up with the best method and proportions. I found that whisking the tahini with lemon juice, as in customary in some of my favorite hummus recipes, results in a baba with superior creaminess. (That idea came from a recipe in Arabesque for the variation of baba ganoush that includes yogurt.)

Yesterday, we finally put it all together — the proportions I favor, and the whisking, which left just one question to answer: Which is better, roasting the eggplant over live coals or under the kitchen broiler? And if one was better, how much better?

We put the two cooking methods to the test, by making two otherwise identical versions of baba ganoush, one using eggplant roasted on live coals (on a chilly Saturday afternoon in February!) and the other in the broiler.

Once they were ready, I spread them on their respective serving plates. Here’s how they looked before garnishing:

Baba ganoush prepared over live coals (left) and baba ganoush prepared in the broiler

Baba ganoush prepared over live coals (left) and baba ganoush prepared in the broiler

The photo probably doesn’t do justice to the visual difference, but the one done over live coals looked more emulsified and somewhat deeper in color. You could tell in whisking them, the live coals version was a bit silkier; though the eggplants seemed to be cooked about as much as the ones in the broiler, the ones done in the Weber were meltier.

In terms of taste and mouthfeel, the difference was starker: The one done on the coals had much smokier flavor, and more depth. I had Thierry and Wylie blind-taste them: The one done on the coals was the clear and immediate winner.

However, they (and we) loved them both: The broiler version was absolutely delicious as well, if a bit subtler. I thought of stirring in some ground cumin, a flourish that seems popular in the version of the dish that comes from Persia. You might consider using a slightly heavier hand with garlic if you go the broiler route, or upping the tahini a wee bit. This is a great dip to play with, to tweak it until it is exactly as you like it — or just cook kind of free-form, adding tahini, lemon juice and garlic by feel rather than measuring.

Another traditional flourish is pomegranate seeds — and once autumn rolls around, the baba ganoush will certainly flow freely at my place, topped with ruby-red beauties.

Until then, I’m loving the essentialist version, and we hope you will too.

RECIPE: Baba Ganoush

Stodgy boomer, plucky Gen-Z-er share in unlikely Instant Pot epiphany; miraculous chicken chile verde results

Chicken Chile Verde Landscape.jpg

A few weeks ago, Wylie chicken-shamed me. 

Maybe you know the drill: following a long day at the office, you stop at the supermarket on your way home and pick up a roast chicken. I was about to do just that, and texted home to see if I should pick up anything else. 

“Just buy a raw chicken,” said Wylie, who is temporarily living with us post-college-graduation in a figuring-things-out moment. “I’ll roast it. It’ll be so much better, and it’s so easy.” Who could argue?

While the hunt for a job in his field has not been thus far fruitful, he has taken full advantage of the parental larder — and our delight at being cooked for  — in order to develop his kitchencraft. 

Wylie making pasta dough from Evan Funke’s ‘American Sfloglio’

Wylie making pasta dough from Evan Funke’s ‘American Sfloglio’

Like many fledgling cooks of his generation, Wylie really gets into cooking projects — the more elaborate the better. The most gleeful I’ve seen him since graduation was when we spent two days making tagliatelle al ragù della vecchia scuola from Evan Funke’s American Sfoglino cookbook — a process which started with putting various meats through a manual meat grinder for the ragù, and passing simmered tomatoes through a food mill. (My favorite line in the recipe: “Begin tasting for tenderness and seasoning after 5 hours.”) We used a rolling pin to roll the pasta dough, and a knife to cut it; Funke’s philosophy is summed up in his hashtag #fuckyourpastamachine. 

And so, when through a curious set of circumstances I brought a shiny new Instant Pot — one of those countertop pressure cookers — into the house, he regarded the thing with contempt.

Not that I blame him; it’s the way he was raised. But for reasons having to do with my consulting business, I wanted to explore the possibilities. And if by some miracle I took to the thing, well, maybe it would lead to fewer supermarket roast chicken situations post work-days.

Because precise timing is involved, and the thing was utterly foreign to me, I couldn’t just dive in and start improvising; I had to learn the basics first. I went to a couple of admired and reliable sources: New York Times Cooking and Serious Eats. 

It was at the latter that I turned up a recipe that looked so implausible I couldn’t wait to try it: J. Kenji López-Alt’s Easy Pressure Cooker Green Chili with Chicken. In other words, chicken chile verde. 

I couldn’t wait to show Wylie, who naturally scoffed. The recipe would have us believe that you could throw raw chicken thighs, onion, garlic, tomatillos, spices and chiles into the vessel, push a button and (once the machine came to pressure) 15 minutes later you’d have something gorgeous and profoundly delicious. 

First time around Wylie insisted on browning the chicken thighs on top of the stove first. So we tried it like that. Then we tried it exactly as written. Then we tried it giving the poblano, Anaheim and serrano chiles, along with the onion, garlic and tomatillos, a quick char on a comal, as you would in a traditional chile verde recipe. 

Green chiles.jpg

I’m here to tell you it was very good each and every time. We served it once with home-made corn tortillas (fantastic!), with handmade tortillas picked up from a nearby Mexican restaurant when we were out of masa harina and couldn’t find any nearby (also fantastic) and with corn tortillas we bought at Trader Joe’s and reheated in the microwave (even that was pretty good).

  • We stirred a couple tablespoonfuls of masa harina (a traditional thickener for these types of braises) into the finished dish: perfect! 

  • We also added an optional garnish of crumbled queso blanco, which rounds out the flavors beautifully; if you’re wrapping the chile verde into tacos, some crumbled queso blanco added in each one is lovely.

What of our various other attempts at improvements? 

  • Because the Instant Pot is all about ease, our recipe uses boneless, skinless chicken thighs instead of using skin-on, bone-in thighs and then removing skin and bones (if the dish lost any depth of flavor as a result of not cooking with the bones, I couldn’t detect it). 

  • Browning the chicken, however, did not noticeably improve the dish, so we jettisoned that step. 

  • Charring the chiles and garlic cloves (in their skins) adds slight value — a subtle charry, roasty flavor — do that only if you feel like it and have an extra few minutes (meanwhile, it’s easier to seed charred chiles than raw). 

  • Don’t bother charring the onion or tomatillos because the charry payoff is less, and it’s a little messier.

Chicken Chile Verde Portrait.jpg

Though our version of the recipe — which we call Chicken Chile Verde (Quick and Easy Pressure-Cooking Version) — calls for boneless, skinless thighs, of course you can also use bone-in, skin-on thighs as the original recipe suggests, simply removing the bones and skin before shredding the chicken. Also, for whatever it’s worth, one time I forgot to buy Anaheim chiles, and so just made it with poblanos — and there wasn’t much of a difference in flavor.

OK, then — a quick walk through. The only active time it takes to speak of is prepping the onion, chiles and tomatillos, which get husked and quartered; the chiles are seeded then roughly chopped, like the onion. (If you’re going to char the chiles, you’d do that before seeding and chopping, and you can toss the garlic cloves in their skins on the skillet, comal or griddle to char as well.) Toast a tablespoon of cumin seeds in a small pan till fragrant. Set the pressure cooker to SAUTE, and toss in all of those things, along with three pounds of boneless, skinless chicken thighs and a pinch of salt. Once it sizzles a bit, seal the pressure cooker and cook on HIGH PRESSURE for 15 minutes. Release the steam, remove the chicken and shred it. Add López-Alt’s brilliant secret ingredient (Asian fish sauce!), along with salt to taste and a handful of cilantro, blitz the sauce — either with an immersion blender or in a regular blender or food processor — then stir in a couple tablespoons of masa harina. Shred the chicken and return it to the sauce. Garnish with more cilantro, and (if you like) some crumbled queso blanco. Serve it with warm corn tortillas and maybe some limes and more crumbled queso blanco.

Here’s the recipe. Please (please!) let us know how you like it.

Or, if you’d prefer an old-fashioned, long, lazy and aromatic braised-the-on-the-stove experience, let us know that as well, and we’ll hurry up with Chile Verde (Stovetop Version).

Serve up irresistible classics on Super Bowl Sunday: glorious Texas chili and killer guac

Chili in pot on wood copy.jpg

When it comes to football munchies, I seem to be desperately out of touch!

A big chunk of America, it seems, is head-over-heels in love with an appetizer I’d never even heard of until today: Buffalo chicken dip. According to a story in The Huffington Post, the gooey, cheesy, spicy, chicken-y concoction is the most Googled Super Bowl snack in six states — California, Arizona, Nevada, Utah, Hawaii and Florida.

Really? OK, BCD fans — dip away! But if you prefer to make something more irresistibly classic on Super Bowl Sunday, perhaps a simmering pot of classic Texas chili — flanked by a molcajete-ful of killer guacamole — would hit the spot. And if you’re (like me) happier in the kitchen than glued to a football game, you could even round out the festivities with hot-off-the-comal handmade corn tortillas.

All sounds super delicious to me, especially on a chill February afternoon. Plus it’ll fill your living space with enchanting aromas.

On top of it, a legit Texas chili, built from a slab of generously marbled chuck, is fun and satisfying to make — and super interesting if you’ve never done it before. You could ask your friendly butcher for a coarse chili grind, but I think it’s even nicer to hand-cut it into half-inch dice.

Hand-cut beef chuck gives Texas chili incredible flavor and texture.

Hand-cut beef chuck gives Texas chili incredible flavor and texture.

Brown the meat, then add to it toasted, then soaked and puréed ancho chiles, stir in some chile soaking water, charred onion, garlic and spices and let the whole thing simmer for a couple of hours. Then your job is just to sit back and enjoy the wafting aromas.

Wanna take a peek at the recipe? Here you go:

Then, shortly before the gang is set to arrive, whip up some guacamole. I’ve evolved this one — our family’s default guac — over the years. My guacamole insurance policy is shopping for avocados two or three days before I’m going to make it, in case I don’t find ripe avocados. Buy almost-ripe ones, and put them on the counter in a brown paper bag to let them ripen. If you find already ripe ones, they should hold fine in the fridge. Make the guac just before kick-off, for the best flavor.

Guacandsalsa.jpg

A couple bags of tortilla chips, maybe some salsa fresca or salsa verde (pick ‘em up, or make one yourself), beers and Topo Chicos and whatnot, and you’ll be all set!

Here’s your ticket to guacamole:


And here are a few other recipes you might want close-at-hand: corn tortillas, salsa borracha and roasted salsa verde. In case this all just puts you in a Mexican mood, you can peruse our Mexican recipes section to see if something else catches your fancy.

Big bowl of chili copy.jpg

That should do it for now. Happy cooking, happy eating — and may your favorite team win!

Wow your friends with Chinese lacquered duck (or chicken!) to celebrate Lunar New Year

WholeLacqueredDuckwebres.jpg

Lunar New Year celebrations will begin on Saturday, January 25 and continue for 15 days until the Spring Lantern Festival on February 8. If we know you as well as we think we know you, you’ll be looking for some spectacular Chinese dishes that’ll wow your friends and family.

This weekend, the gorgeous lacquered duck pictured here can be yours — and remarkably easily, believe it or not. Though a couple days of preparation are required, there’s very little work involved — basically you just slap a marinade/glaze on the bird, stick it in the fridge, forget about it till the next day, brush on more marinade, then pop it in the oven the next evening.

In other words, bird alert: If you want the amazing lacquered duck on Saturday night, you’ll need to start preparing it on Thursday. We’re telling you now, so you can run out and buy your bird in swift order. In our neck of the woods, ducks disappear out of supermarkets like Whole Foods and Central Market after Western new year, but you can always pick up beautiful ducks (and for a lot less money) at Asian supermarkets.

Here — take a look at the recipe so you can swing by the market later. There are only four ingredients (duck, salt, soy sauce and honey), and you probably already have three in your pantry!

This spectacular lacquered duck can be yours!

This spectacular lacquered duck can be yours!

Or center your Lunar New Year kickoff dinner around a lacquered chicken. Same drill, but the chicken can be achieved in as little as 12 hours advance notice. And oh, baby — it is outstanding as well.

LuckyPeachLacqueredChickenLower res.jpg

We are working on some new recipes that would be perfect to serve with either, and hope to get them posted in the next day or two. In the meantime, you’ll find some tasty accompaniments like baby bok choy with whole garlic and two versions of fried rice in our Chinese cooking section.

Who can resist these two stunning winter salads? Nobody!

Escarole salad with 6-minute eggs, crispy prosciutto, lemon and shaved Parmigiano-Reggiano

Escarole salad with 6-minute eggs, crispy prosciutto, lemon and shaved Parmigiano-Reggiano

It sort of feels like escarole is having a moment — at least if the latest salad addition to the offerings at Billy Can Can, one of our favorite restaurants in Dallas, is any indication. There, executive chef Matt Ford recently introduced a delicious grilled escarole wedge with delicata squash, honeycrisp apple, pepitas and blue cheese to his modern Texas menu.

Escarole’s not a winter green that reliably turns up at the supermarket, but when it does, and when it looks good, we grab it. Especially in winter, when you never know whether you’ll find frisée or endives or radicchio (or none of the above), creating a salad around what’s available and looking great is sound policy.

EscarolePlatedHoriz.jpg

The inspiration for this particular salad comes from another Dallas restaurant, Sprezza, where we swooned over the combination of lemon, prosciutto, bitter greens, rich egg and shaved parm a couple years ago. Last night the salad was the perfect lead-off to roast lamb with root vegetables; some kind of succulent braised pork, or crispy chicken thighs with fennel would be killer on its heels, too. For a simpler vibe, you could just as happily follow it with a simple pasta (like spaghetti aglio e olio) or even a pizza delivered to your doorstep. (To be perfectly honest, though, we can totally see just having the salad for dinner with a glass of Italian white, maybe a Roero or a Pecorino.)

While intensely cravable and satisfying, the escarole salad is simple to put together and forgiving, just the ingredients mentioned above tossed in lemon juice and olive oil with some lemon zest, a squeeze of anchovy paste for extra umami and lots of black pepper. You can follow it faithfully or play with it, adding or subtracting eggs, prosciutto and parm depending on the richness and saltiness you’re after. Ready then? Here you go.

In a different winter mood, when brainstorming what to serve as an appetizer for a special evening with friends during the holiday season, we often find ourselves reaching for some combination of winter greens (whether it’s Belgian endives, frisée, curly endive or escarole), a crustacean (crab or shrimp) or smoked fish (usually trout) and radishes. After that, depending on whim and what we find, we might add avocado or celery leaves or stalks, maybe snip in a few chives, grate some Meyer lemon zest — even toss in some tobiko (flying fish roe), for that delightful little pop in the teeth.

Celery, endive and crab salad

Celery, endive and crab salad

These kind of salad never fails to deliver and delight; it always feels light, elegant and festive. And again, it’s easy to put together.

Here’s a pretty basic version — endives, radish, celery and crab meat — to use as is, or as a road map. And a pro tip: If you swap out smoked trout for the crab meat, you can usually pick up everything you need at Trader Joe’s.


Bastille Day cooking made easy: How to conjure a rustic, fabulous French summer feast

This year's Bastille Day feast starts with make-ahead smoked trout pâté, served with crackers and endive leaves.

This year's Bastille Day feast starts with make-ahead smoked trout pâté, served with crackers and endive leaves.

Because I'm almost French (I've been married to a Frenchman for almost 22 years; one of these days I'll get around to applying for French citizenship), I love to celebrate Bastille Day. Going to a restaurant isn't usually what I feel like doing, partly because there aren't many good French restaurants in Dallas, where we live.

Referred to in France as le Quatorze Juillet, or la Fête Nationale, or la Fêt' Nat – never Bastille Day – the holiday rarely falls on a weekend, which creates a quandary: How to pull together something deliciously French after working all day?

This year, I think I found the answer: Make it rustic and easy, prepare a couple things the night before, invite friends over after work and light up the grill. 

Mikie's marinated olives can be made the night before.

Mikie's marinated olives can be made the night before.

Laid-back apps – like marinated olives, asparagus vinaigrette, a freeform savory tart, maybe a saucisson or some store-bought pâté with baguette toasts – are totally festive with glasses of rosé, chilled Lillet garnished with orange slices, or (my favorite!) Ricard. 

Or hey – why not pour a pet nat, since it rhymes with Fêt' Nat! What's a pet nat? It's short for pétillant naturel – the natural sparkling wines, often from France, that are hugely popular in wine circles these days. (If you're new to the natural wine phenom, here's an excellent article, co-authored by my friend Michalene, explaining it.) 

Flipping through award-winning cookbook author Georgeanne Brennan's beautiful new book, La Vie Rustic: Cooking & Living in the French Style, I found plenty of delicious-looking inspiration, starting with her super-easy recipe for smoked trout pâté. 

Honestly, it couldn't be easier: You just mash together smoked trout with crème fraîche, lemon zest, chopped tarragon and one or two other things, pack it in a crock and that's it. While you can make it just before serving (in no time flat), it's the perfect thing to mix up the previous evening and let chill in the fridge. Serve it with Belgian endive leaves and crackers or toasts. Brennan writes in her book that it also works well with smoked salmon – something I'll be trying soon (with dill or fennel leaves, probably!). 

Also inspired by Brennan's book, I've lately become addicted to grilled artichokes. But while Brennan serves them with a yogurt-and-mayo-based herb dip (which also looks really good), I've been pairing mine with garlicky aïoli, one of my favorite substances in the world. This summer I can't get enough of it.

The artichokes can be mostly prepared the night before, as well – boil them, trim out their chokes, stash them in the fridge and make the aïoli (which probably even gets better as it sits overnight; the garlic mellows). When you're ready to serve them, just brush the artichoke halves with a little olive oil and plop them on the grill – along with halved lemons as a squeezable garnish, if you like.

For a main course, you can keep it super simple: Throw some duck breasts or a butterflied leg of lamb on the grill. You can even pick up a roast chicken (very French!) or two at the supermarket; serve it with Dijon mustard and cornichons, and French side dishes. You can blanch some haricots verts, for instance, and toss them with a little red wine vinegar, your best olive oil and some minced shallots; finish with fleur de sel and lots of freshly ground black pepper. 

Or make a warm French lentil salad – which you can either toss together in less than a half hour and serve warm, or prepare the night before and serve room temp.

Here's the easy, forgiving recipe:

Or, you know what? You can even do without a main course altogether, and just serve a bunch of delicious nibbles – French wine-bar-style. 

For dessert, there are lots of possibilities. One of the easiest is also one of the most delicious: a berry and peach crisp. Put the almond topping together the night before, and it's very quick to put together and throw in the oven. Top it with whipped cream, or crème fraîche (you should have some left over from the smoked trout pâté), or a combo. Or serve it with vanilla ice cream. 

Otherwise, if you make pastry cream the night before, you can put together a quick and easy berry tart – with the colors of the French flag!

Here are those two recipes:

Alternatively, you could make a chocolate mousse or pôt de crème the night before (yikes - I need to create some chocolate French recipes for the site – will do that soon!) Or play hooky from work and make a gorgeous stone-fruit tart. Or make profiterôles – cream puffs filled with ice cream and drizzled with chocolate sauce. That's another easy recipe I'll put together soon.

You could also do what so many French people do – pick up something lovely at the bakery.

Or take a tip from my French relatives, and slice up a ripe peach into the glass of red wine you've been sipping. It can't get any easier – or more delicious – than that.

So, want more ideas? Take a spin through Cooks Without Borders' French page – updated recently with a bunch of new recipes. Sound good?

Happy Bastille Day! Vive la France!

Effortless summer baking: The (life-changing!) joy of frozen puff pastry

How much fun can a (relative sane) person have with a box of frozen puff pastry? Quite a lot, as it turns out.

I spent most of my adult life avoiding puff pastry. Well, I'm always happy to eat it, but make it? Not so much. I made it from scratch exactly once, a hundred years ago; that was enough. I'm not the type of person to spend endless hours rolling out layers of dough and butter and chilling it and waiting and rolling, etc. etc.

Until very recently, it never occurred to me that there were good brands of pre-made frozen puff pastry made with actual butter rather than hydrogenated vegetable oils. 

I know, right?! How out of it can a person get?!

Some months ago, I happened upon a box of frozen puff pastry in the freezer case at Trader Joe's that boasted an all-butter situation, snapped it up, stuck it in my freezer and nearly forgot about it. Then, when I was visiting friends in London last month, my dear friend Jenni’s wonderful sister Alison invited us for dinner. It one of these off-the-cuff affairs for 20 or so. What I love about the way these girls entertain is that they don't stress (even when 20 people are coming!); they don't worry if everything's not ready when people start arriving. Sometimes Jenni doesn't even start cooking until people start walking in the door! She and Alison understand that the important thing is to hang out with friends and family, and whatever winds up on the table will be delicious just because. 

They also happen to have some very good ideas up their sleeves. On this particular evening – a regular weekly Friday night dinner with extended family and friends – Alison pulled a savory tart out of the oven, placed it on a table out in the garden, and wheeled a pizza cutter through it to slice it into hors d'oeuvre bites. 

This is Alison's savory appetizer tart, before it was sliced into pieces. Doesn't it look *fantastic*? It was!

This is Alison's savory appetizer tart, before it was sliced into pieces. Doesn't it look *fantastic*? It was!

The thing looked so delicious, I was mesmerized. Free-form, golden-crusted, beautifully messy, it was strewn with greens and mushrooms and slices of some kind of marvelous-looking washed-rind cheese melted into it. It was even more delicious than it looked – some kind of serious umami savory action on that perfect, flaky crust. I stayed there, parked next to it, trying with all my might not to eat piece after piece until it was demolished.

After showering her with compliments, I asked how she made it. "Frozen puff pastry!" she said. "All butter."

That was then (about a month ago). Now, four savory tarts, three fruit tarts and a set of cheese straws later, I can't imagine life without a box of the stuff in my freezer. At. All. Times.

All-butter frozen puff pastry, where have you been all my life?

All-butter frozen puff pastry, where have you been all my life?

So far, I have found three brands. Perhaps there are more out there. Both the Trader Joe's and the Dufour Pastry Kitchens' brands are far superior to the Pepperidge Farms non-butter frozen puff pastry I used to use occasionally in the past (that's the one with the hydrogenated vegetable oil; it also includes high-fructose corn syrup). The Dufour Pastry Kitchens classic puff pastry contains only butter, unbleached unbromated flour, water, salt and lemon juice. It's not inexpensive: I paid $10.99 for a 14-ounce box at my local Whole Foods Market and $10.49 for a box at my local Central Market. The Trader Joe's pastry was nearly as flaky and delicious, and much less expensive: $3.99 for an 18-ounce box. The Dufour brand is one single large rectangle, which comes folded; the Trader Joe's brand is two rectangular pieces, wrapped separately, which is nice (you can defrost one at a time); they come rolled.

Just one problem with the Trader Joe's brand: According to a clerk at my local store, the chain only sells it during the last quarter of the year, presumably for fall and holiday baking. So unless you keep a box in your freezer for more than six months, you can forget about it for summer baking. (Mr. Joe, please change your policy! If you do, I'll make you a summer tart!)

Mr. Trader Joe, if you start stocking your frozen all-butter puff pastry year-round, I will make you one of these. I promise.

Mr. Trader Joe, if you start stocking your frozen all-butter puff pastry year-round, I will make you one of these. I promise.

A third brand, White Toque, was $12.99 for a one-pound box at Whole Foods, but this brand is two rounds – which struck me as less wonderful for a savory tart to cut in small rectangles to eat as pre-dinner nibbles, but very nice for a fruit tart. The White Toque brand – which I've only spotted once – did not rise as high as either the Dufour or Trader Joe's brand, but it's possible it was because my refrigerator died, and after defrosting it sat in a less-than-optimal temperature for more than a few hours. I will give it another try next time I find it. Still, it worked just fine for a cherry-plum tart that I will blog about soon.

First I need to tell you the two ways all-butter frozen puff pastry has changed my life (and no, I'm not exaggerating). 

The first is the savory tart. I managed to approximate Alison's, although Alison used a really nice aged washed-rind goat cheese on hers, and I haven't been able to find anything like it 'round these parts.

But the great news is once you grasp how to put one of these tarts together, you can make one out of just about any kind of summer veg. The general idea is this: Thaw the pastry, unwrap it, and fold up the edges to make a rim, painting a little egg wash on them if you want glossy look. Make a filling of sautéed veg, add a couple of eggs beaten with a little cream or half and half, and either put some grated or crumbled cheese in the egg (feta, goat cheese, cheddar, etc.) or strew crumbled feta or goat cheese on top. Pop it in the oven. So easy.


You can riff on it endlessly, changing up the cheese or the sautéed veg, adding sliced fresh or chopped sun-dried tomatoes. It always turns out great, even if you're in such a hurry that you make a terrible mess of it – as I did with a zucchini, tomato and okra version in which I used too much egg and had a sloppy a edge, so egg spilled out all over the parchment.

My hastily-assembled zucchini, tomato and okra tart. With too much egg and sloppy edges, it spilled all over the parchment.

My hastily-assembled zucchini, tomato and okra tart. With too much egg and sloppy edges, it spilled all over the parchment.

It was still pretty fabulous. (For that one I sliced the okra in half vertically and grilled them before laying them atop the tart, along with sliced fresh tomatoes, before popping it in  the oven.)

Even so, it looked – and tasted – pretty great!

Even so, it looked – and tasted – pretty great!

The point is, these savories are so easy and impressive that they have already become a go-to appetizer for me for laid-back summer entertaining. A glass of rosé, a slice of savory tart – who needs anything else?

OK, here's the other way in which all-butter frozen puff pastry changed my life: They are brilliant to use for summer fruit tarts, including those that star unbaked fruit, like berries.  

Until I learned the joys of frozen all-butter puff pastry, I couldn't for the life of me figure out how to make a good tart using fresh strawberries. All you do is make a quick pastry cream – which is way less involved than you might think (much less tricky than making most custards), blind-bake a crust, spread the pastry cream on top, and cover with berries. If you want to be fancy you can melt some fruit jelly and glaze the berries, but you don't have to. 

I also made a pretty wonderful tart using mixed berries – blackberries, blueberries and raspberries. That one is super easy because you don't have to stem or slice or pit anything -- just toss the berries with a little orange liqueur before dropping them onto the pastry cream. 

Easy berry tart. How festive would this be for the Fourth of July -- or Bastille Day?

Easy berry tart. How festive would this be for the Fourth of July -- or Bastille Day?


I'm thinking it could be the perfect, patriotic-hued dessert to serve on the Fourth. Or for Bastille Day! What the recipe? Here you go. 

From Paris' trendiest tables to yours: Whelks with basil aïoli are a snap to make

If you've been to Paris in the last few years (I just got back!), you know that bistronomie – laid-back bites in relaxed, new-style bistros – is Parisians' favorite way to dine these days. Expensive, elaborate menus dégustations (tasting menus) are pretty much for tourists and rich old fogies. OK, perhaps that's an exaggeration, but that's how it feels.

Thierry, Wylie and I dined bistronomie-style each of four nights when we visited Paris earlier this month, and twice we found bulots – the small sea snails English-speakers call whelks. They seem to be having a moment! I'd seen and eaten them occasionally in decades past on plateaux de fruits de mer – chilled seafood platters – where they'd sometimes be mingled with oysters and clams on the half-shell and steamed or boiled bigourneaux (periwinkles). 

"Bulots mayo," is how they were announced on the blackboard menu at Jeanne A – a terrific little bistro in the super-hot 11th arrondissement. I had to order them (6 euros) – for the three of us to share with our other starters. 

They came chilled in a coffee cup, accompanied by a little pot of good, house-made mayo. So much fun! A couple nights later, there they were again – listed under "zakouskis" at Le Servan, which offered them with mayonnaise au piment for 8 euros. (Le Servan, by the way, was wonderful – the best meal I had in Paris this trip, also in the 11th.) 

Ding ding ding ding ding! A lightbulb went off over my head: We can make bulots at home! Why? Because I know where to find them – and very inexpensively: at Jusco, an Asian supermarket with a fabulous seafood selection, in the Dallas suburb of Plano. In fact, I'd picked some up (about $6 per pound) to toss onto a seafood paella just a couple weeks before my France trip.  

As I researched bulots on my return, I learned a few things. First, that they're also called buccins, though I've never seen them called that on a menu. Second, that they're traditionally served in Provence with aîoli – the super-garlicky mayo whose name has been appropriated by American chefs who want to make gentler flavored mayos sound chic.  And third, that whelks is a term applied to several different types of sea snails, which explains why they don't always look quite the same – some are striped or ridged; others are spotted and smooth.

In any case, they couldn't be easier to cook. First, give 'em a 10-minute soak in cold water, so they release any sand, and rinse. Then boil them in heavily salted water for 20 minutes. That's it. I went a step further and tossed some sliced onion, thyme and bay leaves to the water as it came to a boil, and added a splash of white wine – a court bouillon on-the-fly. 

But first I whipped up some aîoli – a real one, with lots of garlic. It's easy to make in a blender. I flavored half of it with chopped basil. Or you could add chopped or puréed roasted red pepper. Or you could serve the bulots with mayo from a jar, dressed up with a squirt of harissa from a tube. But even plain mayo – home-made or store-bought would be swell.

With the aïoli – and glasses of chilled rosé – they were outstanding, a fabulous pre-dinner nibble, ideal for laid-back entertaining. Serve 'em warm, or chilled, or room temp – with toothpicks, which you need to coax the meat out of the shell. Delicious fun indeed. Want to try it? Here's the recipe:

Please let us know if you find them in your neck of the woods – and how you like 'em!


Having friends over for dinner? Be sure to invite Mikie's fabulous marinated olives

One of the best parts of visiting my hometown, L.A., is dinner or lunch at my friend Michalene's. I've mentioned Michalene – or Mikie, as her family and a few close friends call her – in many posts. It was Mikie, for instance, who wondered, after a recipe for Chinese lacquered roast chicken changed my life, what would happen if I adapted it to duck. (Answer: more life-changingly delectable fowl play.) 

I met Mikie in 2003, when she was Food Editor at the Los Angeles Times, but I'd long been a fan. Before arriving at the Times a couple years earlier, she'd been Dining Editor at the New York Times, producing the Dining section that quickly, under her tenure, became a must-read. I hadn't realized I wanted to work at a newspaper – in fact I thought I didn't. But the minute I met Michalene, who invited me for a drink to discuss the possibility of my coming on board as her deputy editor, and she talked so excitedly about her love for cooking, and eating out, and editing and writing and putting together a food section, I knew I had to give it a go. 

Before long, we became not just co-workers, but fast friends. That meant we cooked and dined together often. It's one of the things I miss most about living in L.A.

So, dining at Mikie's. There are lots of great things about it. Hanging out with Mikie, and her partner Dan (who happens to be an amazing cook, too, and an awesome bread baker). They have an spectacular view of the ocean, over their rows of vineyards, from their house in the Malibu hills, so dinner's often on the patio. They are warm, generous, thoughtful and altogether brilliant hosts. 


I always secretly hope, as I drive up Pacific Coast Highway toward their place in Corral Canyon, that Mikie will have made her fabulous marinated olives: They're just so much better than any other olives anywhere, perfumed with orange and herbs, and spiced just so – a dreamy pre-main-event nibble.

A couple weeks ago, with friends coming to a dinner with a Spanish theme, I thought, as I tried to figure out the tapas y pinxtos, hey – why don't I make Mikie's olives? I texted her, asking for the recipe, and she told me it's from Mark Bittman's How to Cook Everything. – just tweaked a little. She adds orange zest, she tole me, and fennel seed. And she uses more vinegar than Bittman does, and less olive oil. Oh, and her technique is slightly different.

In other words, Mikie has made the olives her own. Honestly, I think it's the orange zest and fennel that knock them out of the park. 

How good are they? Well, I spent all day cooking to prepare for that dinner. I made bandilleros – all kinds of pickly and cured treats, prettily skwered. And some really nice tapas – piquillo peppers filled with brandade. And grilled asparagus with Serrano ham. And seafood paella. (OK, I blew the paella, if truth be told. Overcooked it terribly. Don't tell anyone.) Want to know what got the most applause? Mikie's olives. 

They take all of about five minutes to put together: It's just assorted olives (I like to use Castelvetranos, Picholines, Niçoises, Cerignolas and anything else that looks great – with pits), plus a few smashed garlic cloves, bay leaves, thyme branches, red pepper flakes, fennel seeds, orange zest, olive oil and red wine vinegar. Combine it all, and let it sit on the counter all afternoon – or even just an hour. Give it a toss with a spoon every now and then. That's it. 

Here's the recipe:

I will be eager to hear whether you love them as much as I do.


Mini strawberry Pavlovas may be the most brilliant Passover dessert ever

If ever there was a dessert meant for Passover, it's this one: mini strawberry Pavlovas. 

So, what's a Pavlova, anyway?

It's an Australian dessert named for the Russian ballerina Anna Pavlova (so the story goes), following one of her tours through Australia. Traditionally it's a large, thick meringue disk – hard and crisp on the outside, soft and pillowy on the inside – topped with whipped cream and berries or other fruit. Made this way, it's sliced into wedges to serve. 

Sized individually, mini Pavlovas are just as impressive, not to mention great for entertaining as they're so easy to make and serve. 

Why are mini Pavlovas so brilliant for Passover?

Let me count the ways:

1. There's no flour, making the dessert welcome at the Passover table.

2. They star strawberries, just as the fruit comes into the full flush of its season. 

3. They're beautiful and impressive-looking, yet easy and fool-proof to make.

4. You can make their meringue bases ahead of time – even the day before – and cut and macerate the berries in advance. All that's left to do last-minute is whip cream and assemble the Pavlovas, which is no harder than assembling strawberry shortcake. They're easy enough to manage during the craziness of a seder. 

Pavlovas aren't just for Passover

Pavlovas are having a moment in restaurants – at least here in Dallas, where one of the city's top pastry chefs, Keith Cedotal, is turning out beautiful individually sized versions, filled with citrus mousse and mixed berries, at fashionable Mirador restaurant. 

Besides being chic and delicious, Pavlovas also happen to be gluten-free – just the thing for gluten-intolerant berry lovers who are accustomed to passing up the strawberry shortcake. 

When I say Pavlovas are easy to make, I'm not kidding. All you do is whip up some egg whites, beat in sugar and, if you like, a touch of lemon or orange liqueur. If you want to get fancy, add some lemon zest. Spoon them into messy circles on a parchment-lined baking sheet and bake for less than an hour, till they're light golden and hard to the touch. 

Layer them with whipped cream and strawberries (macerated in a touch of lemon liqueur or orange liqueur if you like), and there you are. If they're messy, or the meringues break that's OK – disheveled is part of their charm. 

Brilliant, right? Here's the recipe:


Warm, tender (thoroughly cooked!) asparagus is a simple, wonderful pleasure

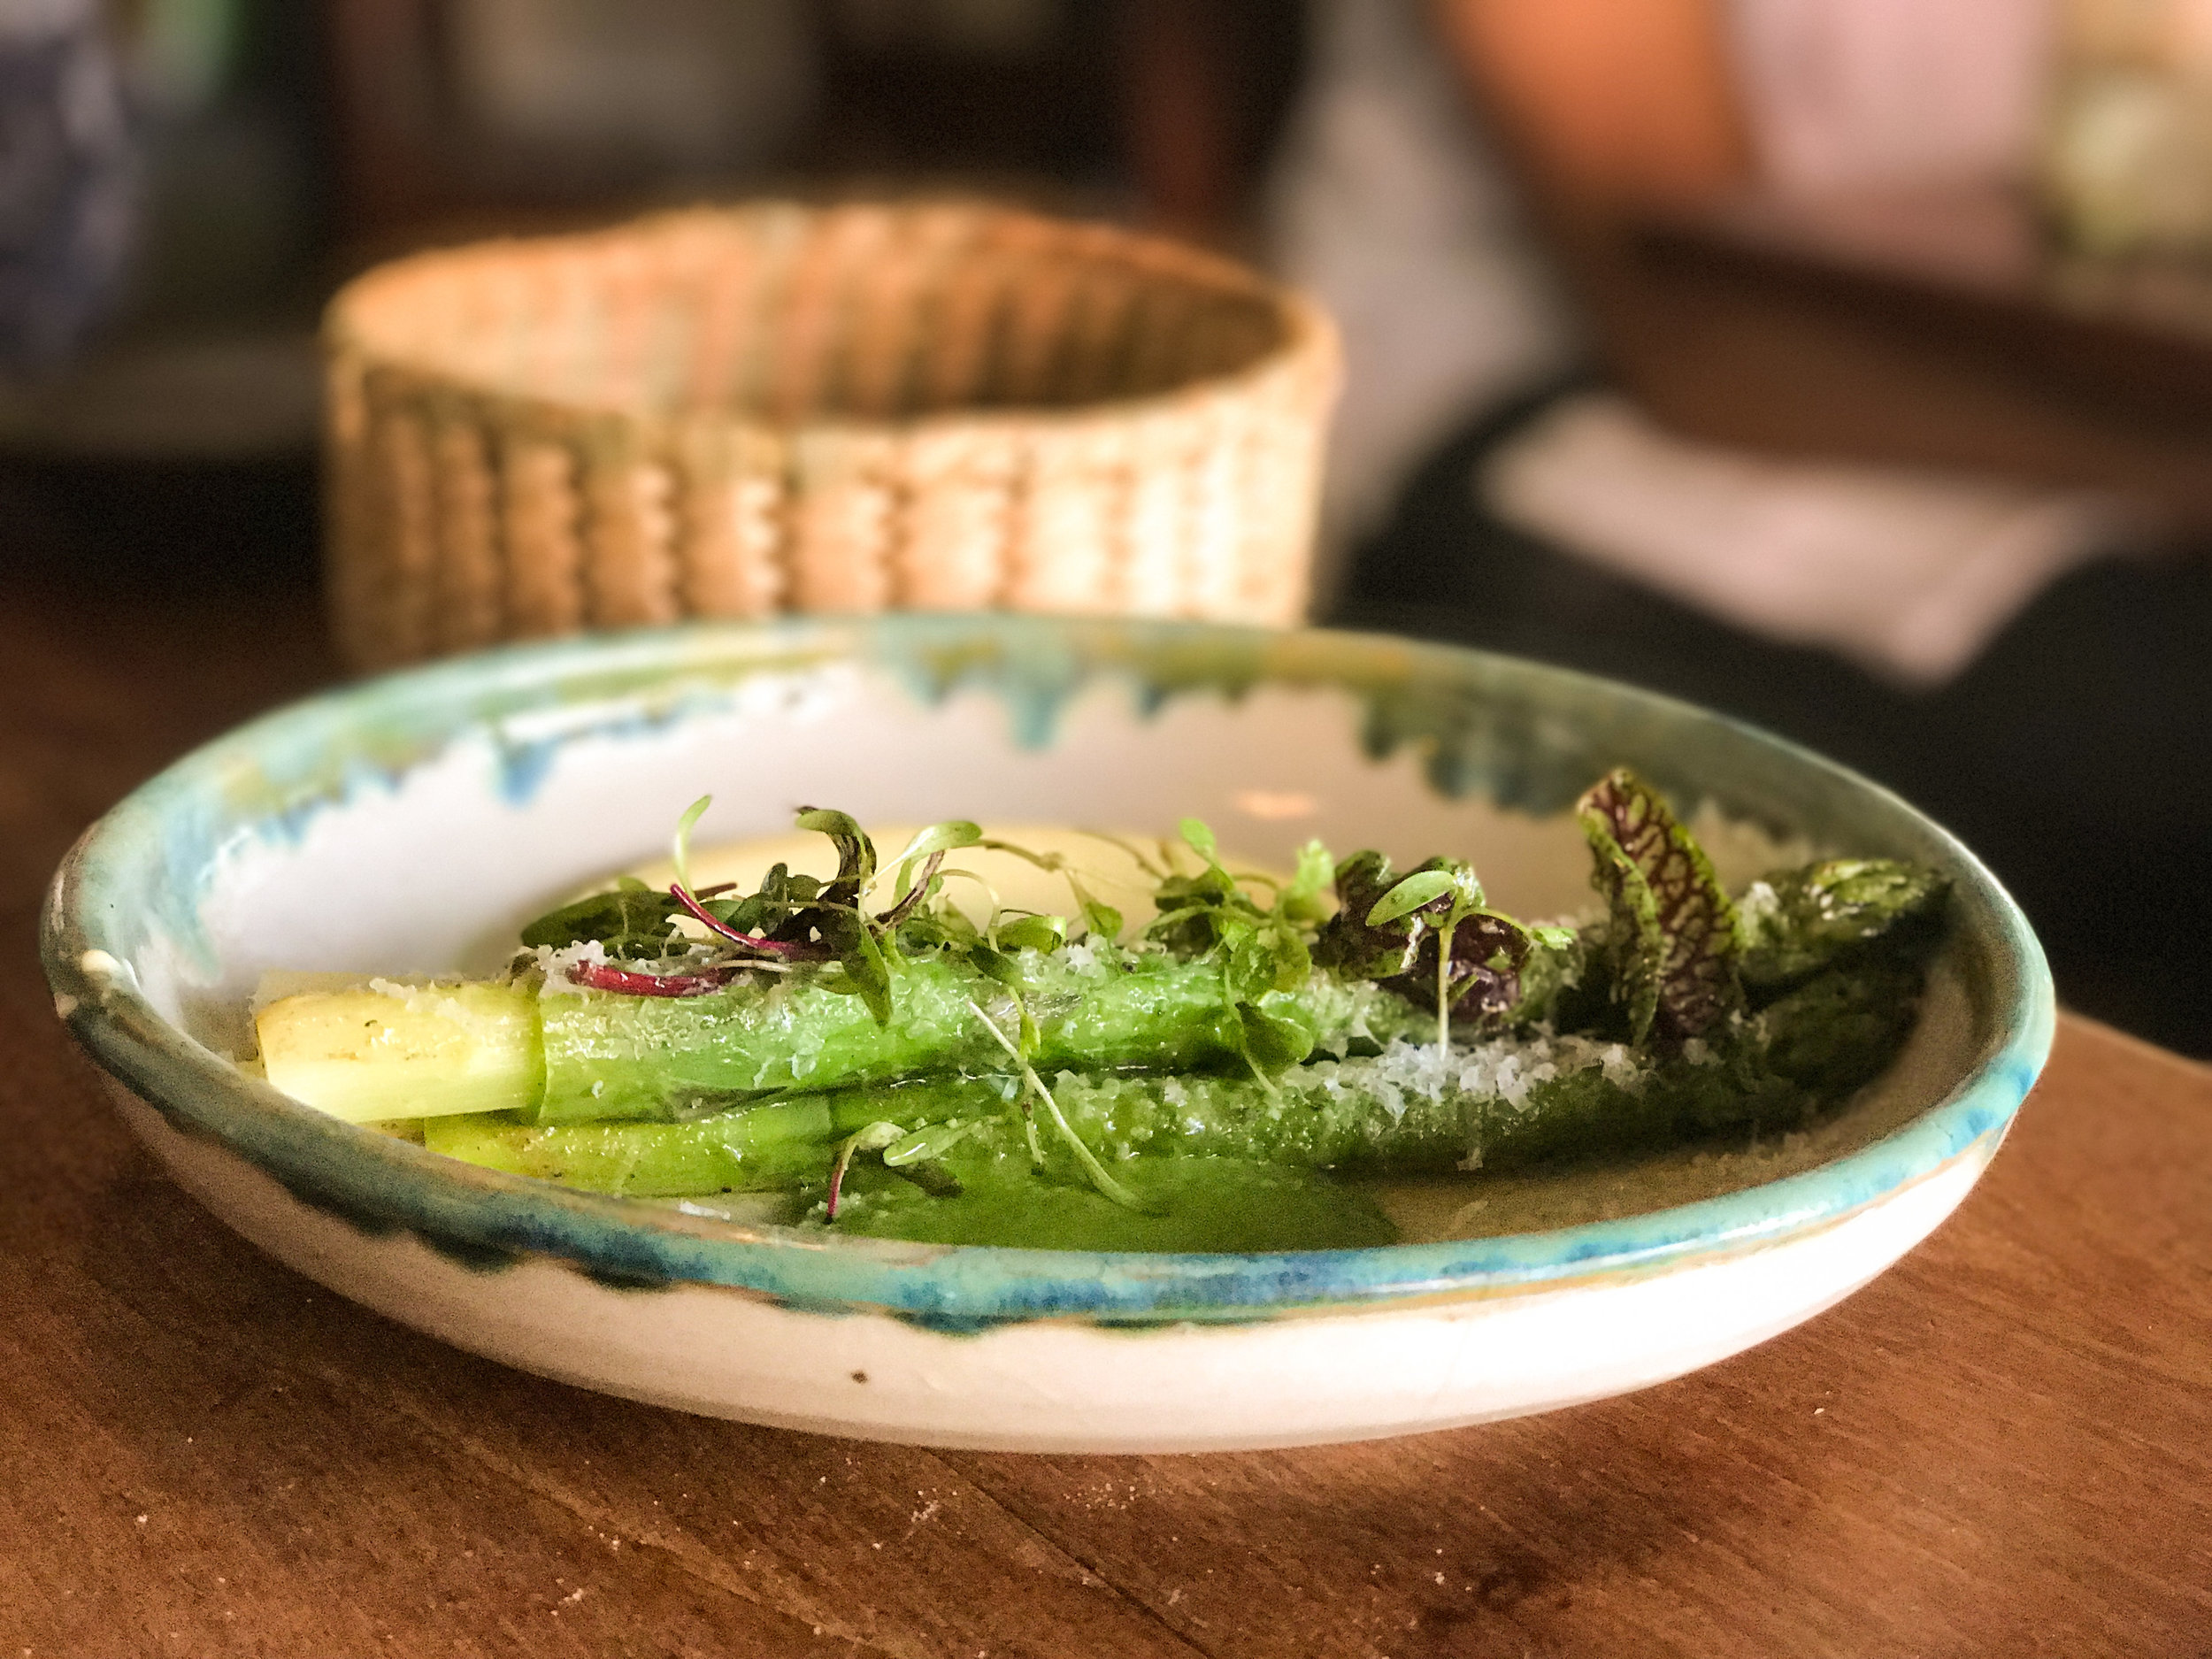
Maximo Bistro's asparagus with hollandaise and pea puree

If you've never had properly cooked asparagus, you're missing out on something wonderful indeed.

I was reminded of its simple and irrefutable pleasure on a recent trip to Mexico City, over lunch at Máximo Bistrot Local, Eduardo García's glammy restaurant in the Colonia Roma neighborhood. I chose as a starter "espárragos, holandesa, ajo tostado," and loved what was set before me: fat, jumbo asparagus, beautifully trimmed and peeled nearly to the tips, poached to almost custardy tenderness and served with luscious, lightly lemony and perfect hollandaise sauce on one side and silky, buttery pea purée on the other. 

Classic hollandaise for me is a luxury (maybe it's time to rediscover its joys in a post!), but the real revelation on that plate was this: So many professional kitchens send asparagus spears to the table undercooked that if you're accustomed to eating it in restaurants, it's entirely possible you've never experienced how luscious it can be.

(Meanwhile, Máximo chef-owner Eduardo García has a pretty amazing cook-busting-borders story.)

Undercooked asparagus, crunchy and forbidding, can taste like a punishment. But if you simmer asparagus long enough to cook it through, its texture becomes soft and almost creamy, and its lovely flavor comes into full bloom.


It's worth taking the time to peel it first. First trim off the woody end of the stalk, then use a vegetable peeler to (gently, so you don't break the stalk) peel it about two thirds of the way up to the tip. I find that letting the spear rest flat on the cutting board and using only very gentle pressure to peel gets the job done most easily. 

Set a pan of salted water to a boil, add the asparagus and cook, covered, until the spears are tender. How long this will take depends on their thickness. Medium-thin to medium spears will take about 3 1/2 to 4 1/2 minutes, jumbos a bit longer.

But rather than time them, I lift them gently with tongs, and when they're just a bit floppy, like this:


. . . I pull them out.

Then I might serve them warm, letting a small pat of butter melt over them first if that's my mood, or leaving them plain if I'm going lo-cal.

If you know your way around a kitchen, you won't need an actual recipe for this, but in case you do, here you go:

Once you discover or rediscover this simple pleasure, you'll probably want to branch out. You can prepare the spears this way, skip the butter, pour a vinaigrette over them and serve them either warmish or room temp. You can also shock them in cold water, chill them, then dress in vinaigrette later. For the vinaigrette, I might go one of four ways: simple vinaigrette with a little Dijon mustard; the same boosted with a dab of anchovy paste; dressed in a simple vinaigrette then garnished with crushed pink peppers; or dressed in a shallot vinaigrette.

Last spring, I became obsessed with gribiche, which continues to show up on fashionable restaurant menus. Whether you make a classic version or a more modern one (like the new-wave one shown below), it's spectacular on poached asparagus. 


Of course there's an exception to the thorough cooking idea: Shaved raw asparagus can be wonderful in salads or as a garnish on fish or chicken dishes. But when you do choose to cook them, the lesson of thorough cooking holds for other methods besides poaching: stir-frying, roasting or grilling. (Lots of people steam asparagus, but it's not a method I love for this veg.) In any case, if you cook them past that hard, green-tasting crunchiness, they're so much nicer. 

Want more asparagus ideas? Here are a million, more or less. 

Isn't this the greatest season?!


How to fool your friends into thinking you shelled 9,000 English peas

When spring rolls around – and even before – I start craving asparagus. And strawberries. And English peas. 

Unless you live near a farm, grow them in your garden or have access to a great farmers market – and depending on where in the world you live – finding sweet, tender English peas can be a real challenge. If you're lucky enough to find English peas at a supermarket, they're likely to be hard and woody, or if they're still small and tender, they'll likely have lost their sweetness. 

The solution? Frozen peas. That's right – they're actually really good, especially if you pick up the tiny ones sometimes called petits pois. I usually have a bag or two in my freezer – even in springtime, when we're all focused on what's fresh. 

And nowhere do they show better than in this wonderful soup, based on traditional French potage Saint Germain. 


It's the easiest thing in the world to whip up. Wilt a head of soft Boston or Bibb lettuce in butter. (Hey, this is like a salad within a soup!) Add a couple bags of frozen peas, stir and cook 10 minutes. Add water, and a few fresh mint leaves and simmer for 20 minutes. Whirr it up with a stick blender, et voilà. Garnish it with a dab of crème frâiche. Or not. That's it!!!

It's vegetarian. And it's a knockout. Serve it to your friends, swearing you shelled 9,000 English peas for their pleasure. 

Or tell the truth. And get ready to hand over the recipe.


Winner, winner chicken dinner: A crazy-good, winter-into-spring one-pan wonder

As Sam Sifton wrote in a delicious story today in The New York Times Magazine, we're in that frustrating shoulder season when cooks are tired of winter and longing for spring.  Like Sifton, I'm finding inspiration these days – when it's too early for asparagus and English peas – in cabbage. In my case it's gorgeous, crinkly savoy cabbage, which, in my neck of the woods, has been turning up recently with lovely regularity in supermarkets. 

In the past, I've always had trouble figuring out how to treat savoy cabbage right. Usually I braise it, and that's good. Lately I've been roasting it – even better!

Also lately, I've been wanting to create one of those sheet-pan recipes that are so trendy right now. The reality has proved less miraculous than I'd hoped. Though I love the idea of tossing everything onto a pan, shoving it in the oven and forgetting about it for an hour, the truth is that things have different cooking times. Roast chicken thighs with turnips until the chicken is done, and the turnips won't be as tender, golden-brown and caramelized as you'd want them.

Adding the three main components of this dish – chicken thighs, turnips and savoy cabbage – one at a time to the pan solves the problem, deliciously. In fact, I think this one-pan dinner is one of the best things to come out of my kitchen in some time! Chicken thighs are great because they're chicken thighs. The turnips cook longer than everything else, so they get soft and caramelized almost to the point of sweetness, with really concentrated flavor. And the cabbage, which gets an umami boost from shiitake mushroom powder and soy sauce, roasts till it has all kinds of wonderful texture, from soft and silky to crunchy on the edges. The flavors and textures of the three meld together gorgeously. 

It's a dish so simple you can toss it together for glorious weeknight dinner, but it's impressive enough that you could serve it at as a main course for a dinner party. Here's a bonus: It's super-healthy, even for someone watching their carbs. (Turnips have way fewer carbs than, say, potatoes.) 

Chicken thighs with Savoy Cabbage and turnips

Here's the way it goes. Toss the turnips in a little olive oil, salt and pepper, throw 'em in the pan and roast 15 minutes. Push them to the side of the pan and add the chicken thighs skin-side down. These you've tossed with a little fennel seed, garlic, salt, pepper and olive oil. 

Next whisk together a little more olive oil and fennel seed with shiitake powder and soy sauce – for that blast of umami. Toss the Savoy cabbage leaves in that mixture to coat, then add them to the roasting pan. Thirty-five minutes later, dinner is ready.

Oh – unless you want a little sauce to pass with it. Either way, with or without, it's pretty great. If you do want sauce, arrange everything on a warm platter, deglaze the roasting pan with white wine or water (the recipe tells you how), and strain it into a pitcher to pass with the chicken.

Want the recipe? You got it: 

Bon app – and happy almost-spring!


Guest cook: Susie Bui shares her fabulous Hanoi-style catfish dish, Cha Ca La Vong – a cult favorite

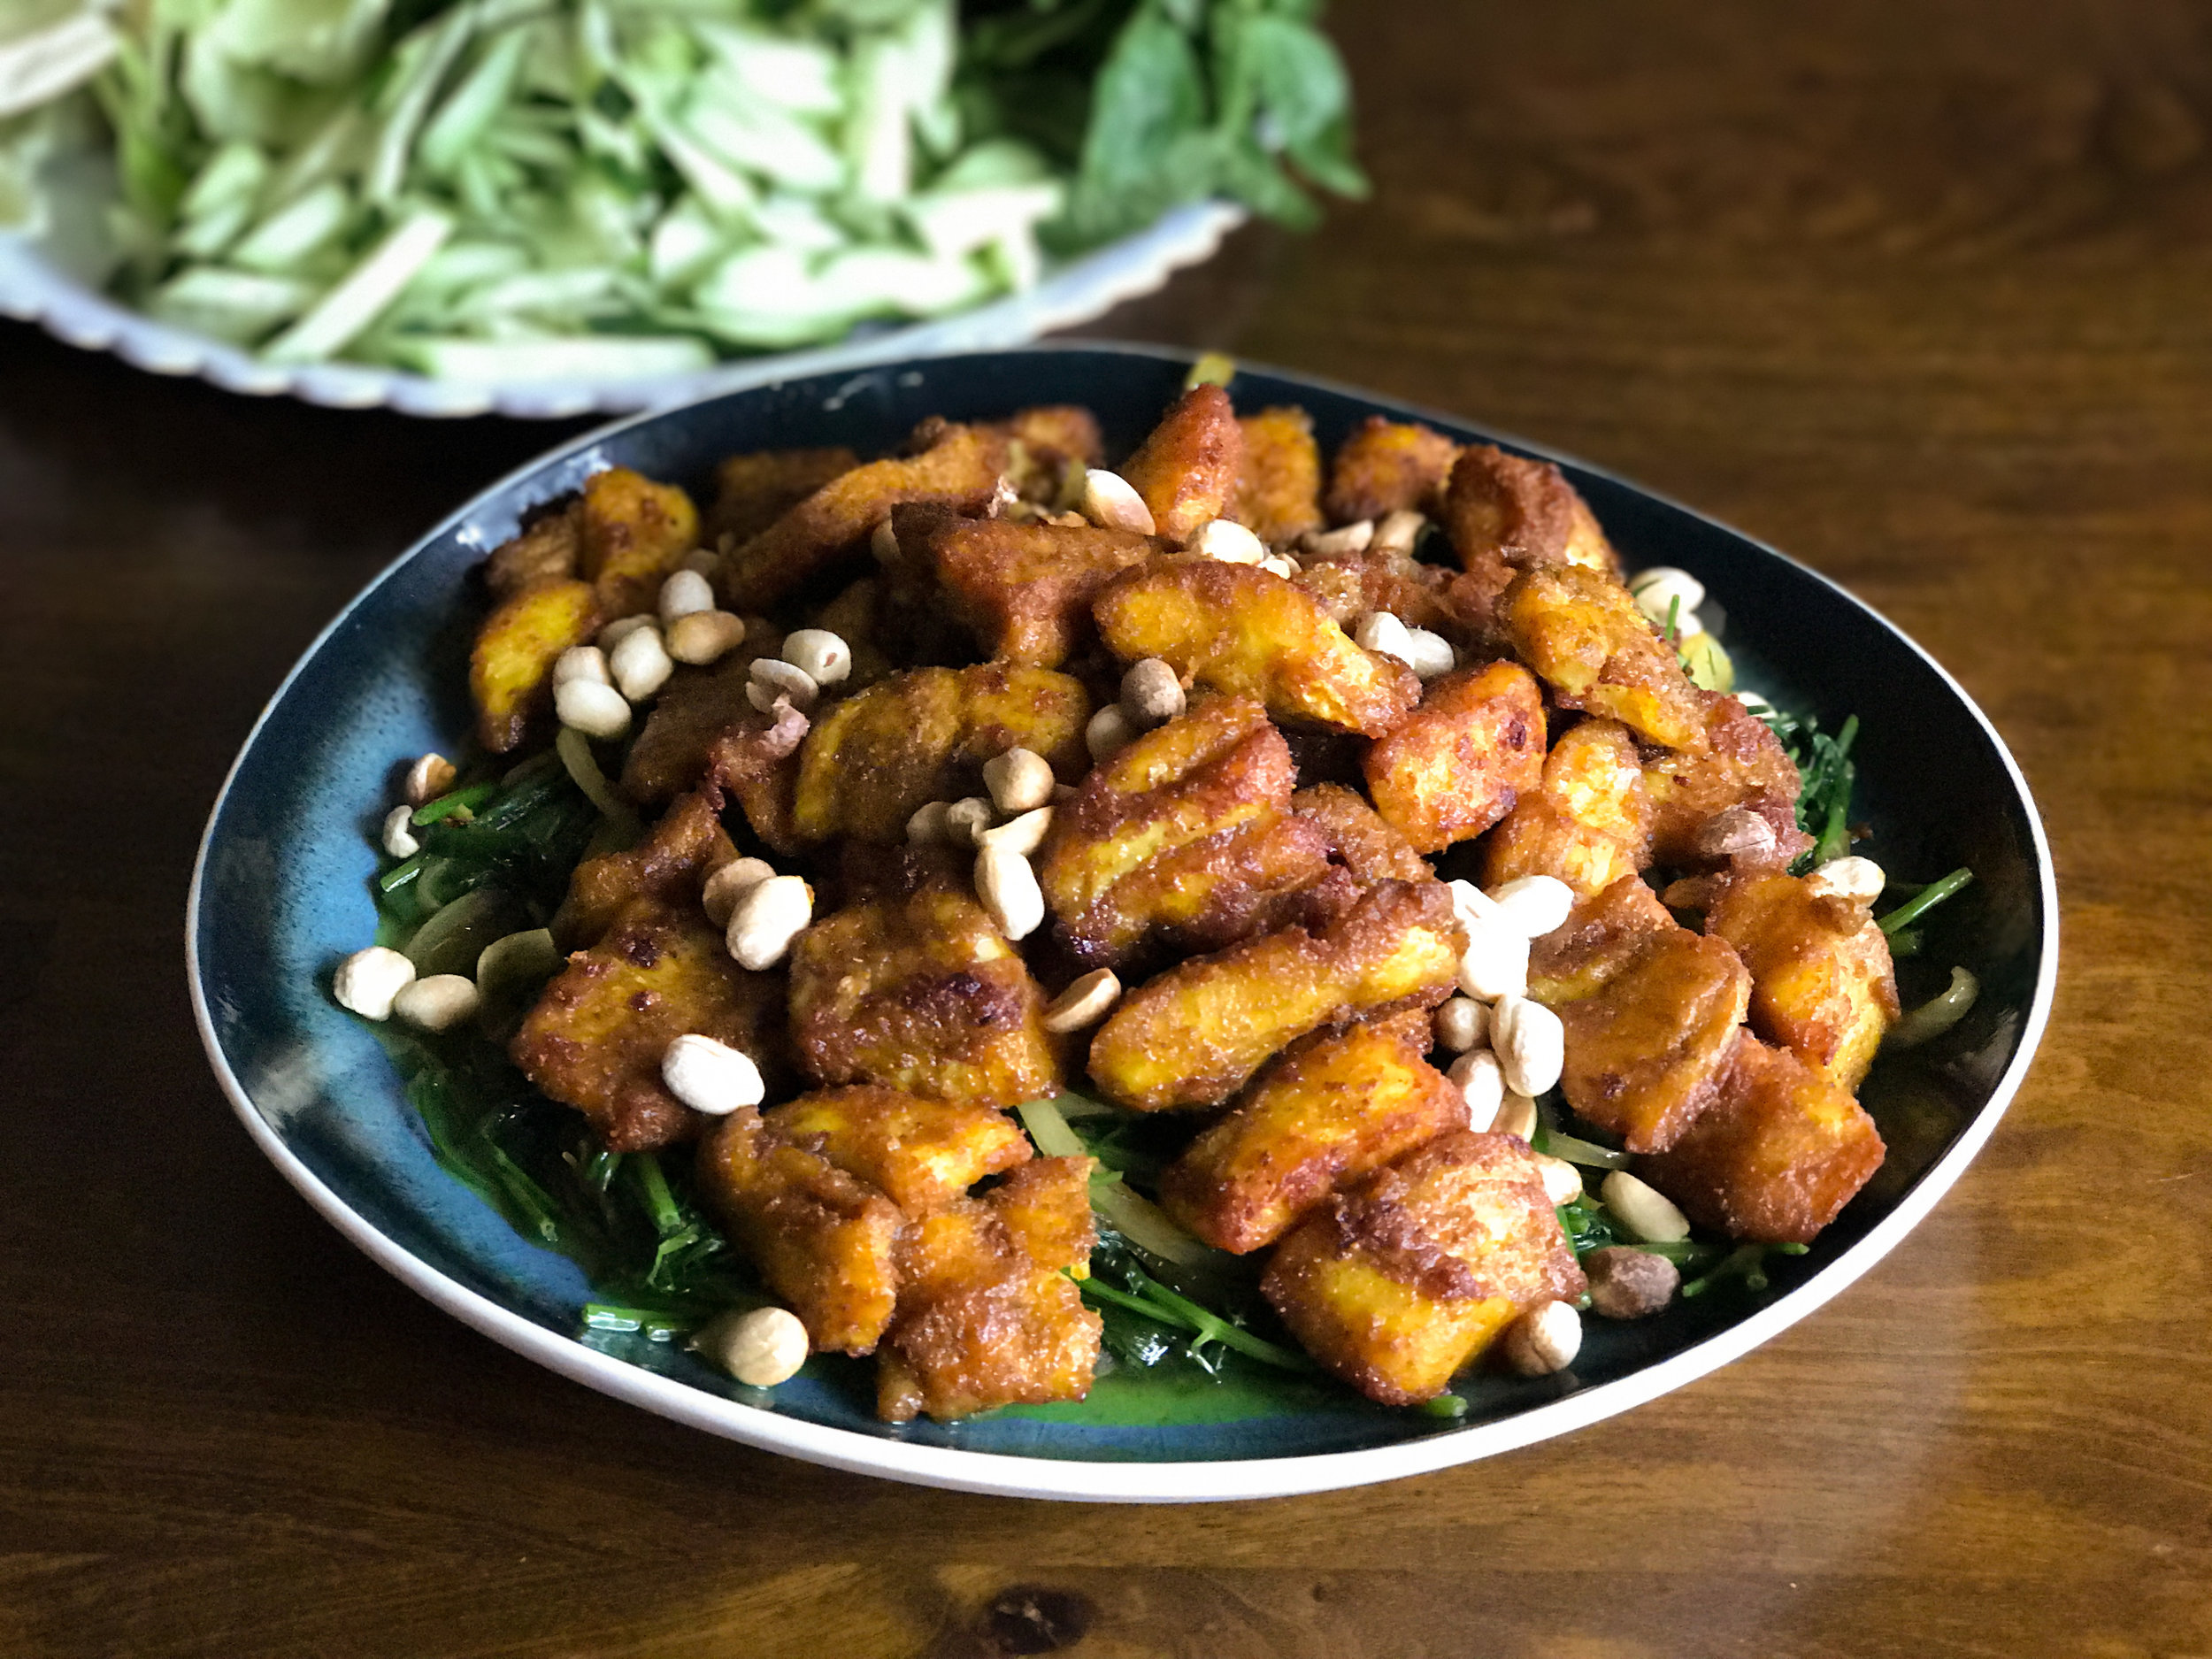
The first time I heard of Cha Ca La Vong, it was on Susie Bui's Instagram feed. Back in November, she had posted a photo of her dad's version of the dish. I couldn't tell what it was exactly, but it was gorgeous – with tons of dill, and turmeric-stained morsels of something, and onions, all being pushed around in a wok. You could just tell looking at it that the flavors were vivid and wonderful.

And there were so many other delicious things on her feed, seemingly that she had cooked: shrimp and egg whites, Chinese style; hu tieu hoanh thanh (Vietnamese wonton soup); beef with mushrooms, chives and bean sprouts; tom kho tau (braised shrimp in roe). 

I'd never met Susie – or at least never in the normal way. I'd seen her and talked to her back in 2009, when she and her brother had a restaurant in Dallas, Lumi Empanada and Dumpling Kitchen. (Dallasites, do you remember it? It was in the wood-frame house on McKinney that later became Belly + Trumpet.) Her brother, married to a Brazilian woman, was the reason for the empanadas. I was an incognito restaurant critic, just starting out in Dallas when I reviewed the restaurant, and it charmed me. But because I was incognito, I didn't introduce myself. 

Susie had never run a restaurant before, let along owned one; prior to opening Lumi she was a marketing coordinator for Brinks Home Security. But she had a real flair. "Somehow," I wrote in a three-star review, "despite her lack of experience and the craziness of the concept, Bui has managed to pull it off with panache and a serious sense of style and fun." Plus a number of the dishes were terrific: Chinese five-spice duck and leek dumplings; traditional Vietnamese crab and asparagus soup; a crazy-good Thai-style blue-crab fried rice.

The restaurant didn't last long (despite the positive review,) and Susie left the restaurant business, and in 2014 she left Dallas for San Francisco.

The day before she left, though, something interesting happened: At a Dallas wedding, she met Tony Perez. "We kept in touch," she says.

And then some: In July, the couple plans to get married, in Playa del Carmen, Mexico. 

Susie has since returned to Texas, but not Dallas – she and Tony live in Houston, where he has a sandwich shop. Susie works for Samsung – out of the company's Mountain View, California office. (She only has to pop in every couple of months.) 

So, to get back to Susie's Instagram feed, everything she was cooking looked so delicious. By the looks of her posts, it seemed she visited Dallas with some frequency, so I invited her over as a guest cook for the blog. To my delight, she accepted.

On a Saturday afternoon a few weeks ago, she showed up at our house, with Tony and their friend Phong Tran in tow. So much fun to meet them, cook, hang out, talk food – and then feast on the results.

Cha Ca La Vong wasn't a dish I'd ever heard of before, and it turns out it has an fascinating story. "It's very popular in just one part of Vietnam," says Susie. "Hanoi. They even have a street named after it." 

Susie has never had the dish in Vietnam, but Phong has, two years ago, at the legendary restaurant named for the dish, Cha Ca La Vong. "It was the first time I tried it," he says; he only learned about it when he was researching what to eat in Hanoi. And it blew him away. "It was probably one of the best dishes I had in Vietnam when I was there."

Later I did some reading, and learned it's a dish with cult status. At more than 100 years old, Cha Ca La Vong is not the only place in Hanoi that serves it. In fact, there's a whole street called Cha Ca after the dish. 

Susie's parents are from the north; her dad, a wonderful cook, she says, taught her to make the dish.

Susie took stock of my kitchen (yes, I have cheesecloth! Yes, I have a mortar and pestle! Yes, I have rice paper!), then she put Tony and Phong to work grinding the galangal. It's a gnarly root that looks a bit like ginger root, but it's about 9,000 times as tough. They peeled it with a sharp paring knife, then pounded it with the pestle in the mortar, taking turns because so much elbow grease is required. "You can do it in a food processor, too," Susie said, but she enjoyed watching the boys do it the old-fashioned way. That would go into the rub for the fish. When I saw how hard it was to grind it, I knew I'd use a food processor.

Meanwhile, Susie showed me how to make our two dipping sauces: An all-purpose nuoc cham (fish sauce, lime, garlic, sugar and Thai chiles), and a funky-intense spin on it, mam ruoc cham, made by stirring pungent, fermenty fine shrimp paste into nuoc cham. Tony can't stand anything with shrimp paste – he ate too much of it once, the first time he met Susie's family, he reminisced, and he hasn't been able to manage it since. It's super-intense if you taste it on its own – and even the dipping sauce is pretty funky. But Thierry and I both loved it, especially with all those fragrant herbs in rolled up with the fish. The combination yells "wow!"

The nuoc cham, easy and approachable – and made from easily-found ingredients – will definitely go into my regular repertoire. To make it, we, just stirred together fish sauce, lime juice, garlic and sugar and Thai chiles, then adjusted the taste. For the Cha Ca La Vong, we just added a tablespoon of the shrimp paste. (If you're skipping the pungent version, you might want to serve double the amount of nuoc cham.)


Once we had the sauces ready and Tony and Phong had accomplished their galangal-grinding duties, Susie made the marinade for the catfish.

Oh, a word about the fish. I'm prone to bouts of angst and 4 a.m. brooding, and I worried about it. Do people want to eat catfish? My friends who are native Southerners love it, and I've always enjoyed it – whether fried Southern-style or steamed or fried Southeast Asian-style. Is it ecologically responsible and healthful? A quick check on Monterey Bay Aquarium's Seafood Watch app assured me that American-raised catfish (which is what you will probably find) is a "best choice." This month's GQ magazine has Mark Bittman raving about catfish, which he calls "the one American fish we should all be eating." They're ugly customers, he points out. But "they're among the best-tasting, most sustainable fish you can find – white, flaky and tender, farmed with clean and smart techniques." Good to go!

OK, that marinade. Susie added a few tablespoons of water to all that ground galangal (what an interesting perfume it has!), then gathered it up in a cheesecloth and squeezed all the juice into a bowl. She then stirred in spices: ground turmeric, garlic powder, onion powder, sugar, mushroom seasoning and olive oil. She cut the catfish into pieces, coated them with the yellow marinade and let them sit for half an hour.

While they're marinating, I want to tell you about the mushroom seasoning. It's an ingredient Susie loves to use lots of dishes: soups, sauces, stir-fries – basically any dish in which other Asian cooks might use MSG, which Susie doesn't like to use. I didn't have an easy time finding it in a sprawling Chinese supermarket; I had to show three different employees a photo Susie sent me of her package. Finally one staffer led me to it: They had gigantic (17.5 ounce) envelopes of one brand, and it was expensive – more than $12. I bought it.

Between that and the Vietnamese herbs I sought, it was quite a goose-chase! 

Later I brooded about the mushroom seasoning, as it turned out the one I bought does have some MSG in it, listed last in the ingredients – after dehydrated mushrooms, vegetable powder, corn starch, salt, sugar and nucleotide. (The brand Susie uses does not, so check the ingredients if you're looking for it.)

The brand of mushroom seasoning Susie Bui uses does not include MSG in its ingredients.    Photo by SUSIE BUI

The brand of mushroom seasoning Susie Bui uses does not include MSG in its ingredients.    Photo by SUSIE BUI

 Not that MSG is necessarily so bad, but I don't love using it, or other products with lots of additives. Here's the good news: I wound up developing a substitute that works really well: powdered shiitake mushrooms, in combination with soy sauce. (Incidentally, that was a breakthrough that led to a whole slew of other kitchen breakthroughs – I will write about that very soon!) Anyway, our recipe for Cha Ca La Vong lets you use one or the other.

Half an hour after the marinade went on, Susie laid the fish pieces on a baking sheet and slipped it into a 375-degree oven, to help seal the marinade into the fish before we'd fry it. (In Hanoi, they grill it rather than baking before frying, says Susie. Maybe I'll try that once we're in grilling season.)


While the fish is roasting, that's a good time to boil the rice vermicelli, rinse it with water to cool and put it in a bowl, then set the table: dipping sauces, rao thom, vermicelli, roasted peanuts and rice paper. Make sure you have your sliced onion, scallions and dill ready at hand near the stove, along with a couple of platters.


After its 15-minute roast, we pulled the fish out of the oven, and Susie heated peanut oil in a large skillet, then fried the fish pieces (in a couple of batches) in the hot oil, transferring them to a platter when they were cooked. Then she poured out all but a couple tablespoons of oil, and stir-fried the onion and scallion, then added the dill. All that went onto a serving platter, then the fish on top, and then, as a garnish, roasted, unsalted peanuts.

To the table, yippeee!

Thierry rustled up a bottle of chilled rosé, I filled a shallow bowl with warm water for the rice paper wrappers, and the party began.

For our first tastes, we each dipped a rice paper in the warm water, piled herbs, lettuce, cucumber, a little vermicelli, a piece of fish with some onion, scallion, dill and peanuts on top.  Here's what mine looked like:

Then you fold the left and right sides of the wrapper over the ingredients and roll it up, burrito-style. Working with those super-thin, stretchy rice paper skins takes a little practice – don't overfill!


Success! Dip it in one of the sauces, and wow. So wonderful. Dip it in the other sauce, different – and also wonderful, so herbal and fragrant; all that dill and turmeric add up to something very unusually delicious, especially when you get that crazy funk from the mam ruoc cham.

After that, Susie made a rice-paper-free salad-bowl version, piling lettuce, herbs, fish, etc. in a small bowl, drizzling sauce on top and eating it with chopsticks.

Stylin'!

Up for trying?

The whole Cha Ca La Vong set-up definitely involves some serious shopping, whether in Asian groceries or online. And some adventuresome kitchen prep. But it's such a fun dish to serve at a casual dinner with friends; it's so interactively delicious.  And it's not something you're likely to find in any restaurant – unless you hop on a plane and head to Hanoi.

Yeah, I knew you were ready for the adventure. Here's the recipe:

If you make it, we'd all love to hear about it – please tell us how it goes in a comment!


Craving pasta? This soul-stirring lamb bolognese takes it to another level

I know what you're thinking: A massive platter of pasta smothered in some kind of luscious sauce would make everyone feel really good this weekend.

Sure, you can always simmer up a dependable beef bolognese, but maybe you want to branch out, take your ragu game up a notch. This sumptuous lamb bolognese is the answer.  

Start thinking now of your favorite people: That's who you'll want to make this for. Nibbles to start, then salad, then the massive plate of pasta. Red wine. The sauce's simmer may be long and slow, but this the easiest kind dinner to execute. Zero stress involved. And the flavor payoff is huge.

This is what your friends will see when they walk in and find you cooking.

This is what your friends will see when they walk in and find you cooking.

It's the kind of thing you want to make on a lazy weekend, when you want the kitchen to fill with dreamy aromas. Once you've put it together, you leave it to bubble quietly why you catch up on your reading. Or eat bonbons. Or paint your toenails. Or bake bread. OK, maybe baking bread doesn't count as lazy, but fresh-baked bread (or any good crusty loaf) would be just thing thing to sop up all that wonderful sauce. Or maybe this is the moment to make your first homemade pasta. 

But you don't have to: This bolognese is splendid on the fettuccine or pappardelle from a box, too. You can make the sauce a day or two ahead of serving, or put it on the table as soon as it's done. 

Lamb Shanks, with the meat cut off the bones

It all starts with lamb shanks, a relatively inexpensive cut. If you've ever made them, you know what happens to them in a long, slow braise: They become incredibly tender to the point of falling off the bone. That's the idea here, but you keep braising past that point, until the meat completely falls apart, melding gorgeously with the rest of the ingredients – wine, tomatoes, broth, aromatic vegetables, dried mushrooms. 

Soffritto

In order to easily brown the meat a bit before the braise starts, I cut it mostly off the bones, into large chunks. But what follows is not a major browning operation: just give the chunks a spin in a pan of shimmery hot olive oil rather than searing them hard. The idea is to get some of that nice caramelized flavor but keep the softness of the meat. It's quick and painless and you don't wind up spattering your kitchen with oil. Toss the bones in the pan, too, for added flavor, and since there's still plenty of meat clinging to them. No need to be careful when you cut the chunks.

After the meat is browned and set aside, next comes the soffritto: You know, that aromatic trio of carrots, onion and celery. Cook them with a little pancetta in a splash of olive oil till they're soft, toss in a few lightly smashed garlic cloves and you're nearly there (work-wise, anyway). 

Next you deglaze the pan with red wine – just about any old kind will do. (Not familiar with deglazing? It's a fancy word for adding wine and scraping up the browned bits sticking to the pan and sending them into the sauce.) Add broth, a can of tomatoes, bay leaves and rosemary, a handful of dried porcini mushrooms and a lemon peel. 

That's it. Leave it to simmer – and simmer and simmer – until your kitchen smells wonderful and all that meat relaxes into deliciousness with all those supporting flavors. 


So, what do you think? Is this the day you're going to make fresh pasta? It's probably easier than you think.  Here's the technique and recipe:

Or not. Either way. But if you're buying the pasta, considering splurging on the one that looks the best and most artisanal. Not sure? See if you can see the texture through the package: You don't want it to look too slick; go for one with some texture. Rustichella d'Abruzzo is a great Italian import you can sometimes find in really good supermarkets. 

Now let's go check on the sauce.

Wow, look – it's nearly done! Hey – did you think about wine? This would be the moment to open that great-looking Barolo your uncle gave you for your birthday. In fact, pretty much anything Italian would be fabulous with it, especially if it starts with a B: Barbaresco, Brunello (yeah, yeah, I know – they're expensive). Barbera! Bingo. Or Chianti, or Rosso di Montalcino, or just about anything, really. This is not a moment to be fussy.

Are you wondering what would make a great starter? How about an escarole salad with crispy prosciutto, egg and parm?

I just happen to have the recipe for you . . . 

OK. Time to eat. Aren't you excited? I know I am. Drop that pasta in the boiling water. Cook it till it's al dente. If your pasta's fresh, that'll just be three minutes or so. Pull it out of the water and drop it into that wonderful sauce. Give it a stir, let it simmer in there for a minute or three. 

Now onto the giant platter it goes. Don't forget the big chunk of Parmigiano-Reggiano to pass with a grater at the table. 

Oh, I almost forgot: Here's the recipe:

Now start rounding up those friends. And try to save me a bite.


Steal this salad! Escarole, crispy prosciutto, 6-minute egg, shaved parm and lemon add up to a spectacular starter

Desperate times call for desperate measures.

You're bored with Caesar. Fed up with the wedge. Finished with chopped. But where, or where, is the simple yet stunning salad of your dreams?

If you don't have it, steal it.

That's what I did. 

The escarole salad I stole, back in December, at Sprezza.

The escarole salad I stole, back in December, at Sprezza.

One night back in December, Thierry and I were having dinner at Sprezza, chef Julian Barsotti's Roman restaurant in Dallas. Thierry first saw it on the menu: an escarole salad with egg and prosciutto. "We're having that," he said. He doesn't usually make such definitive pronouncements when I'm dining for work, but there it was. He had to have it. 

I would have ordered it any case (wouldn't you?).  It was pretty simple, just the bitter winter greens dressed in a lemony dressing, with crisped prosciutto, shaved Parmesan and a halved five-minute egg. (At least it looked like five minutes; it had one of those perfect, just-set, almost gelatinous bright golden yolks.)

Crisped prosciutto, just out of the oven

Crisped prosciutto, just out of the oven

The salad was as wonderful as it sounded and probably looks. The touch of lemon was exactly right with that salty ham. I knew it had to be mine. I would go home and recreate it. Steal it. For you. And for me.

With just one tweak: When I ate it, I wanted some of the egg in every bite, so I had to cut up that halved egg and toss it in a bit. I'd address that in my steal.

The first time I made the stolen salad, I was sort of stymied: couldn't find escarole at the two supermarkets I tried. With friends coming for dinner, I punted, and used Belgian endives. 

As I slid a baking sheet of prosciutto slices into to the oven, I thought about the dressing. Shouldn't be too hard to figure out. I'd keep it simple. Basically just lemon juice and good olive oil. Probably no added salt because of the salty prosciutto and the cheese. The bitter edge of the greens would be balanced by the richness of the egg.

I was getting hungry thinking about it, so nibbled on one of the prosciutto crisps. You can do that too: No one will know.

For the egg, I was a minute off. To achieve a perfect yolk, bring the eggs to a boil in cold water, remove the pan from heat, cover it and let the eggs sit in the hot water for six minutes. Drain and run cold water on the to stop the cooking. Perfect.

The salad came together beautifully, even with the endives. Frisée would work too. Or a combination of the two.

Next time I found escarole, and the salad was everything I hoped it would be; it was exactly the right starter for a pasta dinner with close friends. My pal Georges, a former chef who is even more critical than I, flipped for it. 

My new favorite winter salad is ideal for entertaining, as you can cook the eggs, crisp the prosciutto and wash and dry the escarole ahead of time. Just before you sit down, make the simple dressing, throw the greens in a bowl, add the eggs, toss it all together, then garnish with the prosciutto and shaved parm. 

Here's the recipe:

Who says crime doesn't pay?