Vegetarian

Outrageously luscious comfort from your pantry: Hello, huevos rancheros!

HuevosOverhead.jpg

Huevos rancheros is the opposite of a salad. It’s warm, and saucy. It’s rich and spicy and comforting. With everything we’re all going through these days, you deserve to have it for lunch — even in the middle of the week.

Does the steaming, rich, gooey extravaganza seem like something that can only be had in a restaurant? It’s not! It’s actually super easy to make at home.

I wouldn’t be at all surprised if you had everything you need to make it already in your kitchen:

• Corn tortilla

• Eggs — or even a single egg

• A can of diced tomatoes

• One of those tiny cans of diced green chiles

• Half an onion

• Two or three garlic cloves

Maybe you don’t have garlic cloves, but you have some garlic powder. Maybe you don’t have that little can of green chiles, but you have some red pepper flakes or Tabasco. Maybe you don’t have corn tortillas, but you have masa harina and you know your way around a tortilla press. You’ll manage. I’ll walk you through it.

Probably you do have salt and cooking oil of some sort. Queso fresco or cotija — or even feta or goat cheese or one of those bags of pre-grated fiesta mix? I’m sure you’ve got one the above. Cilantro? Yes! Totally not essential, but lovely if you have it.

If you have a can of pinto beans (or some dried ones and you put up a pot first thing in the morning), you can have dreamy side dish, too. Or maybe you have black beans. But don’t even worry if you don’t: Your belly and your soul will be in a very happy place when the noon-time whistle blows.

We made this indulgent lunch from stuff we happened to have lying around.

We made this indulgent lunch from stuff we happened to have lying around.

Here’s how to achieve the lunch that we all absolutely deserve.

First, toss together a ranchera sauce: blitz a can of diced tomatoes with some diced green chiles from a can and two or three garlic cloves. Set it aside. In a saucepan, sweat half an onion, then add the purée and salt. Simmer five minutes. Taste it: Wow. Sauce whipped up from cans has no right to be that good!

Lightly fry a tortilla or two. Blot and put ‘em on a plate. Fry an egg or two in your tortilla oil, any way you like ‘em — over-easy, sunny-side-up. Slide the egg onto the tortilla, spoon ranchera sauce over. Garnish with whatever you’ve got — crumbled cotija or cheese from a bag, a fresh sprig of cilantro or two.

Don’t you wish you had a ripe avocado? Man, I actually had one and forgot I did. A few slices on the side would have been awesome. (Still kicking myself!)

You’ve already heated up that can of pinto beans or refried beans. Spoon that next to the eggs.

Got it? Here’s the recipe:

If you want to make pinto beans, wash a pound of dried pinto beans, place them in a large pot, add 10 cups of hot water and half an onion, sliced, and bring it to a boil over high heat. Reduce heat to very low, cover the pot, and cook — stirring occasionally — till the beans are tender. It might take anywhere from 90 minutes to 2 1/2 hours, depending on the beans. Add more hot water as you go along if they need it toward the end (you want it very liquidy). 10 minutes before you want to eat them, stir in salt to taste. That’s the basic recipe; throwing in some garlic and herbs (thyme, bay leaf) in the beginning is lovely too.

If it’s only huevos rancheros that you’re after, you can put that together in twenty minutes. Is it a date?

Meanwhile, tonight, if you can’t sleep, think about all the ingredients in your pantry and fridge that you’d love to find a delicious use for. Give me a list in the comments below. I’ll dream up something enticing for you to make.

Baba ganoush fever: How can burnt eggplant become a dip that’s so friggin’ brilliant and addictive?

Baba Ganoush.jpg

Five years ago, an 800-year old chickpea dip suddenly became a global obsession. Now, something tells us that baba ganoush — the smoky, lemony eggplant dip that’s a mezze-table favorite all over the Levant and beyond — may be about to steal the spotlight from its foodie-star brother.

Baba ganoush’s charms can be elusive to those of us who dwell in the Americas. Unless we have Levantine roots, we may not have been exposed much (if at all) to exemplary baba — or muttabal, as it’s called in Syria. The stuff you find in supermarkets, if you do manage to find one baba ganoush among the grillions of plastic hummus tubs that have taken over the refrigerated case, tends to be pale-flavored and forgettable. Meanwhile, I’ve read recipes that suggest adding Liquid Smoke. Liquid Smoke!

I knew that the babas that turned my head over a lifetime of eating in Lebanese restaurants were the unabashedly smoky ones. But somehow, I never wondered how they got their smoke. Or what gave the best ones their wonderful creamy texture. Or how much tahini, lemon or garlic would make a baba ganoush sing.

Somewhere in the back of my semitic mind I understood that the dish was related to the eggplant “caviar” my Jewish grandma used to make. (She roasted eggplants, cutting them in half first, but never long enough to get them smoky, and there was no tahini involved after that.)

Happily — life-changingly, perhaps — it’s easy to make a brilliant one, especially if you have access to an old-fashioned charcoal grill like a Weber. You can also make a pretty outstanding one using your kitchen broiler. In case you want to cut to the chase and achieve immediate baba bliss, here’s the recipe:

The technique is simple: Poke holes all over whole eggplants, then roast them, either under your broiler or directly on coals on the Weber, turning them once, until they’re completely charred and seem to collapse.

Eggplants roasting directly atop live coals in a Weber grill

Eggplants roasting directly atop live coals in a Weber grill

Cut them in half, scoop out the flesh — which will have taken on wonderful smokiness — place in a sieve and mash the flesh over a bowl to get rid of its bitter liquid and achieve a lovely soft texture. Separately, whisk together tahini and lemon juice till fluffy, then add the mashed eggplant, crushed garlic and salt. Spread the dip on a serving plate, drizzle on some good olive oil and scatter with chopped parsley, and you have baba ganoush heaven. Really, it’s that easy.

And it’s a fun dish to make. It’s fun charring the eggplants on the grill, and delightful when you whisk the tahini and lemon to fluffiness. It’s even fun to pull the flesh out of the charred skins with your fingers.

Once roasted, the flesh inside is meltingly tender.

Once roasted, the flesh inside is meltingly tender.

More on technical details in a moment, but first a word about baba ganoush’s history.

Curiously, I was unable to turn up much background about the dip, especially anything definitive. There’s no entry for baba ganoush (or baba ganouj, or baba ghanoush, or baba ghannuge, its alternate spellings) in The Oxford Companion to Food, or in The Encyclopedia of Food and Culture that takes up probably way too much real estate in my cookbook case. Unlike the Wikipedia page for hummus, which boasts two fulsome paragraphs about origin and history and nearly 700 words about regional preparations, Wikipedia’s baba ganoush wisdom is weirdly scant, pretty much limited to a stab at its etymology. (Baba, everyone agrees, is Arabic for “father” or “daddy,” and the Oxford English Dictionary suggests that Ghannuj is “perhaps a personal name.”)

The most intriguing tidbit I turned up came from my brilliant former colleague at The Los Angeles Times (now retired from the paper), Charles Perry, who wrote in a 1997 story about eggplant and its history that “The ancestor of today's baba ghanouj was flavored with ground walnuts instead of tahini.” Beyond that, we have only found speculation about the dish’s history. (If you are an expert, please weigh in with a comment! I am attempting to contact Charlie, who published Scents & Flavors: A Syrian Cookbook in 2017 — which I just ordered — and who I’m pretty sure possesses more intelligence on the subject; will update if successful.)

I found recipes for baba ganoush in some of my favorite cookbooks — including Claudia Roden’s The New Book of Middle Eastern Food and Arabesque and Yotam Ottolenghi and Sami Tamimi’s Jerusalem, and Annisa Helou’s splendid Feast: Food of the Islamic World, which won a James Beard Award in 2019. Online, J. Kenji López-Alt offers his serious take on Serious Eats; The Washington Post’s Smoke Signals columnist Jim Shahin wrote about it and gave a smoky recipe in 2018.

There are lots of recipes out there that include yogurt — which is also wonderful, but not the classic, and many recipes that simply roast the eggplant but stop well before optimum smokiness has been achieved.

Other recipes that I found to be almost perfect have some tiny little detail I felt could be improved. For instance, Serious Eats’ López-Alt calls for not pricking the eggplants, so they’ll cook more quickly and peel more easily, but he also points out unpricked eggplants will explode in your oven (yikes!). In addition, he calls for spinning the flesh in a salad spinner as a way of quickly getting rid of the bitter moisture in them after roasting, which I find cumbersome and messy. I much prefer Roden’s quick and easy solution: mashing the flesh with a fork in a strainer over a bowl; this is much faster than the slow-drain many other recipes call for, and adds no extra work as the flesh needs mashing in any case. (And not puréeing in a food processor, as some recipes recommend — you want to retain some lovely texture and not make it too smooth.)

Chasing optimal smokiness, perfect balance and the creamiest texture has kept me experimenting with recipes for a couple months in order to come up with the best method and proportions. I found that whisking the tahini with lemon juice, as in customary in some of my favorite hummus recipes, results in a baba with superior creaminess. (That idea came from a recipe in Arabesque for the variation of baba ganoush that includes yogurt.)

Yesterday, we finally put it all together — the proportions I favor, and the whisking, which left just one question to answer: Which is better, roasting the eggplant over live coals or under the kitchen broiler? And if one was better, how much better?

We put the two cooking methods to the test, by making two otherwise identical versions of baba ganoush, one using eggplant roasted on live coals (on a chilly Saturday afternoon in February!) and the other in the broiler.

Once they were ready, I spread them on their respective serving plates. Here’s how they looked before garnishing:

Baba ganoush prepared over live coals (left) and baba ganoush prepared in the broiler

Baba ganoush prepared over live coals (left) and baba ganoush prepared in the broiler

The photo probably doesn’t do justice to the visual difference, but the one done over live coals looked more emulsified and somewhat deeper in color. You could tell in whisking them, the live coals version was a bit silkier; though the eggplants seemed to be cooked about as much as the ones in the broiler, the ones done in the Weber were meltier.

In terms of taste and mouthfeel, the difference was starker: The one done on the coals had much smokier flavor, and more depth. I had Thierry and Wylie blind-taste them: The one done on the coals was the clear and immediate winner.

However, they (and we) loved them both: The broiler version was absolutely delicious as well, if a bit subtler. I thought of stirring in some ground cumin, a flourish that seems popular in the version of the dish that comes from Persia. You might consider using a slightly heavier hand with garlic if you go the broiler route, or upping the tahini a wee bit. This is a great dip to play with, to tweak it until it is exactly as you like it — or just cook kind of free-form, adding tahini, lemon juice and garlic by feel rather than measuring.

Another traditional flourish is pomegranate seeds — and once autumn rolls around, the baba ganoush will certainly flow freely at my place, topped with ruby-red beauties.

Until then, I’m loving the essentialist version, and we hope you will too.

RECIPE: Baba Ganoush

How to build the beautifully spiced, mega-healthy, plant-based, cross-cultural soup that could easily change your life

Everything Soup Harissa.jpg

It’s only a few days into the new year, but we’re tempted to proclaim 2020 The Year of the Soup. Yep, we’re thinking it’s going to be a soup-flavored year.

Here’s why. First, plant-based eating is on the rise, and soup is the ideal form for plant-based, soulful hankerings — including vegan ones.

Also, we’ll be hearing a lot about the importance of foods with anti-inflammatory properties this year, as chronic inflammation is now recognized as a major contributor to heart disease, cancer, diabetes and arthritis, and anti-inflammatory eating is widely seen as kind of a “fountain of youth.” Soup is an ideal vehicle to load up on anti-inflammatory superstar ingredients like turmeric — the #1 anti-inflammatory food, according to Michael Greger, M.D., who recently published a compelling new book, How Not To Diet. Ginger and garlic are the second and third most anti-inflammatory ingredients: also great friends of soup.

The most anti-inflammatory components of food, meanwhile, are fiber and flavones — both of which are abundant in the type of super-soup we’re about to provide a blueprint for.

Then there’s the emergence of the zero-waste movement. Making a big ol’ super soup lets you use up produce in your fridge you might have otherwise tossed (or composted) — limp celery, greens that have seen better days, carrot and onion trimmings, the stems of the broccoli from that Chinese recipe you made that called only for the florets, to name just a few. Have a little bowl of leftover sautéed spinach or roasted carrots? Into the pot they go. Make this soup once, and you’ll find yourself saving many more vegetable trimmings going forward (we keep a dedicated zipper bag for that purpose, so it’s easy).

Stuff that came out of our fridge: broccoli stems from a Chinese stir-fry that called for florets only; celery leftover from a crudité platter; a couple of forgotten halved onions, trumpet royale mushrooms from a dish we bought too many mushrooms fo…

Stuff that came out of our fridge: broccoli stems from a Chinese stir-fry that called for florets only; celery leftover from a crudité platter; a couple of forgotten halved onions, trumpet royale mushrooms from a dish we bought too many mushrooms for. The tough and woody parts of the broccoli stems will get peeled away and discarded.

January is our favorite month to fall in love with soup all over again, following all the holiday revelry — especially soups with health-sustaining properties (as we wrote about three years ago). The health benefits of onions, garlic, leeks, shallots (all members of the detoxifying allium family) and cruciferous vegetables like broccoli, cauliflower, Brussels sprouts and kale have all been well documented. And hey — they’re all awesome in soup!

Meanwhile, who couldn’t stand to lose a little weight? (It’s our resolution this New Year’s, and, ahem, every year). According to Dr. Greger’s book, if you’d like to lose weight, soup is your super food because it’s so filling, nutritious, fiber-filled and low-calorie. This type of soup is legume-based, relying on lentils, one of our favorite foods as lentils are earthy, ancient and soul-satisfying. The fact that they’re (surprisingly to those who don’t know their charms) quick-cooking is a giant bonus: It means this dish cooks in no more than about an hour. An Instant Pot would be even quicker.

Do you like spices? Greger’s meticulous survey of medical literature finds that cumin is a powerful appetite suppressants, and he recommends eating it every day. He also touts the truly awesome health benefits of nigella seed, outlined in this medical review, which calls it a “miracle herb.” Both happen to be wonderful in hearty vegan winter soups, as they’re traditionally eaten with lentils.

Finally, there is the flavor factor: This type of soup is so delicious, satisfying and beautifully spiced that we’d be thrilled to eat it even it it weren’t fabulous for our health and good for the planet (especially if you go for organic ingredients and minimal packaging).

Convinced? Hungry? Although we are providing a recipe with this, you really don’t need one — you just need the method — which couldn’t be easier. If you have time to chop things up and wait an hour, you have time to make it. In fact, because we can’t think of what to name it, we’ll call it Sunday Souper Soup.

How to build a Sunday Souper Soup

Mirepoix.jpg
  1. Sweat onions (and other alliuM) and aromatic vegetables

    Heat two or three tablespoons of olive oil (or grapeseed, canola or sunflower oil) in a large soup pot till shimmering, add chopped or diced onion (as much or as little as you like), carrots, celery and any other aromatics you like and have handy (leeks and turnips are nice additions). Toss in garlic (as much or little as you like, or leave it out) — smashed cloves, chopped, sliced, whatever — chopped ginger (if using) and cook another minute or so. You can also add chopped or sliced fresh mushrooms at this point; if you do, let them cook a few minutes till they start to give up their water.

  2. ADd spices

    Add ground spices such as turmeric (1 to 3 teaspoons is a good range; 3 makes it pretty turmeric-heavy), cumin, coriander seed, nigella seed. For best flavor use whole seeds and grind them yourself; toasting them in a small pan first adds depth, but isn’t necessary. You can also use pre-ground spices; nigella seed is generally used whole. Don’t know how much? Try a teaspoon of each you’re using (you can always adjust up or down next time). Stir in and cook two or three minutes.

  3. ADD LENTILS, water, tomato

    Use green, black, red, brown, yellow or any combination. We love green and black lentils, which keep their integrity, so always include one or both of those. Red and yellow lentils break down quickly into a soupy texture, so it’s nice to include one of those as well. But any lentils are fine. Two cups is a good place to start (that’s enough for a big pot), but the anything between one and two cups (or more) is fine. Rinse them well and toss them in, along with water (6 to 8 cups) and a can of chopped tomatoes (including the liquid). What size can? It doesn’t matter — just depends on how tomatoey you like it. During tomato season, of course, you can use fresh ones, if you like. Now’s the moment to add a bay leaf or three and/or dried mushrooms, if you’re using them (They are optional). You can pause for a cup of tea now, or take the time now to survey what else is in your fridge that you might want to add, and cut it up.

  4. ADD longer-cooking VEG

    All of the vegetables in this step are optional. If you want to use harder cruciferous vegetables such as Brussels sprouts, broccoli, cauliflower, rapini, broccolini and the like, you can cut them up and toss them in just after the lentils, or wait 5 or 10 minutes to toss add them. If you’re using very thick, tough broccoli steams, you might want to peel away the tough part on the outside before dicing. If you have cauliflower rice, that can be added now or closer to the end. Also add eggplant (peeled and diced), green beans, scallions, diced potato or sweet potato — anything you’d want to simmer for 20 or 25 minutes or so.

  5. ASSESS LIQUID, AND ADD SALT, PEPPERS/CHILES

    Check and see how your liquid is doing, adding a cup or two (or more) of water as necessary to get the soupiness you like. You can make it pretty soupy, or keep it thicker, like a vegan chili. Add salt (I start with about two teaspoons for a big pot and adjust up from there) and some kind of chile if you like (such as Aleppo pepper, cayenne, chile powder, Espellette pepper, etc.) Taste and adjust (you’ll adjust later again, so don’t worry if it’s not perfect — just don’t over-salt).

  6. ADD LEAFY GREENS, TENDER VEGETABLES AND HERBS

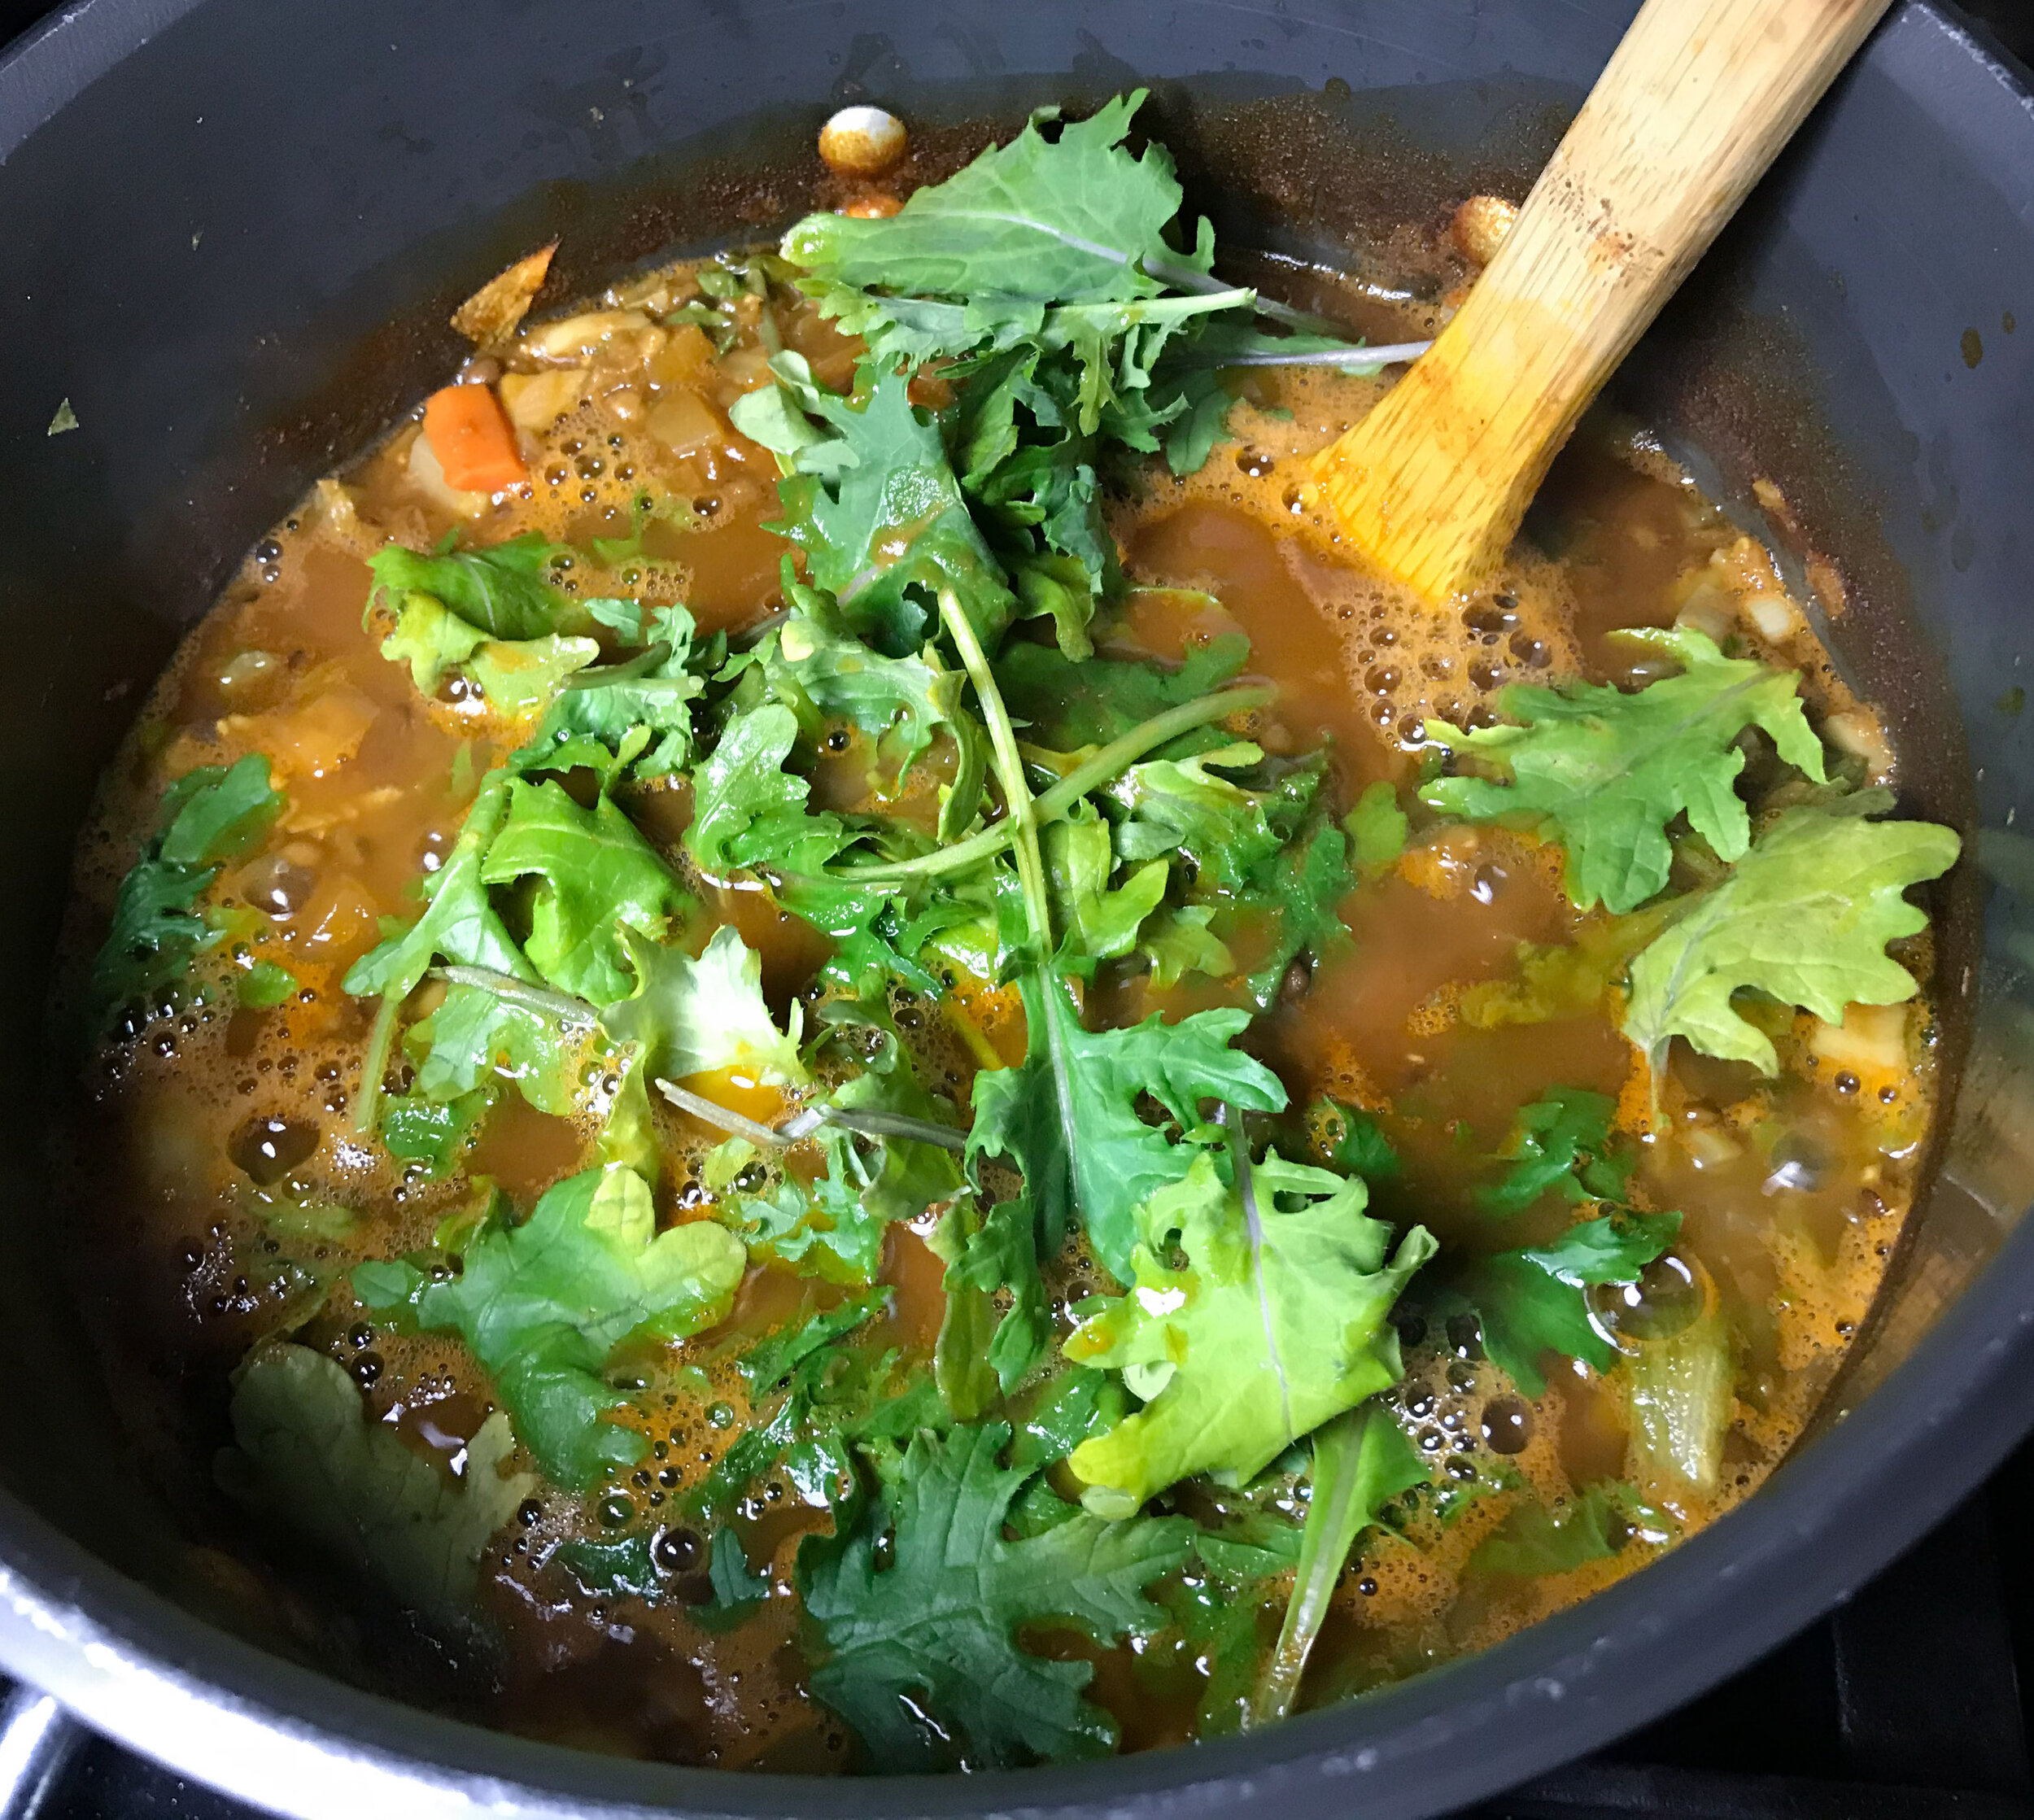
    What kinds of greens are cluttering up your crisper drawer — when we last made this soup, we had a quarter-head of napa cabbage, half a bag of arugula that had seen better days and a few escarole leaves we had deemed too ugly for a salad. Slice up larger greens (as we did the cabbage and escarole), and toss in things like arugula, baby spinach or baby kale whole. Other greens that would work great here are bok choy. When we make this soup and we don’t happen to have tired greens sitting around, we usually pick up a bag of baby kale, arugula or baby spinach, and dump that straight in. This would also be the time to add quick-cooking vegetables like zucchini (diced or sliced cut into half-moon slices), along with any leftover cooked vegetables, chopped up or cut into bite-sized pieces. Add chopped parsley (including stems), dill, mint, basil or whatever other fresh herbs you like at this point as well.

  7. TASTE, ADJUST SEASONING, ADD WATER IF NECESSARY, STIR AND SERVE!

Sunday Souper Soup is almost ready once the greens go in.

Sunday Souper Soup is almost ready once the greens go in.

How to use your Sunday Souper Soup, and why it may change your life

(Maybe you can suggest a better name? Tell us in a comment or shoot us an email at info@cookswithoutborders.com!).

• Make the soup on a lazy Saturday or Sunday afternoon (though any day will do) and eat it all week. I’m happy to eat it once a day, either at lunch or dinner, every day for a week, but other people might get bored and want it every other day or so. Either way, it is so healthy, filling and satisfying that you’ll be much less tempted to overindulge — thereby helping with health-minded and weight-loss-minded resolutions. You may want to add some water when you reheat, as it tends to thicken over time in the fridge.

• You can freeze some of it and keep some to eat this week.

• You can add to it, with delicious results. We just heated up the last bowl of a batch, which wasn’t quite enough for the two of us. We happened to have some leftover roasted Savoy cabbage and mushrooms, so we chopped those up and tossed them in (adding a little water), and the cabbage and ‘shrooms gave the soup a completely different quality. Fantastic!

• It’s the perfect vehicle in which to use nigella seeds, turmeric, cumin, dried chile and other ingredients getting attention for their awesome health-promoting properties.

• We love serve it with harissa to stir in at the end (everyone likes a different spice level). Other hot sauces work just as well — and they all have added health kick.

In case it’s helpful, here’s the Sunday Souper Soup in master recipe form:

We’d love to hear what you think of it — and we’d love to hear from you in general! Let us know (or ask questions about it) in a comment, or shoot us an email at info@cookswithoutborders.com.

Effortless summer baking: The (life-changing!) joy of frozen puff pastry

How much fun can a (relative sane) person have with a box of frozen puff pastry? Quite a lot, as it turns out.

I spent most of my adult life avoiding puff pastry. Well, I'm always happy to eat it, but make it? Not so much. I made it from scratch exactly once, a hundred years ago; that was enough. I'm not the type of person to spend endless hours rolling out layers of dough and butter and chilling it and waiting and rolling, etc. etc.

Until very recently, it never occurred to me that there were good brands of pre-made frozen puff pastry made with actual butter rather than hydrogenated vegetable oils. 

I know, right?! How out of it can a person get?!

Some months ago, I happened upon a box of frozen puff pastry in the freezer case at Trader Joe's that boasted an all-butter situation, snapped it up, stuck it in my freezer and nearly forgot about it. Then, when I was visiting friends in London last month, my dear friend Jenni’s wonderful sister Alison invited us for dinner. It one of these off-the-cuff affairs for 20 or so. What I love about the way these girls entertain is that they don't stress (even when 20 people are coming!); they don't worry if everything's not ready when people start arriving. Sometimes Jenni doesn't even start cooking until people start walking in the door! She and Alison understand that the important thing is to hang out with friends and family, and whatever winds up on the table will be delicious just because. 

They also happen to have some very good ideas up their sleeves. On this particular evening – a regular weekly Friday night dinner with extended family and friends – Alison pulled a savory tart out of the oven, placed it on a table out in the garden, and wheeled a pizza cutter through it to slice it into hors d'oeuvre bites. 

This is Alison's savory appetizer tart, before it was sliced into pieces. Doesn't it look *fantastic*? It was!

This is Alison's savory appetizer tart, before it was sliced into pieces. Doesn't it look *fantastic*? It was!

The thing looked so delicious, I was mesmerized. Free-form, golden-crusted, beautifully messy, it was strewn with greens and mushrooms and slices of some kind of marvelous-looking washed-rind cheese melted into it. It was even more delicious than it looked – some kind of serious umami savory action on that perfect, flaky crust. I stayed there, parked next to it, trying with all my might not to eat piece after piece until it was demolished.

After showering her with compliments, I asked how she made it. "Frozen puff pastry!" she said. "All butter."

That was then (about a month ago). Now, four savory tarts, three fruit tarts and a set of cheese straws later, I can't imagine life without a box of the stuff in my freezer. At. All. Times.

All-butter frozen puff pastry, where have you been all my life?

All-butter frozen puff pastry, where have you been all my life?

So far, I have found three brands. Perhaps there are more out there. Both the Trader Joe's and the Dufour Pastry Kitchens' brands are far superior to the Pepperidge Farms non-butter frozen puff pastry I used to use occasionally in the past (that's the one with the hydrogenated vegetable oil; it also includes high-fructose corn syrup). The Dufour Pastry Kitchens classic puff pastry contains only butter, unbleached unbromated flour, water, salt and lemon juice. It's not inexpensive: I paid $10.99 for a 14-ounce box at my local Whole Foods Market and $10.49 for a box at my local Central Market. The Trader Joe's pastry was nearly as flaky and delicious, and much less expensive: $3.99 for an 18-ounce box. The Dufour brand is one single large rectangle, which comes folded; the Trader Joe's brand is two rectangular pieces, wrapped separately, which is nice (you can defrost one at a time); they come rolled.

Just one problem with the Trader Joe's brand: According to a clerk at my local store, the chain only sells it during the last quarter of the year, presumably for fall and holiday baking. So unless you keep a box in your freezer for more than six months, you can forget about it for summer baking. (Mr. Joe, please change your policy! If you do, I'll make you a summer tart!)

Mr. Trader Joe, if you start stocking your frozen all-butter puff pastry year-round, I will make you one of these. I promise.

Mr. Trader Joe, if you start stocking your frozen all-butter puff pastry year-round, I will make you one of these. I promise.

A third brand, White Toque, was $12.99 for a one-pound box at Whole Foods, but this brand is two rounds – which struck me as less wonderful for a savory tart to cut in small rectangles to eat as pre-dinner nibbles, but very nice for a fruit tart. The White Toque brand – which I've only spotted once – did not rise as high as either the Dufour or Trader Joe's brand, but it's possible it was because my refrigerator died, and after defrosting it sat in a less-than-optimal temperature for more than a few hours. I will give it another try next time I find it. Still, it worked just fine for a cherry-plum tart that I will blog about soon.

First I need to tell you the two ways all-butter frozen puff pastry has changed my life (and no, I'm not exaggerating). 

The first is the savory tart. I managed to approximate Alison's, although Alison used a really nice aged washed-rind goat cheese on hers, and I haven't been able to find anything like it 'round these parts.

But the great news is once you grasp how to put one of these tarts together, you can make one out of just about any kind of summer veg. The general idea is this: Thaw the pastry, unwrap it, and fold up the edges to make a rim, painting a little egg wash on them if you want glossy look. Make a filling of sautéed veg, add a couple of eggs beaten with a little cream or half and half, and either put some grated or crumbled cheese in the egg (feta, goat cheese, cheddar, etc.) or strew crumbled feta or goat cheese on top. Pop it in the oven. So easy.


You can riff on it endlessly, changing up the cheese or the sautéed veg, adding sliced fresh or chopped sun-dried tomatoes. It always turns out great, even if you're in such a hurry that you make a terrible mess of it – as I did with a zucchini, tomato and okra version in which I used too much egg and had a sloppy a edge, so egg spilled out all over the parchment.

My hastily-assembled zucchini, tomato and okra tart. With too much egg and sloppy edges, it spilled all over the parchment.

My hastily-assembled zucchini, tomato and okra tart. With too much egg and sloppy edges, it spilled all over the parchment.

It was still pretty fabulous. (For that one I sliced the okra in half vertically and grilled them before laying them atop the tart, along with sliced fresh tomatoes, before popping it in  the oven.)

Even so, it looked – and tasted – pretty great!

Even so, it looked – and tasted – pretty great!

The point is, these savories are so easy and impressive that they have already become a go-to appetizer for me for laid-back summer entertaining. A glass of rosé, a slice of savory tart – who needs anything else?

OK, here's the other way in which all-butter frozen puff pastry changed my life: They are brilliant to use for summer fruit tarts, including those that star unbaked fruit, like berries.  

Until I learned the joys of frozen all-butter puff pastry, I couldn't for the life of me figure out how to make a good tart using fresh strawberries. All you do is make a quick pastry cream – which is way less involved than you might think (much less tricky than making most custards), blind-bake a crust, spread the pastry cream on top, and cover with berries. If you want to be fancy you can melt some fruit jelly and glaze the berries, but you don't have to. 

I also made a pretty wonderful tart using mixed berries – blackberries, blueberries and raspberries. That one is super easy because you don't have to stem or slice or pit anything -- just toss the berries with a little orange liqueur before dropping them onto the pastry cream. 

Easy berry tart. How festive would this be for the Fourth of July -- or Bastille Day?

Easy berry tart. How festive would this be for the Fourth of July -- or Bastille Day?


I'm thinking it could be the perfect, patriotic-hued dessert to serve on the Fourth. Or for Bastille Day! What the recipe? Here you go. 

Having friends over for dinner? Be sure to invite Mikie's fabulous marinated olives

One of the best parts of visiting my hometown, L.A., is dinner or lunch at my friend Michalene's. I've mentioned Michalene – or Mikie, as her family and a few close friends call her – in many posts. It was Mikie, for instance, who wondered, after a recipe for Chinese lacquered roast chicken changed my life, what would happen if I adapted it to duck. (Answer: more life-changingly delectable fowl play.) 

I met Mikie in 2003, when she was Food Editor at the Los Angeles Times, but I'd long been a fan. Before arriving at the Times a couple years earlier, she'd been Dining Editor at the New York Times, producing the Dining section that quickly, under her tenure, became a must-read. I hadn't realized I wanted to work at a newspaper – in fact I thought I didn't. But the minute I met Michalene, who invited me for a drink to discuss the possibility of my coming on board as her deputy editor, and she talked so excitedly about her love for cooking, and eating out, and editing and writing and putting together a food section, I knew I had to give it a go. 

Before long, we became not just co-workers, but fast friends. That meant we cooked and dined together often. It's one of the things I miss most about living in L.A.

So, dining at Mikie's. There are lots of great things about it. Hanging out with Mikie, and her partner Dan (who happens to be an amazing cook, too, and an awesome bread baker). They have an spectacular view of the ocean, over their rows of vineyards, from their house in the Malibu hills, so dinner's often on the patio. They are warm, generous, thoughtful and altogether brilliant hosts. 


I always secretly hope, as I drive up Pacific Coast Highway toward their place in Corral Canyon, that Mikie will have made her fabulous marinated olives: They're just so much better than any other olives anywhere, perfumed with orange and herbs, and spiced just so – a dreamy pre-main-event nibble.

A couple weeks ago, with friends coming to a dinner with a Spanish theme, I thought, as I tried to figure out the tapas y pinxtos, hey – why don't I make Mikie's olives? I texted her, asking for the recipe, and she told me it's from Mark Bittman's How to Cook Everything. – just tweaked a little. She adds orange zest, she tole me, and fennel seed. And she uses more vinegar than Bittman does, and less olive oil. Oh, and her technique is slightly different.

In other words, Mikie has made the olives her own. Honestly, I think it's the orange zest and fennel that knock them out of the park. 

How good are they? Well, I spent all day cooking to prepare for that dinner. I made bandilleros – all kinds of pickly and cured treats, prettily skwered. And some really nice tapas – piquillo peppers filled with brandade. And grilled asparagus with Serrano ham. And seafood paella. (OK, I blew the paella, if truth be told. Overcooked it terribly. Don't tell anyone.) Want to know what got the most applause? Mikie's olives. 

They take all of about five minutes to put together: It's just assorted olives (I like to use Castelvetranos, Picholines, Niçoises, Cerignolas and anything else that looks great – with pits), plus a few smashed garlic cloves, bay leaves, thyme branches, red pepper flakes, fennel seeds, orange zest, olive oil and red wine vinegar. Combine it all, and let it sit on the counter all afternoon – or even just an hour. Give it a toss with a spoon every now and then. That's it. 

Here's the recipe:

I will be eager to hear whether you love them as much as I do.


Warm, tender (thoroughly cooked!) asparagus is a simple, wonderful pleasure

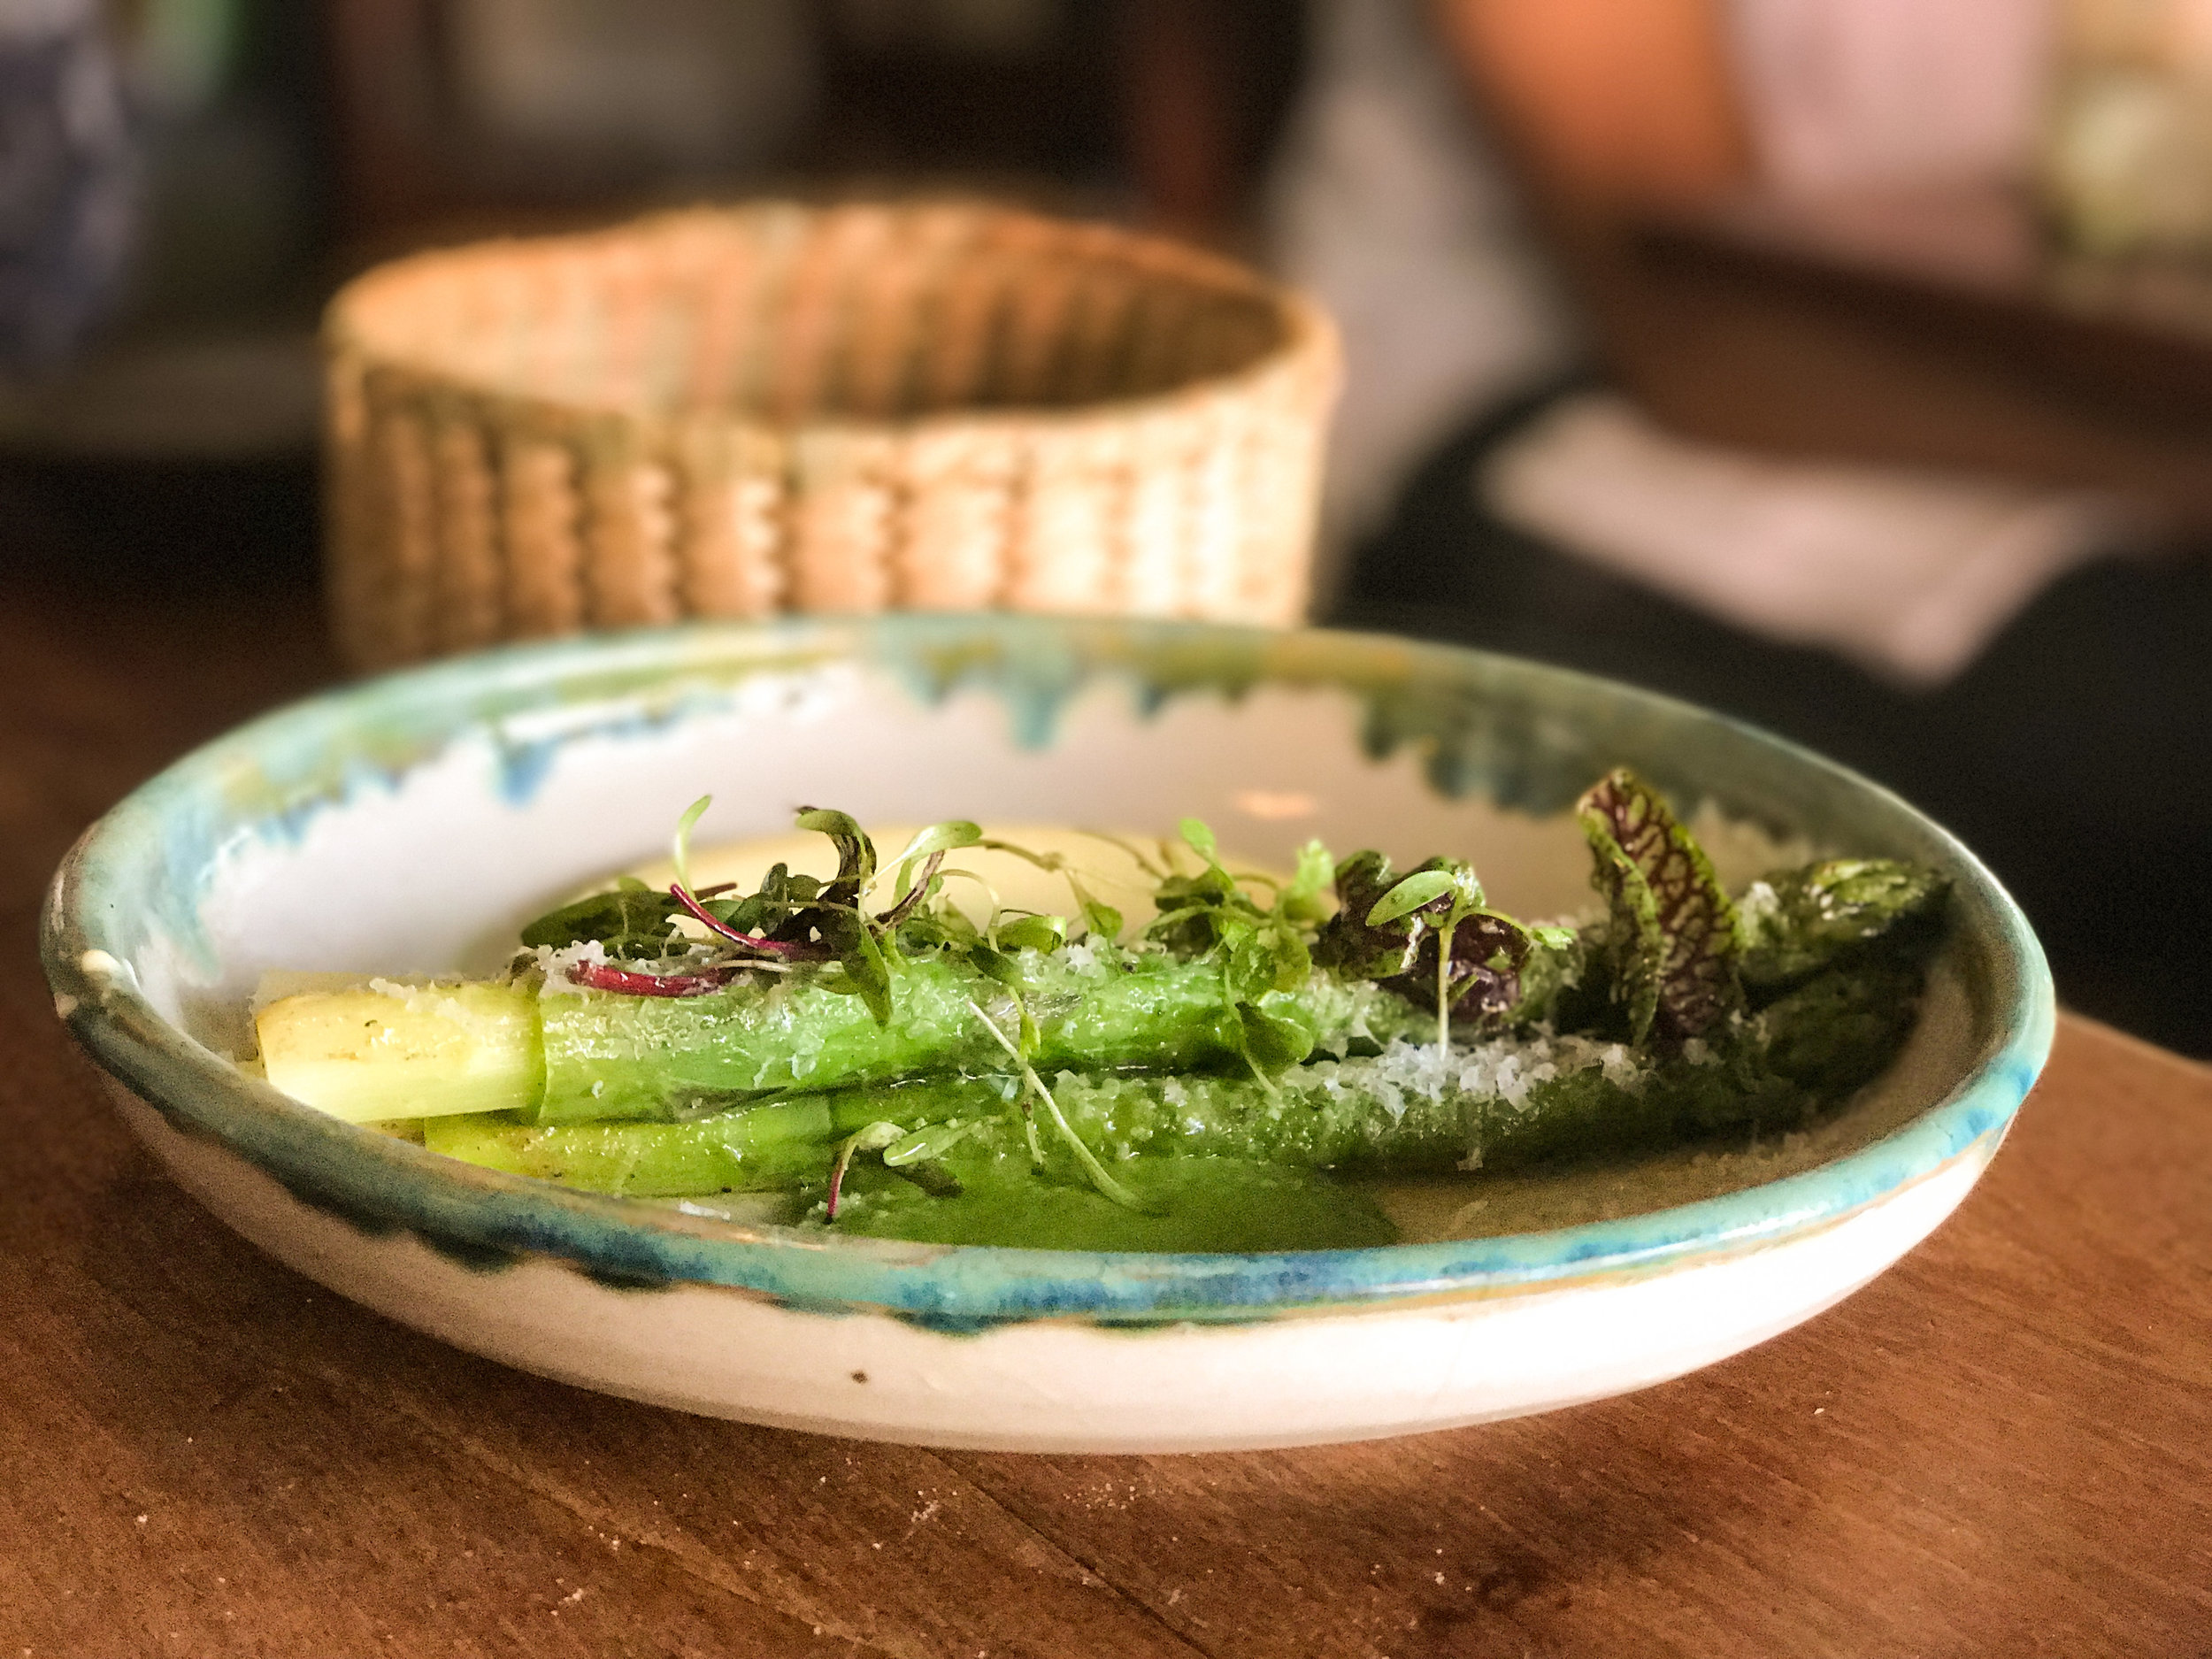
Maximo Bistro's asparagus with hollandaise and pea puree

If you've never had properly cooked asparagus, you're missing out on something wonderful indeed.

I was reminded of its simple and irrefutable pleasure on a recent trip to Mexico City, over lunch at Máximo Bistrot Local, Eduardo García's glammy restaurant in the Colonia Roma neighborhood. I chose as a starter "espárragos, holandesa, ajo tostado," and loved what was set before me: fat, jumbo asparagus, beautifully trimmed and peeled nearly to the tips, poached to almost custardy tenderness and served with luscious, lightly lemony and perfect hollandaise sauce on one side and silky, buttery pea purée on the other. 

Classic hollandaise for me is a luxury (maybe it's time to rediscover its joys in a post!), but the real revelation on that plate was this: So many professional kitchens send asparagus spears to the table undercooked that if you're accustomed to eating it in restaurants, it's entirely possible you've never experienced how luscious it can be.

(Meanwhile, Máximo chef-owner Eduardo García has a pretty amazing cook-busting-borders story.)

Undercooked asparagus, crunchy and forbidding, can taste like a punishment. But if you simmer asparagus long enough to cook it through, its texture becomes soft and almost creamy, and its lovely flavor comes into full bloom.


It's worth taking the time to peel it first. First trim off the woody end of the stalk, then use a vegetable peeler to (gently, so you don't break the stalk) peel it about two thirds of the way up to the tip. I find that letting the spear rest flat on the cutting board and using only very gentle pressure to peel gets the job done most easily. 

Set a pan of salted water to a boil, add the asparagus and cook, covered, until the spears are tender. How long this will take depends on their thickness. Medium-thin to medium spears will take about 3 1/2 to 4 1/2 minutes, jumbos a bit longer.

But rather than time them, I lift them gently with tongs, and when they're just a bit floppy, like this:


. . . I pull them out.

Then I might serve them warm, letting a small pat of butter melt over them first if that's my mood, or leaving them plain if I'm going lo-cal.

If you know your way around a kitchen, you won't need an actual recipe for this, but in case you do, here you go:

Once you discover or rediscover this simple pleasure, you'll probably want to branch out. You can prepare the spears this way, skip the butter, pour a vinaigrette over them and serve them either warmish or room temp. You can also shock them in cold water, chill them, then dress in vinaigrette later. For the vinaigrette, I might go one of four ways: simple vinaigrette with a little Dijon mustard; the same boosted with a dab of anchovy paste; dressed in a simple vinaigrette then garnished with crushed pink peppers; or dressed in a shallot vinaigrette.

Last spring, I became obsessed with gribiche, which continues to show up on fashionable restaurant menus. Whether you make a classic version or a more modern one (like the new-wave one shown below), it's spectacular on poached asparagus. 


Of course there's an exception to the thorough cooking idea: Shaved raw asparagus can be wonderful in salads or as a garnish on fish or chicken dishes. But when you do choose to cook them, the lesson of thorough cooking holds for other methods besides poaching: stir-frying, roasting or grilling. (Lots of people steam asparagus, but it's not a method I love for this veg.) In any case, if you cook them past that hard, green-tasting crunchiness, they're so much nicer. 

Want more asparagus ideas? Here are a million, more or less. 

Isn't this the greatest season?!


Warming lentil super-detox soup is a meatless Monday winter favorite

Warming Lentil Super-Detox Soup

Post-holiday food should never be about repentance. It should be about deliciousness and healthy renewal – clean eating at its best. 

That's why, after New Year's Eve revelry followed by an indulgent New Year's Eve lunch (on the heels of Christmas feasts and other holiday parties), what I craved for dinner was a warming bowl of chunky, vegan lentil-and-vegetable soup. Happily, I'd created one a couple weeks before – one that my family went crazy for. I'd whip up something like it again.

Only this time, I'd boost the turmeric, said to be a powerful antioxidant with terrific anti-inflammatory properties. And I'd add ginger, which I felt would work with the soup's flavors. And I'd try swapping in some red lentils, which have a softer texture than the green or black ones in the original. I didn't have any baby kale in the house, so I used baby arugula. And I left out the celery.

You know what? The soup was every bit as delicious; the ginger took it in a slightly different (and still wonderful) direction. 

It's a soup that can be all things to all people  or at least many kinds of people. It's vegan. It's gluten-free. The only processed ingredients are minimally processed (a can of tomatoes and the ground spices), so it's very clean. 

It's so soul-satisfying that carnivores probably won't miss the meat. Wylie, home for college for winter break, had three bowls. If you don't mention it's healthy, no one will be the wiser. 

Best of all, you can whip it up in a flash. Putting it together takes about 10 minutes, 15 max (if, say, you're in a post-holiday stupor). In less than an hour, it's done. 

Cooking for just one or two? Make a batch, eat some tonight, then take it to work later this week in a Thermos for lunch. 

Ready for the recipe? Here you go...

Happy New Year!!!

Delicious, soul-warming super-detox lentil-kale soup: Why wait till January?

It's only mid-December, and I'm already feeling like eating clean – at least in-between holiday parties and festive feasts. And here in Dallas, it's soooooo cold outside! 

What could be nicer, in such a circumstance, than the prospect of a big pot of soul-warming soup simmering on the stove? I'm thinking green lentils. And turmeric – for its strong anti-oxidant properties. And baby kale. And then a bunch of other stuff to make it delicious. 

That's what I thought yesterday morning, when it was 70 outside but I knew it was headed down to the 40s by the afternoon. 

I already had everything I needed to make the soup coming together in my head, except one key ingredient: I headed out at around 11 to pick up a cello-pack of baby kale at Trader Joe's.

By lunchtime the soup was ready – and the house filled with wonderful aromas. That's how quick and easy it is to achieve. 

The only work is chopping a few aromatic vegetables (onion, celery, carrot, garlic) and opening a can of tomatoes. (Make sure your tomatoes don't have sugar in them, or the soup won't be so detoxifying.) Sauté the veg in a little olive oil, add turmeric, coriander and herbs, then  the lentils, tomatoes and water. 

Did I mention that the recipe is vegan?

When the lentils are tender, throw in a bunch of baby kale, then let a cook a few more minutes till it all comes together. Lentils cook pretty quick, so it'll be done in just about an hour. 

Oh, baby – it turned out even better than I dreamed: lightly spiced, aromatic, earthy, soulful and satisfying. I knew Thierry would want some: Lentils are one of his favorite foods. But even Wylie (yes! He's home for winter break!) went along for the ride – that's how good it smelled. He'd just awakened at noon (college kids!) and had a bowl with us, just after his bagel and coffee. He loved it.

Here's the best part.  When I woke up this morning it was 15 degrees outside – 4 with the wind-chill factor. The tree is now decorated. We have plenty of firewood. This evening, we're going to our friends' holiday open house. 

Meanwhile, I know what I'm having for lunch.

Crazy-good classic mac and cheese may be the most craveable comfort food in the universe

You know you want it. Chefs tell me their customers demand it all the time. When I crave a rich, cheesy, creamy macaroni and cheese, I reach for the cheddar and a bag of elbow macaroni. You don't need to buy anything fancy; no bronze-die pedigree required. For this one I used supermarket large elbow macaroni, and it could not have been better. Yup, crazy-good. (Ding! Ding! Ding!)

It's simple and luxurious, and really easy to make. Boil up and drain the macaroni till al dente. Use the same pot to sweat chopped onion in butter, sprinkle on a little flour and cook it briefly. Stir in milk and cook a few minutes to make a white sauce. Stir in grated cheese, seasonings and the mac. Turn it all into a buttered baking dish, top with bread crumbs, dot the top with butter and bake in a hot oven till golden-brown.

You can riff on the recipe, adding ham or roasted chiles or crumbled bacon or whatever, but I'm a mac and cheese purist. Sharp cheddar is the cheese of choice (with a little Parm), but you can mix that up, too, throw in some Gruyère, if you're feeling French. Go ahead: Treat yourself. You deserve it. 

When I'm in the mood to indulge, a perfect dinner is a simple arugula salad, this classic, luscious mac and cheese and a glass of red wine. Right? 

Here's the recipe:

When life deals you zucchini, make these insanely delicious Greek fritters

It happens to everyone at one point or another: You find yourself with zucchini coming out of your ears. Maybe you have a garden, and it's the end of summer. Maybe your friend has a garden, and she's gifted several pounds of giant veg to you. Maybe the heirlooms at the farmers market were so pretty you bought too many. 

Whatever it is, after a lifetime of looking for delicious things to do with the cartoonishly prolific summer squash, I've found it: The most insanely delicious zucchini dish ever. 

Barry making scottiglia in my mom and Warren's kitchen in Malibu

The fritter is the creation of my step-cousin Barry Kalb, who is a gifted cook, a former journalist and restaurateur and an all-around amazing person with a super-interesting story. 

Barry moved to Hong Kong in 1975 to work for NBC News, then became a staff correspondent for CBS News before heading to West Berlin in 1979 as Eastern Europe bureau chief for Time magazine. His Time gig later took him to Rome, then New York and eventually back to Hong Kong. In 1987, still in Hong Kong, he quit journalism and became a restaurateur – opening Marco Polo Pizza, the first "genuine, Italian-style" pizzeria there. The following year, he opened what he describes as the first authentic Italian restaurant in Hong Kong – Il Mercato, in the Stanley Market on the south side of Hong Kong Island. He ran it until 2002, when he returned to journalism, as an editor at Voice of America's Hong Kong bureau. 

These days Barry is writing fiction; he just published his second novel, a mystery – Chop Suey: A Tale of Hong Kong, China and the Chinese People.  (I'm not usually one for mysteries, but I'm looking forward to diving into this one!) He and his wife Suzi divide their time between Hong Kong and Thailand; they have a house in Phuket, which is where he was when my mom died in June. Barry flew out for her memorial (which we held, with lots of food and wine, at my mom's favorite neighborhood Italian restaurant) and to spend some extended time with Warren. 

To soothe ourselves and each other, we cooked. We needed comfort food. One night I made my mom's chicken curry, a family favorite. Another night Barry made a wonderful Italian braised meat dish, scottiglia con polenta – preceded by Greek-style zucchini fritters so delicious they blew us all away. 

Barry's zucchini fritters

Why Greek-style?  Barry fell in love with the fritters that inspired them in Greece, where he and Suzi are building a house – on the island of Meganisi, south of Corfu, just off the larger island of Lefkada. "When we arrive in Lefkada, en route to Meganisi," says Barry, "we always head for our favorite restaurant on the island, Margarita's, which serves the best zucchini balls we've found anywhere in Greece (and which introduced us to the dish)." It was this fritter than Barry set out to recreate. What sets them apart from other zucchini fritters is tons of chopped fresh herbs – mint and dill and parsley – along with a healthy dose of crumbled feta. 

I think you'll love them, and they're easy to make. You grate the zucchini on a box grater, sprinkle it with salt, let it sit for an hour, then squeeze out the liquid. Mix the zucchini with egg, breadcrumbs, the crumbled feta, herbs, ground cumin and pepper, form the mixture into patties, dredge them in flour, and fry them on both sides in olive oil. 

Barry's were pretty big – about three inches, with a shape like a flattened ball – and required a fork to eat, which I'm guessing is how you eat them at Margarita's. (I hope I have the occasion to find out one day!) 

For my adaptation, I made them a little smaller – finger food – and added tangy yogurt sauce with punched with lemon zest, which is wonderful with the minty thing the fritter has going for it. Got zucchini? You want this recipe:

Do try it, and let us know what you think!


Fall in love with the most versatile warm summer salad in the universe

Are you a friend of okra? If so, you'll love this warm summer salad or summer squash, sweet cherry tomatoes, grilled corn and grilled okra. 

Are you anti-okra? You, too, will love this warm summer salad: That's because you can leave simply leave it out. Add grilled eggplant. Or some cooked black beans. Or fresh green garbanzos, if you score them at the market and you're wondering what to do with them.

I'm calling it a warm summer salad because I conceived it to be eaten warm. But it's also great at room temp. Or even straight out of the fridge the next day. 

It may be the most versatile warm salad in the universe.

It's great with cheese crumbled on – queso fresco or cotija, for a Mexican or modern Tex-Mex feel. Feta gives it a Greek accent. Shaved ricotta salata spins it Italian, especially if you make it with basil. Try cilantro, if you want to be more Mexican, or parsley for more Greek. Or mint. It's a salad without borders.


Leaving off the cheese sacrifices nothing – and makes it vegan.

It's fabulous as a starter or main course salad on its own. Serve it next to or under some grilled fish or chicken or lamb (or beef or pork or tofu . . . ) and you've got a gorgeous, cheffy main course. 

See what I mean? It's versatile. 

Don't feel like grilling the corn? Don't worry – just cut it raw off the cob and toss it in with the squash. Want to use more of one vegetable and less of another? Go ahead – it's a free country. Use balsamic or red wine vinegar in place of the sherry vinegar if you like. Throw in a handful of toasted pine nuts, or a spoonful of leftover basil. Serve it on a bed of quinoa or lentils or arugula. Or toss some arugula or microgreens on top. 

It's your salad. Now go for it.

How to be blown away by your own gazpacho

If you cook a lot, you've probably made gazpacho before. Maybe you've even made it dozens of times. But how often has it blown you away?

Just as I thought.

And just as we're heading into prime tomato season, it seems the right time to give the perennially popular cold soup – whose birthplace is southern Spain – a fresh look. As I wrote in a story that snagged me a James Beard Journalism Award some years ago, the soup's roots go back a long way: It was born sometime between the 7th and 13th centuries (depending on who you ask). In any case, it pretty clearly predates the arrival of tomatoes in Europe, which may come as a surprise to anyone who knows gazpacho as a cold tomato soup with cucumbers and peppers thrown in. In fact, gazpacho was originally a cold soup of pounded bread, garlic and salt with olive oil and vinegar pounded in. Some of those ingredients are often forgotten by modern American cooks, which is one of the many reasons gazpacho so often falls flat. Bread is essential for body, garlic for a little bite and vinegar for zing; a olive oil adds silkiness and its own fruity personality. 

In the summertime, when the weather's hot and tomatoes are bursting with flavor, gazpacho is one of my favorite things to make and eat. 

I approach it one of two ways. If I want a quick-as-possible version, I soak bread in sherry vinegar, toss it in the food processor with chopped tomatoes, cucumbers, a red bell pepper, a little water, garlic, salt and a pinch of red pepper, give it a whirl and serve it right away with a couple of ice cubes in the bowl. Chopped cucumber, peppers and maybe scallions go on top as garnishes. It's pretty damn good.

Gazpacho garnishes tight.jpg


But if I want a version that's absolutely stunning, I take just a couple of extra steps – peeling and seeding the tomatoes, straining the intensely-flavored juice that runs out of them and adding that to the sherry vinegar-soaking bread. I use a vegetable peeler to peel the red bell pepper. And after I purée the soup in the food processor, I give it a whirl with an immersion blender, to make it super-smooth and silky. The few minutes extra results in a gazpacho that's out-of-this-world elegant. 

A great Andalusian gazpacho depends on two things: ripe tomatoes with fabulous flavor, and the right balance of ingredients – including the vinegar and olive oil. If you get your hands on great tomatoes and use them in this recipe, I'm pretty sure you'll be blown away: 

Either way, I generally use the same or garnishes. If I make the super-smooth version, I'll take more care by dicing them finely rather then chopping them in a hurry – and sometimes add radishes and/or avocados. I can't think of a more stunning vegan summertime starter.

You can also follow the lead of chefs, and get all creative with the garnishes. Want to go super-splashy, maybe for a special dinner party? Top each bowl with a spoonful of lump crabmeat or diced cooked shrimp (or boiled tiny bay shrimp), plus some diced ripe avocado and a few pretty sprigs of frisée.

Whether you go the super-smooth route or the quicker route, I think you'll love it. Go ahead: Give it a whirl! 

 RECIPE: Gazpacho Sevillano

A million delicious ways to put asparagus on your springtime table (including some new ones!)

Goodbye, Brussels sprouts. Hello, asparagus – springtime's A-list vegetable.

Of course fava beans, English peas and artichokes rock the season as well, but asparagus stands apart, as it's so abundant and easy to get along with. If asparagus were as expensive as it was once upon a time, we'd likely celebrate it as a luxury, up there with morels and ramps and fiddlehead ferns. But it's not – which is why it finds a starring role on my table several times a week when it's in season.

There are a million delicious things you can do with it, from steaming to roasting to grilling to braising, sautéeing or stir-frying – even shaving the stalks with a peeler and adding them raw to a salad.

Most traditional is steaming it – in one of those upright baskets. I've never owned one; instead I trim the ends, use a vegetable peeler to peel the stalks halfway up or more, lay them flat in a wide pan and simmer them in salted water. After draining the stalks well, you can dress them in butter and serve them warm or send them to the table with a fluffy, lemony hollandaise. Or dress them in vinaigrette (that's lovely served warm, at room temp or chilled). Or keep them naked, chill 'em and serve with mayo. 

Easiest is roasting asparagus. A turn in the oven gives it a completely different character, no less delicious. Just snap off the tough bottoms or trim them with a knife, lay them on a baking sheet with a teaspoon or so of olive oil and a sprinkle of salt, roll the stalks around to coat them, and roast for 17 minutes (for stalks of medium thickness) at 400 degrees F.

Grilling is nearly as easy: Brush the stalks or roll them around in a little olive oil, sprinkle with salt, toss them on the grill or a hot grill pan and cook until they're just tender.

One mistake people (including home cooks and many a restaurant) often make: undercooking them. They shouldn't be crunchy; they need to be tender. How to know when they're done? Use tongs to lift them up by the middle of the stalk. When they're done, they'll droop a bit on either side. 

Roasted asparagus and radishes from Steven Satterfield's Root to Leaf cookbook

Last spring I fell in love with Steven Satterfield's recipe for roasted asparagus with green garlic and radishes, from his then-just-published cookbook Root to Leaf: A Southern Chef Cooks Through the Seasons. I haven't been able to find green garlic where I live in North Texas, so used regular garlic, Satterfield's suggested substitution. Simple and fabulous, the dish instantly became a regular player in my spring repertoire. Best of all, it's so easy to put together you don't even really need the recipe: Just cut the asparagus into 1 1/2-inch lengths, cut the radishes into quarters and toss both in a bowl with a little olive oil, finely chopped garlic, salt and pepper. Spread them on a baking sheet, baking dish or roasting pan and roast in a 400 degree oven till they're just tender, about 15 minutes. Want more specifics? Here's the adapted recipe:

Last weekend I fell in love again: With a technique for braising asparagus in butter I gleaned from a recent story and recipe in the New York Times by David Tanis. 

Butter-braised asparagus with herbs

The technique is brilliant: Place asparagus spears flat in a pan with a good deal of butter and a little water, salt and pepper; cover the pan and cook till the asparagus is just tender. Remove the asparagus and reduce the cooking liquid to nice sauce. Tanis adds lemon zest, lemon juice and chopped herbs, then garnishes the dish with herb leaves. It was super, though I had to tweak the recipe a bit (mine needed more liquid and longer in the pan; I added more water and a little more butter. I'll add an adapted recipe here once have time to retest it (watch this space!). In any case, butter-braising gives the asparagus a rich and luxurious silkiness and this too will become a go-to treatment chez moi. I love the lemon and herb flavors with it, but it should be great without them, too.

Meanwhile, in case you're wondering about the photo that leads off this post, that's a salad of shaved raw asparagus, sautéed asparagus and black lentils from Michael Anthony's V is for Vegetables, which just won a James Beard Foundation Book Award in the category of Vegetable Focused and Vegetarian. Again, this recipe needed some adjustments (more acid in the dressing, for one thing), but it's pretty swell, so I'll tweak and provide an adaptation soon! (I was wowed last fall by Anthony's cooking at Untitled at the Whitney Museum in New York City, so was excited to cook from his book). 

Asparagus with new-wave gribiche

Are you still with me? I want you to have all these asparagus ideas and recipes in one place. Another great way to serve asparagus is with sauce gribiche, whether the new-wave version shown in the photo above, or a slightly more traditional one. Just simmer the stalks in salted water, roast or grill them (as explained earlier in this post), and dress with the gribiche of your choice. Here's the new-wave gribiche recipe:

And here's an adaptation of Judy Rodger's four-minute egg gribiche from The Zuni Cafe Cookbook

Just one more direction, and it's a good one: Stir-fry asparagus Chinese-style. I wrote about this version adapted from Lucky Peach 101 Easy Asian Recipes in mid-February, when springtime was still a dream away.

I know you want the recipe. Here you go:

Now let's get cooking!


Artichoke vinaigrette: an easy, elegant, French (and vegan! and healthy! and make-ahead!) appetizer

Artichoke Vin edit.JPG

Growing up in California, I took fresh artichokes for granted. After all, Castroville – the town that bills itself as "the artichoke capital of the world" – is right there in the central coastal part of the state, not far from Monterey. I used to love stopping there on road trips and seeing the giant concrete artichoke sculpture that greets you at the edge of town.

In the spring and summertime, my mom always steamed artichokes and served them as an appetizer with melted butter to dip the leaves in. I love them even more dipped in mayo, or a mustardy red wine vinaigrette. Wylie loves it with balsamic vinaigrette.

A classic French way to serve artichokes is  à la vinaigrette – that is, actually dressed in the vinaigrette; shallot vinaigrette suits them particularly well. Pouring the sauce over them while they're still warm lets the vinaigrette penetrate the leaves – no additional dipping sauce required. An artichoke vinaigrette is also pretty beautiful. It's great as a sit-down starter at a dinner party or as a sharable treat before the dinner gets started. 

A few years ago, I served boiled artichokes as an appetizer to new friends in Texas, and was surprised that they found them exotic. "How do you eat them?" they asked. We showed them how to pull off a leaf, dip it in sauce, scrape off the meaty part (closest to the crown) with your teeth and discard the rest of the leaf. When all the leaves are gone and only the thin, prickly ones at the heart remain, you pull those off, scrape the fuzz off the crown with a spoon, and eat the heart  – the prize! – which is also delicious dipped in mayo or vinaigrette.


Many cooks boil artichokes rather than steaming them. I've prepared them both ways, and find that boiling them in plenty of salted water gives them the best texture. Acidulating the water with lemon juice (as some cooks do to prevent discoloration) is unnecessary; I find the results to be the same with unacidulated water. Instead, after I trim them, I simply rub the cut surfaces with half a lemon.

For a party of four to eight, I often make two artichokes and serve it with another app or two. For a dinner party, you can serve one per person, or for a more casual dinner, one for every two to share.

So, how to trim them? You can get all fancy, and remove the chokes if you want to, but I usually don't. 

Once you do it once or twice, it's easy. Using a sharp serrated knife, slice off the stem, creating a flat surface for the artichoke to rest on. Then slice off the top straight across – removing the tops of the inner few rows of leaves. Next use your fingers to break off the tough row or two of small leaves around the bottom.


Finally, use kitchen scissors to snip off any remaining leaf tips (be careful – there's a prickle at the top of each). Rub the cut surfaces with half a lemon and they're ready to cook.

Boil them in lots of salted water in a covered pot. Don't worry if they bob up to the top; flip them over with a spoon once or twice so they cook evenly. While they're cooking, whisk together the vinaigrette. 

Drain the artichokes upside down, then dress them with the vinaigrette. Voilá. Easy, chic, delicious and healthy. And there are a couple of bonuses: You can serve them warm, or make them ahead, serving them chilled or at room temperature. And . . . they're vegan!

Ready to try? Here you go!


How I learned to stop worrying about nixtamal and make fresh tortillas from masa harina

You can wrap just about anything in a freshly made corn tortilla, hot off the comal or griddle, and it'll be wonderful.

Well, that's a little bit of an exaggeration, but not much. 

In another lifetime, a hundred years ago when I was in my twenties and living in L.A., I made fresh tortillas all the time. I had a cheap aluminum tortilla press and a cheap aluminum comal (tortilla griddle); I'd picked up both in a Mexican grocery. You could buy a bag of masa harina (dried powdered masa) just about anywhere. I was in a serious carnitas phase: I'd fallen in love with Diana Kennedy's version in The Cuisines of Mexico, and I'd make that with salsa verde cruda and guacamole and a big pot of pinto beans to serve on the side. 

When I moved to New York to go to graduate school a few years later, I brought my comal and tortilla press and even my molcajete – though masa harina was not so easy to find.

The tortilla press I've had forever

A few years after that, some time in the early 90's, I lucked into an opportunity to meet Kennedy, and even spent a long weekend cooking with her and the late, wonderful Peter Kump, founder of Peter Kump's Cooking School in New York. My friend Danièle Mazet-Delpeuch (I wrote about her in my post about pissaladière) had invited Kennedy and Kump to her 500 year-old stone farmhouse in Dordogne to spend some days cooking and soaking up the delicious and gorgeous region. Danièle knew I was a huge Kennedy fan, and was wonderfully generous to invite me along.

At some point during a weekend spent making pommes sarladaise in a big pot suspended from the hearth in the center of Danièle's living room, and confit de carnard and chou farci and I can't remember what all else, Diana and I got into a discussion about corn tortillas. I'll never forget her expression when I told her I was in the habit of using masa harina to make mine: I might as well have told her I was a regular at Taco Bell. She was positively scandalized.  She insisted that masa made from nixtamal – corn kernels cooked in a solution of lime (calcium oxide) and water – was the only legitimate masa. I knew all about it from her book, but when I'd gotten to the part of the two-page process that said, "Meantime, crush the lime if it is in a lump, taking care that the dust does not get into your eyes," I stopped reading. 

With Diana, I tried to defend my position, arguing that tortillas freshly made from masa harina are way better than anything you can buy at the store. "Better to buy masa at a tortilleria in your neighborhood," she countered. But there were no tortillerias anywhere near my hood – the Upper West Side of Manhattan. It wasn't even easy to find masa harina there.  The conversation seriously deflated me (this was my Mexican cooking hero!) and I think I lost some of my joy for tortilla-making.

That's why last summer when a review copy of Alex Stupak and Jordana Rothman's cookbook Tacos: Recipes and Provocations landed on my desk at work, I was delighted when the book fell open to the following: "In Defense of Masa Harina." "A warm tortilla prepared with harina may not hit the same celestial notes as one made with fresh masa," it said, "but it is still an absolute revelation if all you've ever tasted is reheated, store-bought tortillas. There's irrefutable value in that, so I stand by it." 

Well, of course I've tasted many a fabulous tortilla made from fresh masa, but I still think the ones you make from masa harina (all you need to add is water!) are pretty darn good. And once you get the hang of it, making them is easy – easier than making pancakes, in fact, because the dough is just harina and water.


Though I'd already made tortillas a hundred times, I followed Stupak's instructions and found they worked perfectly, though I prefer the proportions of water to masa found on harina packages (1 1/8 cup warm water to 1 cup harina). You knead the water into the flour, roll it into a ball, and keep it moist under a damp towel while you work. "You want the texture to be as soft and moist as possible without sticking to your hands," is the way Stupak describes the right texture. 

 Set up a double griddle or two cast-iron pans and heat them so you have one side or pan hotter than the other. Line your tortilla press with plastic (so the dough doesn't stick). Roll some dough into a golf-ball-size ball. Open the press, plop in the ball, push down on the lever. Open the press, flip the tortilla onto your palm, peel off the plastic. (The thinner the plastic, the easier it is to peel off. I cut up thin, crinkly plastic bags like the ones you get at CVS if you forget to bring your own.) Drop the tortilla onto the cooler side of the griddle, cook for 15 seconds, then flip it over onto the hotter side and cook for 30 seconds. Flip it again (still on the hotter side) and leave it for 10 seconds, then flip a final time and cook 10 more seconds. At that point it may puff up a bit. Transfer it to an tortilla basket – or an insulated tortilla container (Stupak has a good section about which type is best – a "thick fabric tortilla warmer covered with culturally insensitive dancing chili peppers" was his favorite. He also explains why it doesn't work to reheat corn tortillas that have cooled completely.)

So, what shall we wrap these tender warm beauties around? That's a subject for my next post. Meanwhile, I can tell you what I put on the ones I whipped up tonight: Shredded store-bought roast chicken, diced avocado, white onion, cilantro, some leftover pinto beans, a squeeze of lime and a drizzle of leftover salsa borracha, also from Stupak's book. The salsa borracha – spiked with mezcal – was a revelation. That recipe's coming soon, too.

Meanwhile, in case you want to get some practice – or just have a fabulous vehicle in which to wrap leftovers (barbecue brisket is dreamy!) or do some creative taco improvisation – here's the corn tortilla recipe. Same thing I just gave you, but in a little more detail.


Nothing says spring like strawberry-mezcal ice cream

I don't know what inspired this exactly. Except it's spring, so I'm jonesing for strawberries. And it's spring, so I'm jonesing for mezcal. A friend was coming to lunch last weekend, and I wanted to cook Mexican. But dessert . . . strawberry shortcake? Nah. A big ol' Pavlova smothered in strawberries and cream? Nah. Almond cake with strawberries? Nah. None of it felt right to follow the lamb barbacoa tacos I'd planned. 

But ice cream! Who makes strawberry ice cream, anyway? I would! 

I figured I'd roast my strawberries, as they weren't exactly peak-season Harry's Berries (the fabulous ones I'd buy at the farmers market if I happened to be in Santa Monica). Roasting the supermarket berries would concentrate their flavor a bit. For some reason, when I thought about roasting them, I thought of hitting them with a little mezcal. In the back of my mind, I was remembering a wonderful nieve de naranja (orange ice) con mezcal my friend Michalene and I had when we were in Mexico City in February, at a restaurant called Fonda Fina. "Aha" moment! I thought mezcal might work well with the brightness of the berries. 

And so it did! Making the custard base is always easier than it sounds; just take it slow. Best to do this the day before you want to serve it, so the ice cream can set up in the freezer overnight – or at least for a few hours. In any case, you want to have time to chill the custard before it goes into the ice cream maker.

Want to leave out the mezcal? Just substitute half a teaspoon of vanilla. Or a teaspoon of aged balsamic vinegar. I served the ice cream with a couple of (store-bought) almond crisps.

Want the recipe? Here you go . . . 

Gribiche, gribiche, gribiche: A different take on the sauce that jazzes up everything

Boiled shrimp with four-minute egg gribiche

Last month I wrote about a modern take on sauce gribiche, promising to follow up right away with more about gribiche. Forgive me – I got sidetracked by a startling hummus development

So, back to gribiche. I don't know how long gribiche has been around, but I do know August Escoffier gave a recipe for it in his 1903 Guide Culinaire. You've gotta love the way recipes were written then:

"Crush in a bowl the yolks of six hard-boiled eggs, and work them into a smooth paste, together with a large tablespoon of French mustard, the necessary salt, a little pepper, and make up the sauce with one pint of oil. Complete with two teaspoons of parsley, chervil, and tarragon (chopped and mixed), as many capers and gherkins, evenly mixed, and the hard-boiled whites of three eggs, cut in short, Julienne strips. This sauce is chiefly used with cold fish."

A few notes: First, this is the 1969 American English translation of the French; today it would no doubt say "Dijon mustard" rather than "French mustard." Second, I love the phrase "the necessary salt." Third, by "make up the sauce with one pint of oil," I'm pretty sure he meant whisk the olive in slowly, as in a mayonnaise – though I was surprised not to find vinegar or lemon juice in the recipe. "Gherkins": no doubt Escoffier was referring to cornichons. 

Anyway, the effect would have been like a chunky mayo – and that's what sauce gribiche meant for the better part of the century. (Excuse me while I geek out on culinary history; if I'm boring you, just skip down to the modern part!) 

Fast forward to The Zuni Cafe Cookbook, which the late great Judy Rodgers published in 2002. In it Rodgers included a recipe for Four-Minute Egg Gribiche. 

"This one is inspired by the mustardy gribiche the Troisgros brothers drizzled over beef carpaccio," she wrote, "and crowned with a pile of crispy hot fried potatoes, as an alternative to the familiar raw-egg steak tartar. " She goes on to describe the grillions of things you can do with it, from serving it with grilled fish or poultry to slathering it on sandwiches to putting it in potato salad.

Her version is much more like a mayonnaise than my modern take is. But it's much zingier, herbal and zesty than mayo, with wonderful texture.  Here's my adaptation of Rodgers' recipe:

It requires more a bit more concentration and technique than my easy modern version; you need to whisk all that olive oil in slowly so the sauce emulsifies (getting that mayonnaise consistency) and doesn't "break." But for some people it'll be worth it: Thierry loved it even more than he did my new-wave version. 

Roasted romanesco with four-minute egg gribiche

Roasted romanesco with four-minute egg gribiche

And if right about now you're thinking it would be fun to live with me because I cook, think again: I must have fed him gribiche twenty times that weekend! That day for lunch we had the gribiche three ways: with boiled shrimp (excellent); with boiled asparagus (wonderful) and with roasted slabs of romaneso (also very good!). Insanely weird all together: We had gribiche coming out of our ears! But that shrimp would be really nice as a main course for a Sunday lunch, or as a starter at a dinner party (the shrimp can be served warm or chilled). Or it would be great with cracked crab. Or roasted ham. Maybe even a roast tenderloin of beef. 

I'm not providing formal recipes for those very simple things, but happy to walk you through the three I made:

Roasted romanesco (feel free to substitute cauliflower): Slice the romanesco into slabs about 1/2-inch thick, place on a baking sheet, brush with olive oil, sprinkle on a little salt and pepper and roast in a 425 degree oven for about 20 minutes, or until just tender. Serve with sauce gribiche – the four-minute egg version or the new wave version

Boiled shrimp: Devein the shrimp, but leave the shells on. Drop them in court bouillon or boiling salted water and cook just thill they're pink and firm, about three minutes or so, depending on their size. Drain and serve. To make a quick court bouillon, fill a medium sauce pan about half way full with water, add a few glugs of white wine, half a sliced onion, a peeled and sliced carrot, salt, a few black peppercorns, celery leaves, thyme and parsley, bring to a boil, reduce heat and simmer 15 or 20 minutes. Don't worry if you're missing an herb or two. Serious people would tie the herbs and peppercorns in a bouquet garni, but I see no harm in the stuff floating around. To me it's easier to fish out the shrimp than look for the cheesecloth. 

Boiled asparagus: Trim the bottoms, and use a vegetable peeler to peel the asparagus to an inch or three below the tips. Simmer in a pan of salted water until the asparagus are floppy but still firm-ish, about four minutes for average-size asparagus – longer for jumbos and quicker for pencil-thin. Don't want to peel? Roast them instead: 17 minutes in a 400 degree oven, et voilà.

Best potato salad ever – thanks to new-wave gribiche


Oh: I almost forgot to mention. I had friends over for burgers last weekend, and made a batch of new-wave gribiche to see how it would do in a potato salad. Success! Here's an actual recipe:


Celebrate spring with a sugar-snap pea salad with lemon and parmesan

Spring is here – officially, anyway. In my hometown, Los Angeles, that means asparagus and fabulous strawberries and English peas, favas, nettles and morels. Where I live now, in North Texas, it means tornados and thunderstorms and hail. English peas? Not so much. 

I do find nice asparagus in the market, and good sugar snap peas – which I love to blanch lightly, slice up and toss in a lemony vinaigrette with snipped chives and grated parm. It was inspired by a salad I fell in love with a couple years ago over lunch with my girlfriend An-My at ABC Kitchen in New York. 

There's really not much to it. It takes a little while to slice up all the sugar snaps; after that, it comes together in a flash. I'm thinking it would be really nice served with frico, those lacy Italian parmesan crisps. (Remind me to scare up a recipe for them sometime soon!) 

Anyway, it's a lovely starter on its own.  Even if it's stormy outside, at your table it will feel like spring. Here's the recipe:

Hummus fans rejoice: Introducing an amazing, easy cheater version

I lied: I told you this post would be more about gribiche. But we need to interrupt our gribiche coverage to bring you breaking news on the hummus front: Cooks Without Borders has figured out how to make pretty amazing hummus from canned chick peas. 

No joke! 

If you're among those who caught hummus fever as chef Michael Solomonov's recipe for Israeli hummus tore up the internets last fall, or fell in love with Yotam Ottolenghi and Sami Tamimi's recipe in their brilliant cookbook Jerusalem (the excellent cooking blog Food 52 featured it a few years ago), you know how earth-shattering this is.

For those who are just catching up with it, here is the hummus situation in a garbanzo shell: Since time immemorial, creating hummus as smooth and fluffy as what you get in a great Lebanese, Israeli or other middle-Eastern restaurant involved soaking chick peas (aka garbanzo beans) overnight, simmering them for an hour and a half or two hours and removing their skins (can you imagine?!) before puréeing them. Sheesh! The brilliance of Ottolenghi's technique (which he apparently didn't invent, and which Solomonov also uses) is that it uses baking soda during the cooking process to soften the chick peas' skins so they don't need to be removed. 

Home cooks, meanwhile, who want to make a quick, easy hummus that's always at least as good as what you buy in a plastic tub at the supermarket, could simply purée chick peas in the food processor or blender with some garlic, lemon juice, tahini and salt, maybe a little olive oil. A hummus like that is fine, but never killer. It never has that amazing texture and deep flavor that a great one has.

I've been playing for the last few weeks with hummus made the Ottolenghi/Solomonov way, and I'll post about it when I'm ready to draw some conclusions. (There's more hummus to be made and tasted first!) But as I play, I can't help but wonder: Can we use this baking soda trick to radically improve the super-quick and easy version from canned garbanzos?

Yes, we can!

All you do is rinse the canned beans, simmer them for just five minutes in water and a little baking soda, and toss 'em in the food processor with some tahini sauce you've made while the garbanzos simmered. I found it pretty incredible that the skins could be softened enough to make a difference in just five minutes, but there you go. 

Was our cheater version as smooth as hummus made using dried-and-soaked garbanzos you simmer for an hour with baking soda? Well, if not, it was certainly close. It had been a week since I made a more involved one, but Thierry couldn't tell the difference: The cheater hummus was light, fluffy and soft, maybe more velvety than satiny. The flavor was very good, if not as extraordinary as the more involved way. It was terrific enough so that I'll certainly do it again if I'm pressed for time and want hummus. 

Want to try?

OK, toss whole garlic cloves (you can leave their skins on) in the food processor with salt and lemon juice. Purée briefly to chop the garlic, and let the mixture steep 10 minutes while you boil the garbanzos. Strain the solids from the lemon-garlic-salt juice, then put the juice back in the processor. Add tahini, pulse, then slowly pour in ice water through the tube as the motor runs. 

That gives you very light, lovely tahini sauce. Now add the garbanzos plus a little cumin (if you like that flavor), purée a couple minutes till very smooth, plate and garnish with olive oil and paprika – and more, if you like. I usually keep it simple, but you can get creative with parsley, whole garbanzo beans and such. 

Yippeee! Who says cheaters never prosper?

I think I can improve it still further flavor-wise (I'm going to play with adding more tahini, for instance). Once I have the very best version possible of the cheater hummus and the more involved hummus, we'll do a side-by-side taste-test. 

Meanwhile, I wanted to give you this recipe right away as it is very acceptable – way better than the stuff you'd buy in a tub.

Very good indeed with pita toasted or heated in the oven, and crudités. Who says cheaters never prosper?


Sauce gribiche makes every simple thing you cook instantly delicious

Seared barramundi with gribiche

How about an easy-to-make sauce that can turn the simplest grilled fish into a dazzling dinner party dish? Or that can dress up boiled or roasted asparagus? Or that you can add to sliced boiled potatoes to turn them into the snazziest potato salad ever?

That's the beauty of sauce gribiche: It can make every simple old thing deliciously new again. 

Poached leeks. Poached chicken. Boiled shrimp. Cold cracked crab. Fried or pan-fried soft shell crabs. Steamed mussels. Thick roasted slices of cauliflower. Sliced rare roast beef or lamb or ham. The possibilities are, you know, endless.

Traditional sauce gribiche is a mayonnaise made with hard-boiled egg yolks instead of raw ones, dressed up with herbs, capers and cornichons. (It's French, which is why it's called "sauce gribiche" instead of "gribiche sauce.") That old-style version is just as tedious to make as mayo, too, as you have to dribble in the oil while you constantly whisk, being careful not to let it "break." (Don't worry, though: Our new-wave version is super easy!)

The traditional style of gribiche bears little resemblance visually to the new-wave versions turning up in restaurants these days, though the ingredients are the same. The reason? Instead of whisking the ingredients into an emulsion, you quickly stir everything together. Using soft-boiled eggs instead of hard-boiled ones, and lots of herbs, brings it irresistibly into the 21st century in terms of looks and taste. 

Grilled jumbo asparagus with gribiche and bottarga from Gjelina: Cooking from Venice, California

I stumbled on one as I flipped through Gjelina: Cooking from Venice, California – the new book from chef Travis Lett. Lett uses it to sauce jumbo asparagus that he first parboils, then grills; the dish is finished with lots of grated bottarga, dried cured mullet roe. I love bottarga, and I happened to have some in my fridge, so I made it – and loved it. (Note: in case you happen to make it, boil the asparagus longer than he tells you, or it will be crunchy-hard. Also, I substituted panko for the garlic crouton crumbs that added a bunch of extra steps to his recipe, and the panko worked great.) But bottarga is hard to come by, and it's expensive, so before I added it to the dish, I tasted it without. Good, but not great. It wanted a little more zing. I decided to develop a recipe that would be zingy enough to jazz up simple, plain food without the help of bottarga. 

I pretty quickly hit upon the answer: cornichons. Traditional gribiches include them, yet Gjelina's did without them (probably they would taste weird with the bottarga). Adding them did the trick: It was much more vibrant. I made a batch and tried that on asparagus I cooked simmered in salted water till tender:

Asparagus with new-wave gribiche

Bingo! This was perfect! I also used it to sauce barramundi, a delicately flavored fish with nice body. I did nothing fancier than put salt and freshly ground black pepper on the fish, and seared it gently in a little olive oil. Wow – it was really good, something I'd happily serve at a dinner party. 

Want to try it? Here's the recipe:

Seared barramundi with new-wave sauce gribiche

I didn't stop there. I also found a version in one of my all-time favorite cookbooks, Judy Rodgers' The Zuni Cafe Cookbook. I'll tell you about that – and more about gribiche – in my next post!